A smores pan is usually a small heat-safe skillet or shallow tray that lets you melt chocolate and toast marshmallows without juggling skewers, plates, and sticky fingers. For camp cooking, that matters more than it sounds: the right pan gives you better heat control, easier serving, and far less mess than trying to improvise with a random frying pan. In this guide I cover how to choose one, how to use it at camp, which ingredients work best in the UK, and the mistakes that ruin the texture fast.
The quickest way to make warm, shareable s'mores at camp
- Cast iron is the best all-round choice if you cook over a stove, fire pit, or grill.
- An 8-inch pan is usually enough for 2 to 4 people; go bigger if you are feeding a family.
- In the UK, Digestive biscuits are the most practical biscuit base and hold up well when warmed.
- Keep the heat low to medium-low; sugar burns much faster than most campers expect.
- Covering the pan briefly with a lid or foil helps the marshmallows melt through before the top over-browns.
- For easy cleanup, wipe the pan while it is still warm, before the sugar hardens.
What a s'mores pan actually does at camp
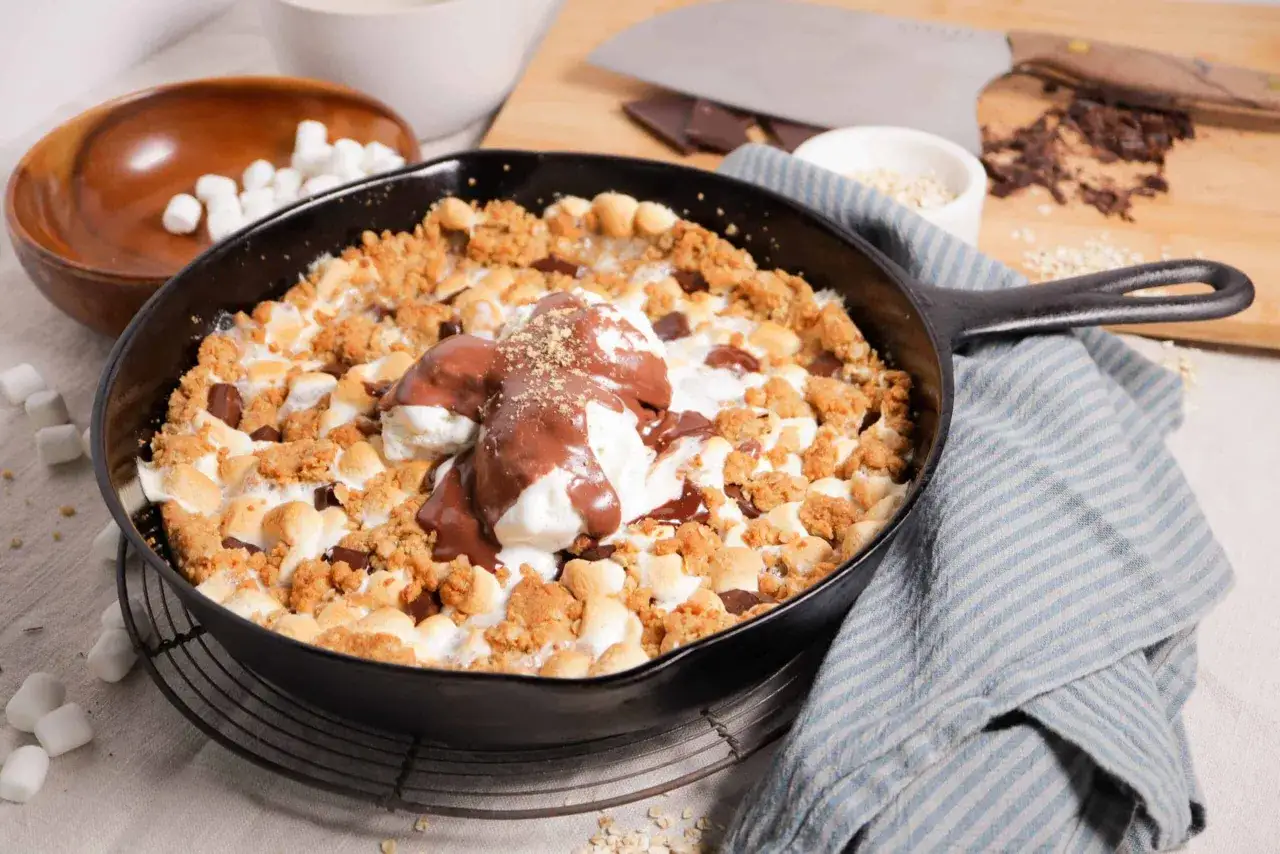
At its core, this is a dessert pan built for one job: turning a handful of simple ingredients into something gooey, warm, and easy to share. I use it when I want the flavour of a campfire treat but do not want to stand over flames with a long skewer or deal with marshmallows dropping into the fire. A good pan keeps the chocolate soft, gives the marshmallows room to puff, and lets everyone scoop or sandwich the filling without the whole thing falling apart.In practice, that means shallow depth, even heat, and a stable handle matter more than fancy branding. A pan that is too deep traps steam and can make the base soggy. One that is too thin creates hot spots, which is how you end up with scorched chocolate and marshmallows that look done on top but are still firm inside. I prefer a design that behaves like a small skillet first and a serving dish second.
If you are used to making classic s'mores one by one, think of the pan version as the group-friendly version. It is less theatrical, but it is often more practical, especially when you are camping with children or trying to serve dessert before the light disappears. That is also why material choice matters so much, which brings us to the part most people should decide before they buy.
How to choose the right pan for camp cooking
I look at three things first: heat retention, weight, and cleanup. Heat retention decides how evenly the marshmallows toast. Weight matters if you are carrying everything from the car to a pitch. Cleanup matters the second you realise melted sugar can cling to the wrong surface like glue.| Pan type | Best for | Strengths | Trade-offs |
|---|---|---|---|
| Cast iron skillet | Fire pits, camp stoves, family servings | Excellent heat retention, durable, evenly toasts toppings | Heavy, needs seasoning, takes longer to heat up |
| Enamelled cast iron | Car camping and serving at the table | Easy to present, simple to wipe clean, looks tidy | Still heavy, chips if knocked, not ideal for rough handling |
| Carbon steel skillet | Lighter camping setups | Less bulky than cast iron, heats quickly, good control | Needs seasoning and a bit more care over time |
| Foil tray | One-off trips and ultra-light cleanup | Cheap, disposable, very light | Flimsy, poor heat control, easy to burn or warp |
How I make it without turning the campsite into a sticky mess
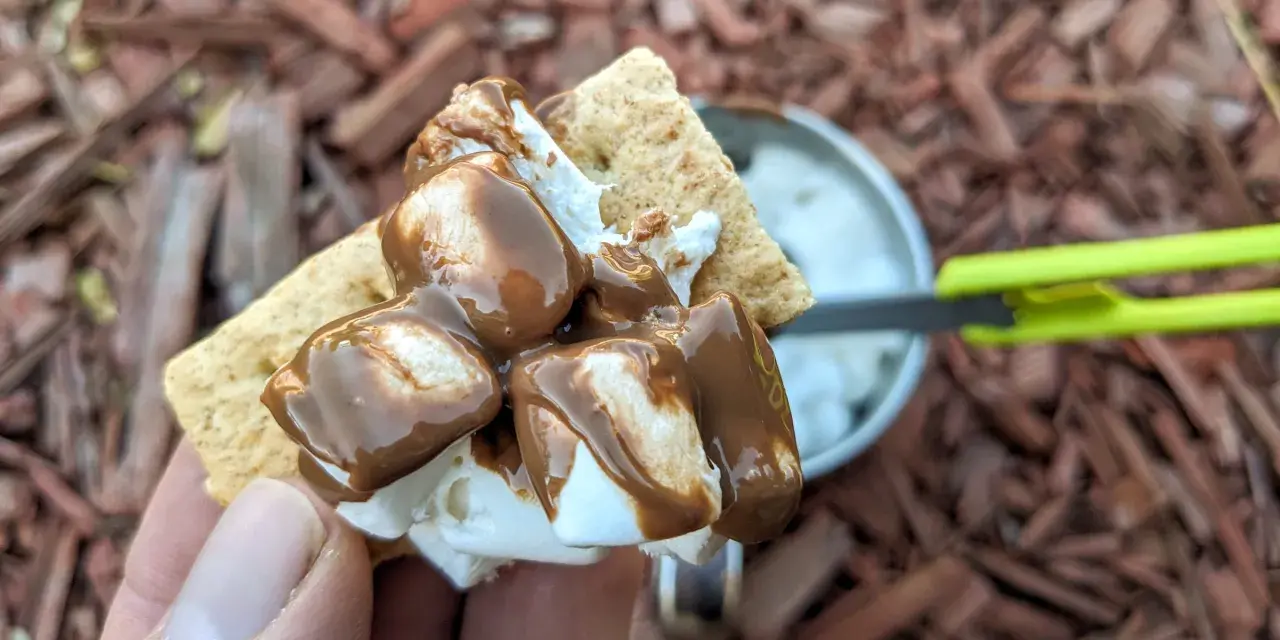
The easiest camp version is a shared skillet dessert: chocolate on the bottom, marshmallows on top, then biscuit pieces for scooping or sandwiching. I keep the method simple because camp cooking rewards short ingredient lists and predictable heat. For a family of four, I usually start with 150 to 200 g of chocolate, 8 to 12 large marshmallows or about 2 cups of mini marshmallows, and 8 Digestive biscuits or a similar biscuit base.
- Warm the pan over medium-low heat, not high heat. On a camp stove, that usually means a gentle flame rather than a roaring one.
- Add a very light coating of butter or neutral oil if your pan tends to stick. You only need a thin film.
- Scatter the chocolate evenly across the base, then place the marshmallows on top.
- Cover the pan loosely with a lid or foil for 1 to 3 minutes so the heat works from the top and bottom at the same time.
- When the marshmallows look soft and glossy, uncover the pan and let them colour for a short burst if needed.
- Serve immediately with biscuits for scooping, dipping, or topping.
The important part is not to overthink the timing. On a steady stove, I start checking after about 2 minutes. Over embers or a small fire pit, I would expect 4 to 6 minutes, depending on how close the pan sits to the heat. If the chocolate starts bubbling hard, it has gone too far. If the marshmallows are turning dark while the middle is still firm, the heat is too aggressive. That is why the next decision, the flavour combination, is worth thinking through before you cook.
The flavours that work best for British camping trips
For UK readers, I think the biscuit choice is where this dessert becomes more practical and more interesting. Digestive biscuits are my default because they are easy to find, sturdy enough to hold warmth, and familiar to most families. If I want something a little richer, I use shortbread fingers or a plain chocolate digestive. They are not identical to graham crackers, but they do the job well, and in some cases they do it better because they are less crumbly under heat.
These combinations are the ones I would actually pack:
- Milk chocolate and Digestives for the classic version. This is the safest crowd-pleaser and the best starting point for children.
- Dark chocolate and a pinch of sea salt for adults who want less sweetness and a cleaner finish.
- Peanut butter and banana for a richer, more filling dessert that feels almost like a campsite sandwich.
- White chocolate and berries if you want something brighter and slightly less heavy after dinner.
- Caramel pieces with crushed biscuits for a softer, stickier version that works especially well in a shared skillet.
I would keep the fruit versions modest if you are camping in warm weather, because extra moisture can loosen the base faster than you expect. Dark chocolate and sea salt, by contrast, travel well and stay balanced even when the dessert sits for a minute or two before serving. Once you know which flavour direction you want, the next thing to avoid is the classic set of mistakes that ruin the texture.
The mistakes that turn a good dessert into a burnt one
The biggest error is too much heat. Sugar-based desserts do not forgive impatience. Chocolate can seize, marshmallows can blister before the centre softens, and the whole thing can taste bitter instead of toasted. I would rather cook a little slower and serve something perfectly gooey than chase a dramatic flame and end up with a blackened top.
- Using a pan that is too small makes the filling too deep, which slows melting and creates uneven heat.
- Choosing a pan with very high sides traps steam and softens the biscuit base instead of keeping it crisp.
- Skipping the lid or foil cover means the top browns before the centre has time to melt.
- Overloading the pan sounds generous, but too much chocolate or too many marshmallows just turns into a sticky pool.
- Letting the pan sit dirty makes cleanup harder, because melted sugar sets fast once it cools.
The fix is straightforward: use gentle heat, keep the layer shallow, and clean the pan while it is still warm. If the campsite has wind, move the setup to a sheltered spot or use a windbreak, because gusts create uneven heat and make the temperature harder to judge. The more stable the setup, the more reliable the result, which is exactly why I pay attention to the kit I pack.
What I would pack for a campsite-friendly s'mores night
If I were putting this together for a UK family trip, I would keep the kit small and deliberate. A dedicated skillet is useful, but the supporting tools matter just as much because they make the process calmer and safer. For me, the ideal setup looks like this:
- One 20 cm or 8-inch cast iron or carbon steel skillet
- A lid or a sheet of heavy-duty foil
- Heatproof gloves or a thick oven mitt
- Long-handled tongs or a wooden spoon
- Chocolate, marshmallows, and biscuits measured before cooking
- A damp cloth and a dry towel for quick cleanup
For car camping, I would still choose cast iron because it is dependable and holds heat well once it is hot. For lighter trips, I would only bring a lighter pan if I knew I had a stove and a steady serving plan, because flimsy cookware tends to make dessert more frustrating than fun. In other words, the best setup is not the fanciest one; it is the one that lets you control the heat, serve quickly, and keep the biscuit base intact. That is what makes this kind of camp dessert worth packing in the first place.