A good bikepacking setup is less about buying a special frame and more about making a normal bike carry weight predictably, stay comfortable for long hours, and survive bad weather. In the UK, that usually means wet lanes, mixed surfaces, short but punchy climbs, and enough room for lights, layers, and mud. I’m focusing on the choices that matter most: the bike itself, where the weight goes, which parts deserve upgrades, and how to test everything before you leave.
Key things to get right before you load the bike
- Match the bike to the route instead of forcing one build to do everything.
- Keep heavy items low and central so the bike still handles cleanly.
- Give yourself easier gears than you would use on a normal day ride.
- Choose tyres with enough clearance, grip, and puncture protection for wet British surfaces.
- Do a loaded test ride near home before the real trip.
Choose the base bike for the route you actually ride
The best starting point is the bike that suits the terrain, not the bike that looks the most “bikepacking-ready” on paper. If most of your riding is on gravel roads, canal towpaths, and smoother bridleways, a gravel or endurance bike is usually the most efficient choice. If your routes lean toward rooty climbs, muddy tracks, and rough descents, a hardtail gives you more control and a more forgiving ride when the load gets tiring.
For mixed UK routes, I usually think in terms of four practical starting points rather than one perfect answer.
| Route style | Best starting point | Why it works | Watch-outs |
|---|---|---|---|
| Smoother lanes and gravel roads | Gravel or endurance bike | Efficient on tarmac, quick on long days, easy to live with | Less forgiving when surfaces turn loose, wet, or rocky |
| Bridleways, forest tracks, and steep mixed terrain | Hardtail mountain bike | More grip, more comfort, more confidence when tired | Slower on road sections and often heavier to push uphill |
| Short, mainly road-based overnighters | Rigid touring or all-road bike | Simple, stable, and usually easier to service | Less enjoyable once the route gets rough or technical |
| Technical off-road routes | Full-suspension MTB | Best control on rough descents and broken ground | Bag placement is trickier and suspension movement changes clearances |
Bikepacking.com’s beginner handbook makes the same practical point I do: start with the bike you already have if it suits the terrain, then use a short test ride to see what needs changing. I agree with that approach because it keeps the first trip honest and saves money for the parts that actually matter. Once the base bike makes sense, the next question is where the weight should live.
Put the weight where the bike still feels natural
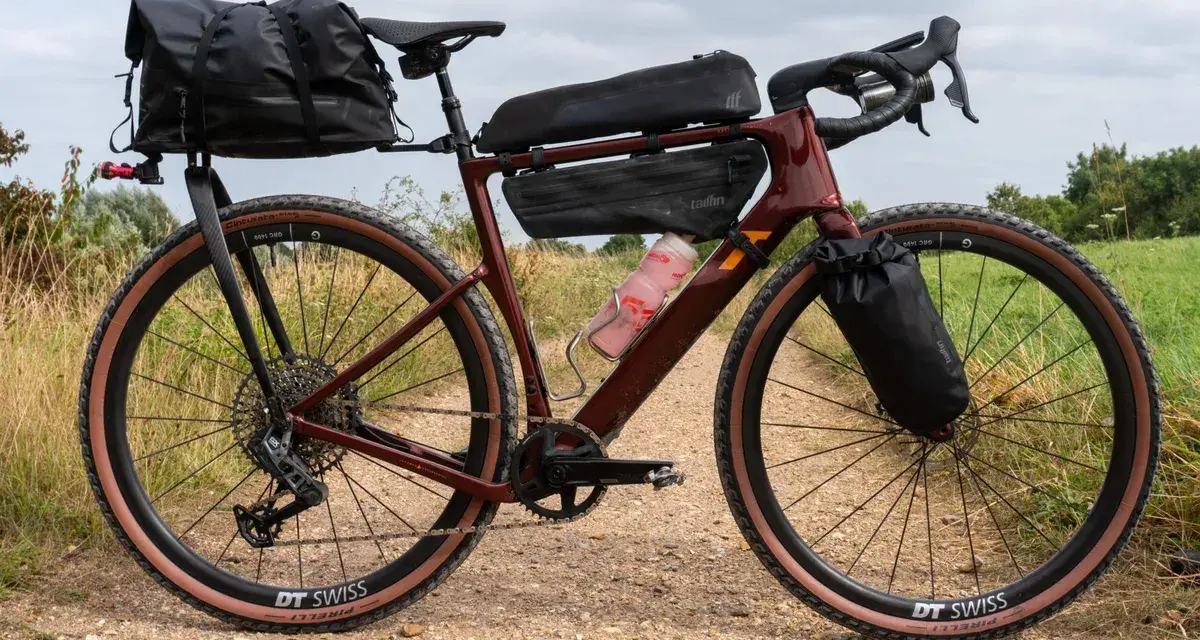
Heaviest items belong low and central. That is the rule I trust most. Dense kit such as tools, spares, stove fuel, food, and sometimes water works best in the frame triangle because it keeps the centre of gravity lower and the bike calmer at speed. Lightweight, bulky items such as a sleeping bag, sleep mat, and spare layers are better placed in the seat pack or handlebar pack.
| Bag position | Best use | Good items to put there | Common mistake |
|---|---|---|---|
| Frame bag | Stable, dense storage close to the bike’s centre | Tools, tubes, food, stove, fuel, water bladder | Blocking bottle cages with bulky, awkward items |
| Handlebar pack | Light, bulky kit | Sleeping bag, spare clothes, lightweight shelter | Overloading it until steering feels vague |
| Seat pack | Light but compressible gear | Sleep kit, clothes, soft items that do not need quick access | Putting heavy gear high and far back so it sways on climbs |
| Top-tube bag | Easy access while riding | Snacks, phone, batteries, lip balm, small repair items | Cramming it with tools that should sit lower |
| Fork cages | Extra capacity for longer trips | Water, tent poles, bulky but not fragile gear | Adding weight so far forward that the bike becomes sluggish |
| Backpack | Last resort for overflow or hydration | Light odd-shaped items, small hydration bladder | Turning every climb into a sweat test |
That matches REI’s packing guidance: keep dense gear close to the frame, and use seat and handlebar bags for lighter, bulkier items. I would add one more filter from experience: if a bag makes the bike wander on climbs or feel nervous on descents, move the weight inward before you add more straps or accessories. With the load balanced, the next gains come from tyres, gears, and braking power.
Dial in tyres, gears, and brakes for British conditions
This is where a lot of first builds go wrong. The UK rarely rewards the fastest possible tyre or the tallest possible gear. It rewards control. On gravel bikes, I tend to think in the 40 to 50 mm range for mixed riding, assuming the frame has enough clearance. On hardtails, 2.1 to 2.35 inch tyres are a sensible all-round range for grip, comfort, and enough speed to keep the ride moving.
If tubeless tyres are an option, I would seriously consider them. Sealant helps with thorns, flints, and the occasional sharp edge, and it usually lets you run a more forgiving pressure without feeling like you are gambling with pinch flats. The exact pressure depends on rider weight, luggage, and tyre volume, but the general rule is simple: start slightly lower than your day-ride pressure and raise it only if the bike starts to feel vague or the rim begins to complain.
Gearing matters just as much. A loaded bike is harder to push, and British climbs often arrive after already tired legs and wet conditions. I want a gear low enough that I can keep spinning instead of grinding, especially on loose or muddy ramps. If your bike is 1x, that may mean a smaller chainring and a wide-range cassette; if it is 2x, a compact or sub-compact chainset is often the smarter choice. My rule is simple: if the lowest gear feels merely acceptable on a café ride, it is probably too tall for bikepacking.
Brakes are the final part of this triangle. Fresh pads matter more than fancy branding, and properly bedded-in discs make a bigger difference than most riders expect. On heavier builds or routes with long descents, a 180 mm front rotor can be worthwhile if your frame and fork are rated for it. If not, at least start with new pads and clean rotors before you leave. Once the bike rolls and stops properly, comfort becomes the last big factor.
Get the cockpit and contact points right
I see more trips spoiled by poor fit than by poor luggage choices. If your shoulders tense up, your hands go numb, or you are constantly shifting around the saddle, the problem is usually the contact points, not the bags. A solid build should let you hold a relaxed position for hours without thinking about the bike every ten minutes.
Three details usually make the biggest difference:
- Saddle and reach should already work on normal rides before you add any luggage.
- Bars, grips, or bar tape should let your wrists stay neutral instead of forcing your hands into one angle.
- Cockpit space should leave room for lights, a bike computer, cables, and quick-access snacks.
If you run a handlebar bag, check that it does not block your light or computer mount. A small bar extender can be useful when the front end starts feeling overcrowded. If you use a dropper post, make sure the seat pack does not interfere with its travel. These are small details, but they decide whether the bike feels tidy or cluttered when the trail gets rough. Once the riding position feels calm, the last step is to rehearse the whole system.
Test the load on a short loop before you trust it
A first overnight should be boring in the best possible way. Bikepacking.com’s beginner handbook still gives the right advice here: pick a short loop near home, keep a bailout option open, and use the ride to expose weak points before they become trip-ending annoyances. I would rather find a strap issue 20 kilometres from home than on a windy moor with fading light.
For a first shakedown, I like a route of roughly 15 to 30 kilometres, or a half-day ride if the terrain is rougher. The goal is not fitness; it is systems checking. Ride seated and standing, brake hard a few times, and climb in your lowest gear long enough to see whether anything rubs, sways, or shakes loose.
- Check whether the rear bag touches the tyre when you pedal hard over bumps.
- See if you can reach food, water, and a rain layer without unpacking half the bike.
- Confirm that lights, GPS, and charging cables still fit with the bags installed.
- Inspect every strap and bolt after the first hour of riding.
- Carry the same rain kit and night kit you would take on the real trip.
If anything feels awkward on that first loop, fix it immediately rather than trying to “get used to it.” The bike should adapt to the route, not the other way around. After a shakedown like that, you normally only need refinement, not a complete rebuild.
The four changes I would make before a first overnighter
If I were helping someone prepare a first British overnighter, I would keep the changes simple and visible. The goal is not to build a showpiece; it is to make the bike calm, reliable, and easy to manage when the weather turns.
- Fit the widest tyre the frame can sensibly clear, with a tougher casing if the route is sharp or muddy.
- Lower the gearing one step so tired legs can still spin on climbs when the bike is fully loaded.
- Move dense kit into the frame triangle and keep rear bags as light as possible.
- Add one extra light source and one extra warm layer, because British evenings are rarely as generous as the forecast suggests.
If money is tight, I would spend it here before chasing a lighter frame or a fancier bag brand. A stable, well-fitted bike with sensible tyres and easy gears will do more for your trip than a premium build that handles nervously. Start with the bike you trust, tune the parts that change handling, and take a loaded ride before the real departure. That is the most dependable way I know to turn a pile of gear into a bike that actually feels ready.