After a long day outdoors, I want food that is hot, fast, and easy to share. These camping nachos are exactly that: a one-pan supper with crisp chips, melted cheese, and toppings that do not need much fuss at the campsite. In this guide, I cover the ingredients, the best cooking method, family-friendly variations, and the mistakes that usually spoil the finish.
The essentials that matter most
- Use sturdy chips and a cheese that melts cleanly, or the base will collapse before the top is ready.
- Keep wet toppings for the end so the nachos stay crisp instead of turning soft.
- A cast-iron skillet, Dutch oven, or deep foil tray all work, but medium heat is the safest choice.
- Pre-grating the cheese and pre-cooking any meat at home cuts campsite prep to about 10 minutes.
- The dish works best when it is served straight away, while the chips are still warm and the cheese is stretchy.
Why this version works so well outdoors
Nachos are one of the rare campsite meals that feel casual without being lazy. They do not need a long simmer, they do not demand a lot of equipment, and they can scale up easily if the group gets bigger than expected. That makes them useful for family camping, shared pitches, and those evenings when everyone is hungry at the same time.
What I like most is the timing. The fillings should already be cooked, so the final stage is just about warming, melting, and bringing everything together. That keeps the cooking short and reduces the chance of ending up with burnt bottoms and cold centres. If your site allows a gas stove but not an open fire, the recipe still works, which is one reason it fits camp cooking so neatly.
Once that balance is right, the ingredient choices become much easier, and the flavour can stay simple without feeling dull.
The ingredient list I would pack for a campsite
For a British campsite, I tend to shop for ingredients that travel well, are easy to find, and do not need much babying in a cool box. Mature cheddar is my default because it melts predictably and holds its flavour, even when the rest of the meal stays simple.
| Ingredient | Amount for 4 | Why it earns a place | Easy swap |
|---|---|---|---|
| Tortilla chips | 200 to 250 g | They form the base and need enough strength to carry heat and toppings. | Thick corn chips |
| Mature cheddar, grated | 200 g | Reliable melt and strong flavour. | Cheddar mixed with a little mozzarella |
| Black beans, drained | 1 x 400 g tin | Adds bulk and makes the dish more filling. | Kidney beans or pinto beans |
| Sweetcorn, drained | 150 g | Brings sweetness and a little crunch. | Diced peppers |
| Salsa | 4 to 5 tbsp | Gives moisture and lifts the whole pan. | Chopped tomatoes with a pinch of salt |
| Red onion, finely sliced | 1 small | Sharpness cuts through the cheese. | Spring onions |
| Jalapeños, sliced | 1 to 2 tbsp | Useful if you want heat without making the whole pan spicy. | Pickled green chillies |
| Optional cooked protein | 150 to 200 g | Turns a snack into a proper supper. | Cooked chicken, chorizo, or beef mince |
If I want a slightly stretchier finish, I add a small handful of mozzarella, but I never use it on its own. It can go greasy if the heat is too high, and outdoors that usually means the pan has been left over the flame for too long. The one thing I avoid is anything too watery before the cooking starts; once chips absorb too much moisture, the texture falls apart quickly.
With the ingredients packed sensibly, the cooking itself becomes straightforward, and the method matters more than the shopping list.
How to cook them without burning the bottom
I prefer a cast-iron skillet or a Dutch oven because both hold heat evenly. A deep foil roasting tray can work in a pinch, but it is less forgiving, so I would only use it if I had no better option. On a campfire, set the pan on a grate or over steady embers rather than right in the flames.
- Lightly oil the pan if it is bare cast iron, especially if you are cooking directly over heat.
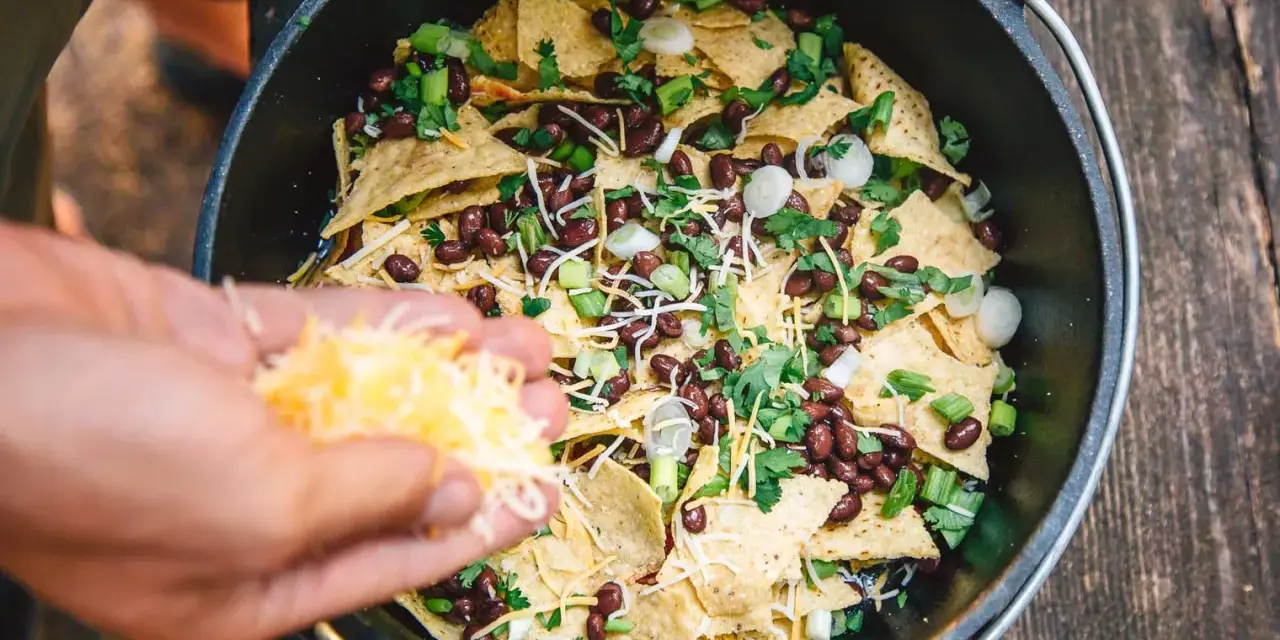
- Add a thin layer of chips, then scatter over half the beans, sweetcorn, onion, and cheese.
- Repeat with another layer, but keep the pile shallow. Nachos need coverage, not height.
- Cover loosely with foil or a lid and cook for 5 to 8 minutes over medium heat, just until the cheese melts.
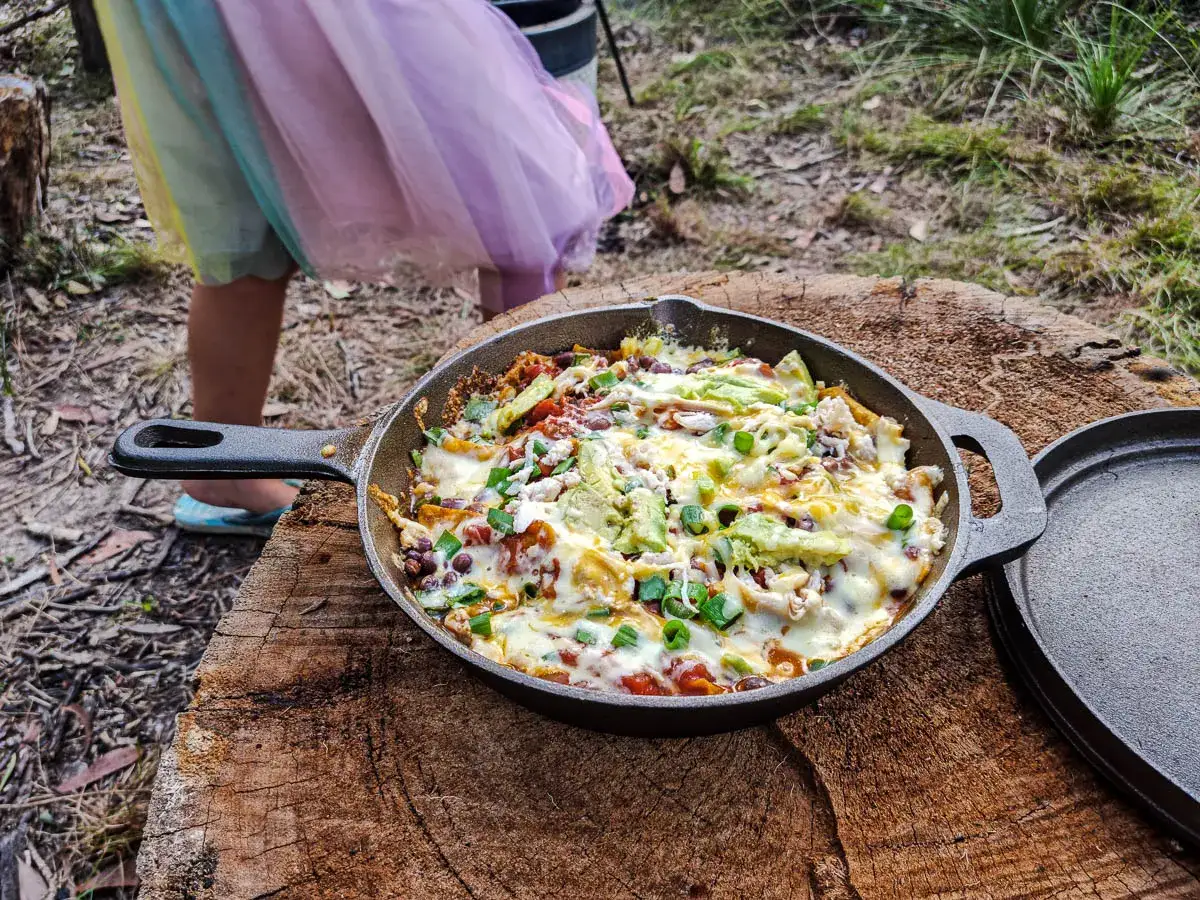
- Take the pan off the heat, let it sit for a minute, then finish with salsa, avocado, coriander, or a squeeze of lime.
That short resting time matters more than people expect. It lets the cheese settle slightly, so the top does not slide off the moment you lift the first chip. I also like to keep the hottest part of the pan low rather than chasing speed. Outdoors, slower and steadier usually wins.
Once you know the basic method, the fun part is adapting it to the group around the fire.
Variations for families, vegetarians, and bigger appetites
The best campsite versions are the ones that can be adjusted without making the whole dish complicated. For a mixed group, I keep the base mild and put the sharper toppings on the side. That way children, cautious eaters, and people who want heat can all build their own plate.
| Version | What to build it with | Finish with | Why it works |
|---|---|---|---|
| Family-friendly | Beans, sweetcorn, cheddar | Spring onions, yogurt, mild salsa | Comforting and easy for children to eat |
| Smoky supper | Cooked chicken, chorizo, peppers | Coriander and lime | More filling after a long day of walking |
| Vegetarian | Black beans, onion, sweetcorn, salsa | Avocado and pickled jalapeños | Keeps plenty of texture without meat |
| Lighter plate | Fewer chips, more beans and peppers | Herbs and a spoon of yogurt | Feels less heavy in warm weather |
If I am feeding adults and children together, I almost always separate the spicy bits. Jalapeños, hot sauce, and extra chilli should stay in small bowls, not be baked into the whole pan. That gives everyone control, and it keeps the main tray approachable instead of over-seasoned.
Once you know the format, the main thing left is avoiding the small mistakes that ruin texture.
Mistakes that ruin the texture
- Using too much salsa before heating turns the chips soft. Wet toppings belong at the end unless they are part of a very light layer.
- Choosing thin chips means the base breaks under the fillings. Thick corn chips hold up much better.
- Cooking over a fierce flame burns the underside before the cheese has time to melt. Medium heat is safer and usually faster in practice.
- Overloading the pan makes the centre uneven. If you are feeding a crowd, split the mixture across two smaller pans.
- Adding avocado too early makes it warm and dull. It should be a fresh finish, not a cooked ingredient.
- Using raw meat outdoors creates a food-safety problem and slows the recipe down. I only use fully cooked fillings at camp.
- Skipping the lid or foil cover leaves the top dry. Trapping the heat for a few minutes is what melts the cheese properly.
Those are simple mistakes, but they make a huge difference. When the pan is shallow, the heat is steady, and the toppings are layered with restraint, the result tastes much better than the effort suggests.
That is the part I always come back to when I make a shared campsite meal: keep the method simple, and let the ingredients do the work.
The little campsite details that make the pan disappear fast
I usually prep the toppings at home in small containers so the campsite feels calm rather than cluttered. Grating the cheese ahead of time, draining the beans, and slicing the onion before departure saves a surprising amount of faff. If I have room in the cool box, I also pack lime, spring onions, and a little pot of sour cream or yogurt because those fresh, cold finishes make the whole dish taste brighter.
One other detail matters more than people expect: serve the pan immediately. Nachos are at their best in the first few minutes, while the cheese is soft and the chips still have some crunch. If you leave them sitting around the fire too long, even a good recipe starts to lose its shape. That is why camping nachos work so well when you want a quick, shared meal that feels satisfying without asking much from the cook.
Keep the toppings simple, keep the heat moderate, and serve them as soon as the cheese melts. That is enough to turn a basic campsite supper into something everyone reaches for twice.