The basics of dehydrating food for backpacking are simple: remove enough moisture to make meals light, stable, and easy to rehydrate without carrying unnecessary weight. The part that matters is the detail underneath that idea, because the difference between a dependable trail dinner and a disappointing one is usually about ingredient choice, drying temperature, storage, and how much water the food wants back at camp. I focus here on the methods that actually hold up on UK and European trips, where damp weather, long days, and small rucksack volumes make every gram count.
The main things to get right before your first batch
- Keep fat low. Lean, cooked ingredients dry and store far better than oily or creamy dishes.
- Use the right heat. Most fruits, vegetables, grains, and meals dry well between 52°C and 63°C, depending on the ingredient.
- Condition the food. Let dried food sit in airtight containers for 7 to 10 days so hidden moisture shows up before long-term storage.
- Pack single portions. One meal per pouch is easier to label, store, and rehydrate at camp.
- Test before the trip. A home trial tells you how much water, time, and heat the meal really needs.
Why home-dried meals earn their place in a backpack
Home-dried trail food solves a very practical problem: it cuts weight without forcing you to live on shop-bought bars and instant noodles. Once water is removed, meals take up less room, dry ingredients are easier to portion, and you can build dinners around the kind of flavours you actually want after a long walk. I also like the control it gives me. On a family camp, I can make one base recipe and adjust the salt, spice, and serving size instead of buying separate meals for everyone.
The method is not magic, though. Dehydration preserves food by removing moisture, not by making poor ingredients safe or improving low-quality cooking. If a meal is greasy, overloaded with dairy, or unevenly cooked before it goes into the dehydrator, drying will only preserve those problems. The good news is that once you understand the limits, the system becomes very predictable. That is what makes it useful for real camp cooking, not just for the occasional experiment.
Once you know why the method works, the next question is what actually belongs in the dehydrator.
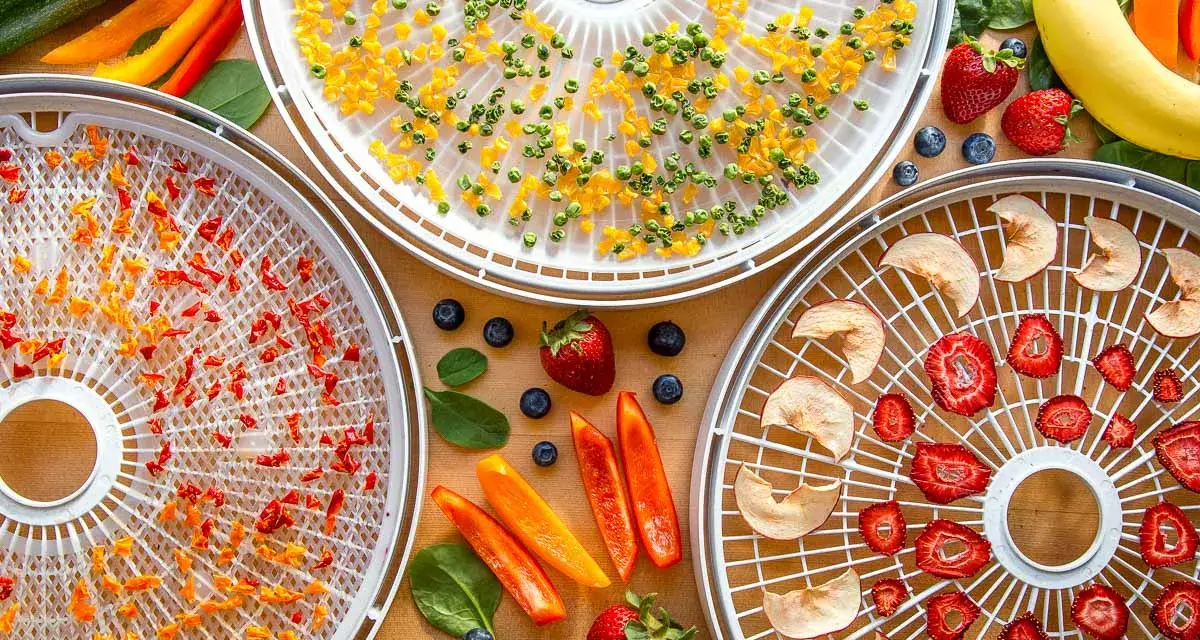
What dries well and what does not
Not every food is a good candidate. The best trail meals are usually built from ingredients that dry evenly, rehydrate cleanly, and stay stable once packed. Fat is the main troublemaker, because it does not disappear during dehydration and it can go rancid during storage. I keep that rule in mind before I start slicing or cooking anything.
| Food group | Works well | Why it matters |
|---|---|---|
| Lean cooked meat | Yes | Good protein base for savoury meals, especially when fully cooked and blotted dry. |
| Cooked beans and lentils | Yes | Filling, affordable, and reliable in chilli, curry, and pasta sauces. |
| Cooked rice, quinoa, and pasta | Yes | Excellent meal base if they are spread thin and dried thoroughly. |
| Vegetables and herbs | Yes | Add texture and flavour, and they rehydrate well when cut to a similar size. |
| Fruit | Yes | Useful for snacks, breakfasts, and sweet meal add-ins. |
| Fatty mince, oily sauces, creamy dairy-heavy dishes, avocado, and nut butter blends | No, or only with caution | These are slow to dry, less stable in storage, and more likely to spoil or taste stale. |
A practical middle ground is to use dry shelf-stable ingredients where they make sense, such as powdered milk or cheese powder, instead of trying to home-dry foods that were never meant for it. Two rules matter more than anything else: keep the fat low, and keep the pieces the same size. If the pieces are uneven, the outside dries first while the centre stays damp, and that is where storage problems begin. That leads naturally to the choice of equipment, because the right tool makes even drying much easier.
Choosing equipment that actually makes the job easier
If you plan to do this more than once, a proper dehydrator is the most practical option. A fan-driven unit with adjustable temperature gives you more control, better airflow, and far less guesswork than a standard oven. In a small UK kitchen, that repeatability matters. I would rather run a steady batch overnight than babysit an oven that keeps running hotter than I want.
| Method | Best for | Main advantage | Main limitation |
|---|---|---|---|
| Food dehydrator | Regular batches, mixed meals, lean meat, sauces, fruit leather | Even airflow and stable low heat make results far more consistent. | Costs more upfront and takes counter space. |
| Fan oven | Occasional small batches of fruit or vegetables | No extra appliance to buy if you only dry food once in a while. | Lowest setting is often still too hot, and airflow is weaker. |
- Adjustable temperature helps you match the setting to the ingredient, instead of forcing everything into one compromise.
- Good airflow is what removes moisture instead of just warming the food.
- Tray inserts or fine mesh sheets are worth it if you want to dry sauces, purées, or fruit leather.
- Enough tray space matters more than people expect, because crowded trays slow drying and create uneven results.
For a one-off batch, an oven can work, but I would not make it my long-term plan. It is too easy to overheat the edges, dry the outside too fast, and trap moisture inside the food. Once the gear is sorted, the real work is in how you prep and dry the ingredients.
The drying process I trust at home
I follow the same basic sequence every time: cook safely, slice evenly, dry at the right temperature, then condition the finished batch before I seal it away. That routine sounds simple, but it is exactly what prevents the common failures, especially with rice dishes, beans, and anything that contains meat. The numbers below are a useful starting point, not a rigid law, because thickness, moisture content, and tray load all affect the final result.| Food type | Typical temperature | Usual drying time | What to watch |
|---|---|---|---|
| Fruit | 57°C / 135°F | 6 to 24 hours | Too much heat can cause case hardening, where the outside dries before the centre. |
| Vegetables | 52°C / 125°F | 4 to 12 hours | Blanching or steaming first usually improves quality and safety. |
| Beans, rice, meat, and mixed meals | 63°C / 145°F | 6 to 12 hours or more | Use lean ingredients and rotate trays if the batch is thick. |
| Herbs | 32°C to 38°C / 90°F to 100°F | 1 to 3 hours | They dry fast, so check them often and do not leave them unattended for too long. |
- Cook foods fully first. Meat, rice, beans, and sauces should be safe before they ever see the dehydrator.
- Cut everything to a similar size. Thin, even pieces dry far more predictably than chunky ones.
- Spread the food in a single layer. Overlapping pieces slow the whole batch down.
- Use the hotter setting for meat and rice-based meals. I would rather dry a little slower than leave moisture trapped in the centre.
- Blot away visible fat. A paper towel between drying stages helps more than most people expect.
- Cool the batch completely before storage. Warm food in a container can sweat and undo several hours of work.
When food seems dry on the outside but still bends or feels leathery in the middle, I keep going. That is usually the point where a batch looks finished but is not actually ready for storage. The best habit here is to test one portion at home by rehydrating it exactly the way you would on trail. That gives you a real answer on water volume, texture, and flavour before you depend on it for a remote night in camp.
How I store meals so they stay reliable
Storage is where a lot of homemade trail food fails. Drying removes moisture, but it does not make food immune to damp air, warm kitchens, or sloppy packaging. The UC Master Food Preserver treats conditioning as the overlooked final step, and I agree with that emphasis. It is the easiest way to catch hidden moisture before a batch goes into long-term storage.
My routine is straightforward. I let the food cool completely, place it in airtight containers for 7 to 10 days, shake the containers daily, and watch for condensation or stickiness. If I see any sign of trapped moisture, I send the food back through the dehydrator. After that, I move it into labelled pouches or jars and keep it in a cool, dark place rather than a warm cupboard near the cooker or boiler.
| Food type | Rough storage window | Best storage note |
|---|---|---|
| Vegetables, grains, beans, rice, and pasta | Up to about 1 year | Store airtight in a cool, dark place. |
| Fruit | Around 6 months | Freeze longer-term batches if you want extra protection. |
| Meat | About 1 to 2 months at room temperature | Vacuum-sealed and frozen portions last longer. |
| Full mixed meals | Depends on the most perishable ingredient | Treat the weakest ingredient as the limit, not the whole recipe. |
- Airtight jars are useful for pantry storage at home.
- Vacuum-sealed pouches are ideal for single-trip portions, but they are a packaging method, not a substitute for proper drying.
- Mylar bags with absorbers can add another layer of protection for longer storage.
- Labels matter because meal name, date, and water amount save time later.
REI’s advice to mark the water amount on each pouch is one of those small habits that pays off every time you cook in camp. The same goes for portioning. A single-serving pouch is easier to pack, less likely to absorb moisture when opened, and much simpler to manage when people are hungry and the weather has turned. Once the food is stored well, the last piece is knowing how to bring it back to life on the trail.
Packing and rehydrating meals on the trail
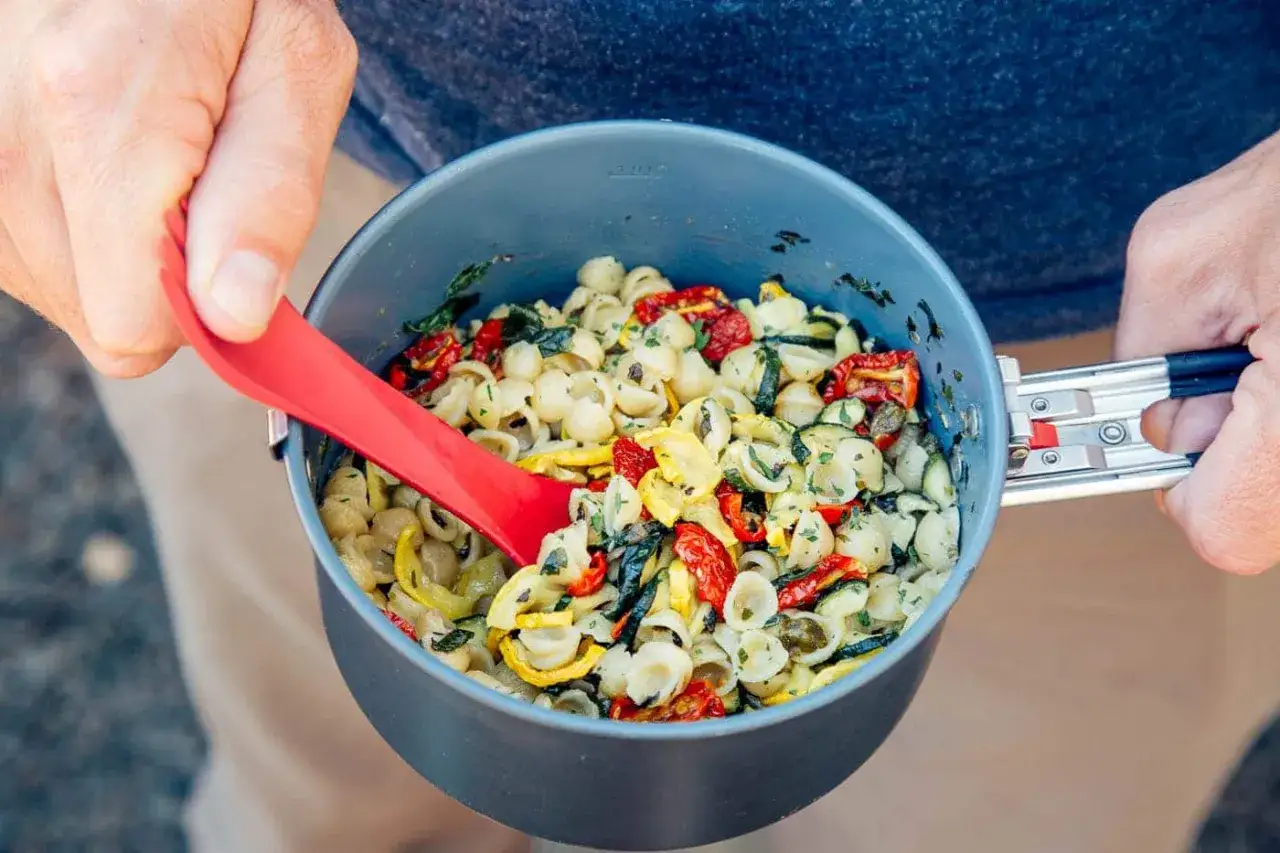
At camp, I want the meal to be predictable. That starts with packing the right amount of food in the first place. I portion each dinner separately, write the water amount on the pouch, and keep wetter ingredients away from dry ones if they would otherwise travel badly together. Many meals begin around a 1:1 ratio by volume, but beans, rice, and thick sauces usually need more water and more time.
Boiling water does most of the work, but heat retention matters too. A lid, a cosy, or even wrapping the pot in spare clothing can make a real difference on a windy campsite. That is especially true in the UK, where evening temperatures and damp air can steal heat faster than people expect. If you are using a bag method, use a heat-safe pouch rather than improvising with whatever plastic happens to be in the cupboard.- Start with boiling water unless the recipe is specifically designed for cold soaking.
- Stir or shake once if the meal is dense, then let it sit covered.
- Add more water in small amounts instead of flooding the pouch at the start.
- Give beans and grains longer because they rarely rehydrate as quickly as vegetables.
- Test the meal at home with the same pot, stove, and spoon you will carry.
Cold soaking has its place for simple breakfasts or lunches, but for most savoury dinners I still prefer a hot rehydration step. It tastes better, feels more like a meal, and usually gives a more dependable texture. Once you have the trail routine sorted, the next improvement comes from choosing recipes that dry cleanly in the first place.
Meal ideas and mistakes that teach the fastest lessons
The recipes that work best are usually the ones with a simple structure, moderate seasoning, and a low-fat base. I season trail meals a little more boldly than I do at home because flavours flatten after drying and rehydrating. That small adjustment makes a real difference when the meal is being eaten from a pot at the end of a wet day.
Meals that dry and rehydrate well
- Lentil chilli. It is forgiving, filling, and easy to portion into family-sized or solo servings.
- Mushroom risotto. The texture comes back well, and it delivers a proper comfort-food dinner without relying on a lot of fat.
- Chickpea curry with rice. This works well if the sauce is not too oily and the rice is dried evenly.
- Lean beef or turkey bolognese. The meat adds protein, while the sauce carries flavour across the whole meal.
- Apple and cinnamon porridge. It is light, fast, and a good example of how dried fruit can turn a basic breakfast into something better.
Common mistakes I avoid now
- Using too much oil or cheese. These ingredients age badly and slow drying.
- Drying different-sized pieces together. The batch only looks finished when the smallest pieces are done.
- Sealing food before it has cooled and conditioned. Warm food sweats, and sweating creates mould risk.
- Expecting every ingredient to rehydrate at the same speed. Fruit, rice, and meat all behave differently.
- Forgetting to test the exact recipe on a real stove. A home test tells you more than any guess ever will.
- Under-seasoning the batch. Once the water goes back in, the food usually tastes milder than it did before drying.
The best part of this process is that every batch teaches you something useful. A slightly too-thick sauce tells you to thin the next one. A grain that stays hard tells you to cook it longer first. A meal that tastes perfect on the first try becomes a repeat recipe, which is exactly what you want when you are building a dependable backpacking food system.
The small habits that make the system better every season
I do not treat trail food as a one-off project. I treat it like a system that gets better with notes and repetition. After each batch, I write down the drying time, the rehydration water amount, and whether the flavour held up in camp. That tiny notebook saves more money and frustration than any fancy piece of kit ever will.
- Standardise a few base sauces so one batch can become chilli, bolognese, curry, or rice bowls with only small changes.
- Portion separately for adults and children on family trips so nobody is stuck with too much or too little food.
- Rotate your stock and use older pouches first instead of leaving them buried in the cupboard.
- Dry in batches you can actually finish rather than stuffing the trays and hoping for the best.
That is how I keep trail food predictable: simple ingredients, honest drying, airtight storage, and a quick home test before any trip that matters. The finished meals are rarely fancy, but they are light, comforting, and reliable when camp is cold and everyone wants dinner fast.