These white chocolate s'mores are the easiest way to turn a classic campfire snack into something creamier, softer, and a little more polished without adding extra kit. I’m focusing on the version that works best at a campsite: what to pack, how to toast it properly, how to keep the filling balanced, and which flavour twists are worth making when you want a dessert that feels intentional rather than overloaded.
Quick take on the campfire version
- Digestives are the most practical UK biscuit base because they hold together better than thinner cookies.
- White chocolate softens fast, so it needs gentle heat and a little patience rather than a hard flame.
- A small amount of salt, berries, or tart jam keeps the filling from tasting flatly sweet.
- For families or bigger groups, a foil-tray or barbecue-lid method is easier than building every sandwich by hand.
- Long roasting sticks, clean hands, and simple setup make the dessert safer and less messy.
Why the white-chocolate version works so well at camp
I like this twist because it keeps the ritual intact but changes the mood of the dessert. White chocolate is softer, more vanilla-forward, and less bitter than milk or dark chocolate, so the marshmallow becomes the main event rather than just another sweet layer. That makes it especially good after a salty barbecue or when I am cooking for children, but it also means the balance matters more: a pinch of salt, a sturdier biscuit, or a few tart berries stops the finished bite from feeling one-note.
The practical upside is that the filling softens quickly, which is useful at camp and slightly annoying if you overdo the heat. Once you understand that trade-off, the rest is mostly about packing smart and timing the toast properly. That starts with choosing ingredients that behave well in a rucksack, a cool box, and a slightly chaotic campsite kitchen.
What I pack for a version that actually works on site
If I were building this on a real campsite, I would keep the ingredient list tight. The dessert is at its best when each part has a clear job, and the British biscuit swap matters more than people expect. Digestives are my default because they are sturdy, easy to find in the UK, and close enough to the graham-cracker idea without needing a specialist shop.
| Ingredient | My pick | Why it matters |
|---|---|---|
| Biscuit base | Digestives or chocolate digestives | They are sturdy, familiar, and less likely to collapse when the marshmallow lands. |
| Chocolate layer | A bar of white chocolate broken into thin squares | A bar melts more evenly than a thick pile of chips and gives a smoother bite. |
| Marshmallows | Large vanilla marshmallows | One large marshmallow gives better structure and less leakage. |
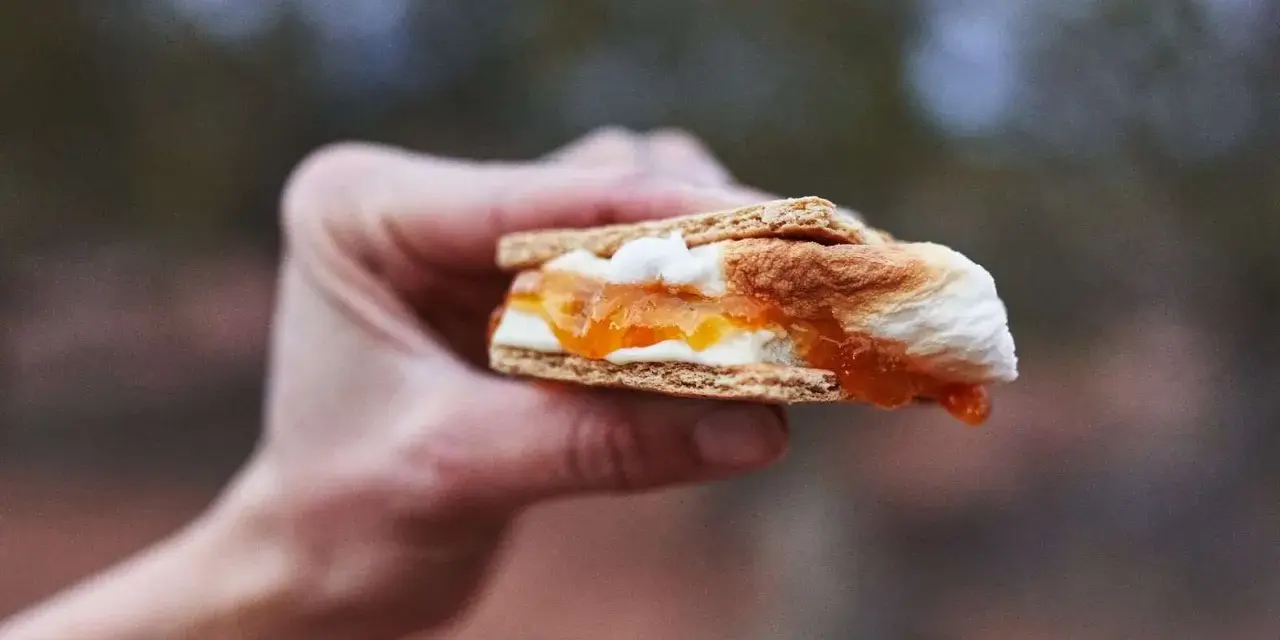
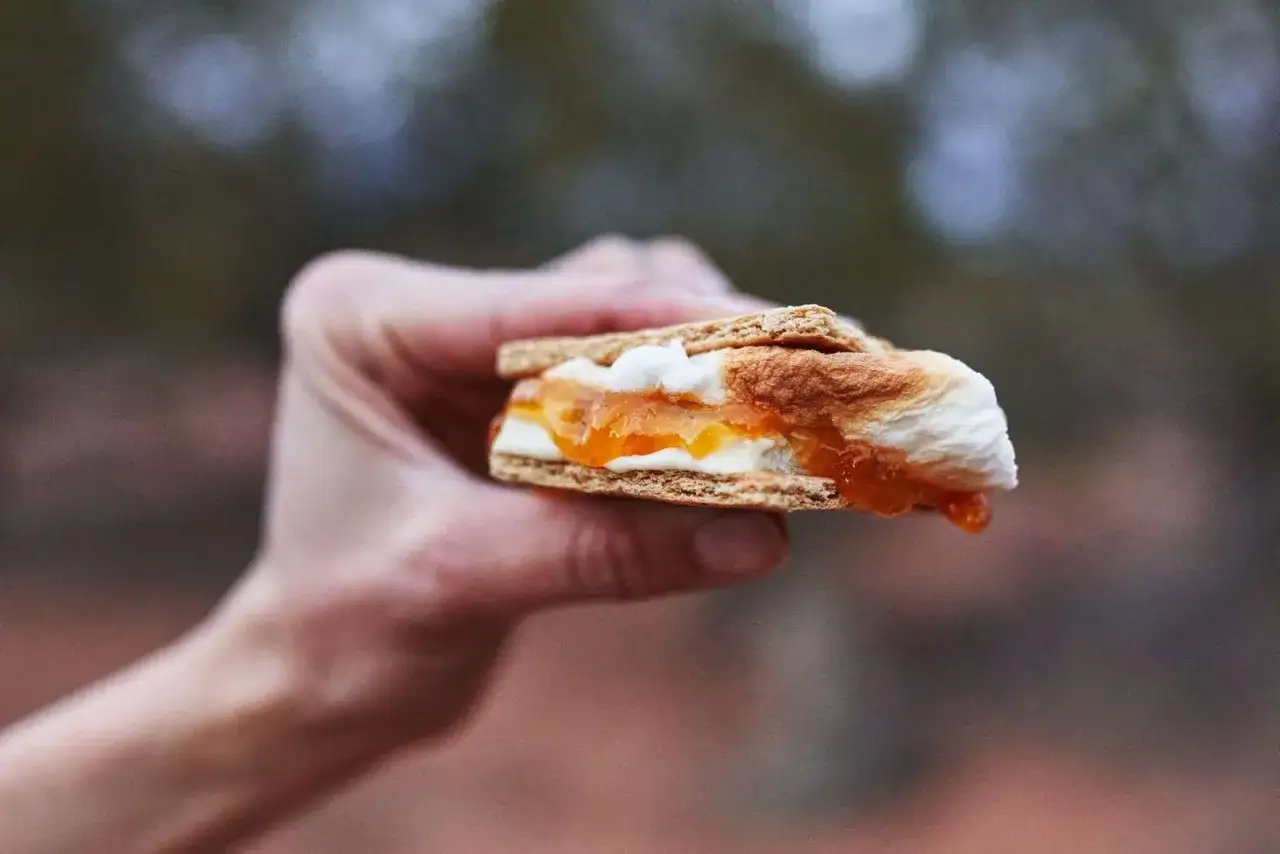
| Balance | Raspberries, blackberries, apricot jam, or a pinch of sea salt | These cut through the sweetness and make the finish taste cleaner. |
| Tools | Long roasting stick, napkins, heatproof tray, foil | They keep the process safer and far less messy around a fire or barbecue. |
As a rule of thumb, I plan on 2 biscuits, 1 large marshmallow, and about 20g of white chocolate per serving. If I am feeding a family, I pack extra biscuits and one additional bar because campfire desserts rarely stay perfectly tidy once everyone gets involved. Next, the real skill is not the ingredient list but the heat control.
How I toast and assemble them without losing the filling
For camp cooking, I build these in the order that gives the cleanest melt: biscuit, chocolate, marshmallow, biscuit. The fire should be down to glowing embers or a gentle barbecue heat; an open flame turns the marshmallow black before the centre softens, and white chocolate is less forgiving than milk chocolate when it gets too hot.
- Set one biscuit on a board or heatproof plate and add the white chocolate.
- Skewer one marshmallow on a long stick or a soaked wooden skewer. I prefer a roasting stick of about 75 cm so hands stay away from the hot zone.
- Toast it 5 to 10 cm above the embers, turning it every few seconds, for roughly 20 to 45 seconds until it is evenly golden.
- Hold it off the heat for 5 to 10 seconds so the outside settles and the chocolate can start softening.
- Set the marshmallow on the chocolate, top with the second biscuit, and press very lightly.
If the chocolate still feels too firm, close the sandwich in your hands for a few seconds rather than putting it back over the flame. That gives a smoother melt and far less mess. When children are involved, I keep the setup simple and supervised, with everything laid out before we start, which is exactly the kind of practical caution I would use for any Scouts-style campfire activity. Once the technique is steady, the fun part is deciding which extra flavour actually improves the bite.
Variations that improve the flavour instead of just making it louder
The best additions are the ones that make the dessert feel more balanced, not more crowded. White chocolate is naturally sweet, so I usually reach for something tart, salty, or gently spiced. A little contrast goes much further than a pile of extra toppings.
| Variation | What to add | Why I like it |
|---|---|---|
| Blackberry and white chocolate | 2 to 3 berries, lightly squashed | The tartness cuts the sweetness and keeps the dessert tasting fresher. |
| Apricot jam version | A very thin smear on the biscuit | It adds brightness and works well when you want something sticky and camp-friendly. |
| Lemon-zest finish | A tiny pinch of zest over the chocolate | It lightens the flavour without turning the snack into something fussy. |
| Salted peanut butter layer | A whisper-thin spread under the chocolate | It adds depth, but only if you use it sparingly. |
| Ginger biscuit swap | Replace the digestives with gingernuts | The spice gives the dessert more character when you want a warmer finish. |
I would not stack more than one of these ideas into a single sandwich unless I was making a tray version. The dessert gets messy quickly, and the white chocolate already brings plenty of sweetness on its own. The next question is what to do when the fire pit is not available or the campsite rules are stricter than expected.
The traybake version when a fire pit is not available
When I cannot use an open fire, I switch to a foil-tray or barbecue-lid method. It gives you the same flavour with less standing around, and it is the version I would use for a family campsite meal or a group of six people who all want dessert at the same time.
| Serves | Digestives | White chocolate | Marshmallows | Heat time |
|---|---|---|---|---|
| 4 | 8 biscuits | 80g | 4 large | 3 to 4 minutes |
| 6 | 12 biscuits | 120g | 6 large | 4 to 5 minutes |
| 8 | 16 biscuits | 160g | 8 large | 5 to 6 minutes |
To make it, I line a foil tray, arrange the biscuits, scatter over the chocolate, and add the marshmallows on top. Then I warm it under a barbecue lid or over gentle, indirect heat until the marshmallows puff and the chocolate softens. I stop as soon as that happens, because if I push white chocolate too far it can split, taste greasy, and lose the creamy finish that makes this variation worth making. That leaves one final part worth getting right: the small habits that stop a good dessert from becoming a sticky compromise.
The last details that make the dessert feel finished
The version I reach for most often is the one that stays simple: digestives, one good square of white chocolate, a properly toasted marshmallow, and either a pinch of salt or a tart fruit if the mood needs it. That combination gives the dessert enough contrast to taste deliberate, not just sweet.
If I am cooking for a family campsite, I keep the ingredients separate until the last minute, use the gentlest heat available, and make each sandwich while the marshmallow is still hot enough to melt the chocolate. That way the biscuit stays crisp, the filling stays creamy, and the whole thing still feels like a proper campfire treat rather than a rushed snack. In other words, the trick is not to make it complicated; it is to make each small choice count.