Getting stronger on the trail is usually less about “being naturally fit” and more about building the right habits: climbing practice, better pacing, smarter packing, and enough fuel to stay sharp. If you want to know how to get better at hiking, the fastest gains come from training for hills, learning to move efficiently, and choosing routes that stretch you without flattening you. In the UK, where wet ground, steep ascents, and changing weather can turn an easy-looking walk into a long day, those details matter even more.
The main things that make hiking feel easier
- Build leg and core strength twice a week, not just cardio.
- Train on hills, stairs, and uneven ground so your body learns the real movement pattern.
- Shorten your stride on climbs and stay controlled on descents.
- Keep pack weight honest, especially if backpacking is part of the plan.
- Eat before you feel drained and drink consistently, not only when you are already thirsty.
- Use map reading and route planning to avoid wasting energy on avoidable mistakes.
The fitness base that makes hills feel less punishing
Most hikers do not fail because they cannot walk far enough on flat ground. They struggle when the route starts climbing, the footing gets uneven, or fatigue makes every step feel expensive. I look at hiking fitness as three linked pieces: aerobic endurance, leg strength, and the ability to keep moving efficiently when the trail gets awkward.
A solid weekly base is simple enough: two non-consecutive strength sessions, two moderate cardio sessions, and one longer walk. If you are preparing for a backpacking trip, make at least one of those walks carry some load. You do not need a gym full of machines. Squats, split squats, step-ups, calf raises, dead bugs, and side planks cover a lot of ground when you do them consistently for 2 to 3 sets of 8 to 12 controlled reps.That combination matters because hiking is not just “walking harder”. Steep climbs ask more from your glutes and calves, while uneven descents challenge your ankles, hips, and balance. Once that base starts improving, the next gain usually comes from training in the right terrain rather than only in the gym.
Train on the terrain you want to enjoy
If your goal is a better mountain day, flat-road cardio will only take you so far. The body learns specificity, which is just a tidy way of saying that step-ups are useful, but step-ups on a hill with a pack are more useful. I like to build hiking-specific conditioning around terrain that looks and feels like the routes I actually want to walk.
That can mean stairs, a treadmill set to a steep incline, a local hill repeat session, or a loop that includes roots, mud, loose stones, and a few awkward descents. The point is not to destroy yourself; the point is to repeat the movement pattern often enough that it becomes economical.
| Training type | What it improves | How to start |
|---|---|---|
| Stair climbs or incline treadmill | Breathing under load and climbing endurance | 10 to 15 minutes of intervals, then build gradually |
| Hill repeats | Pace control and leg stamina | 4 to 6 climbs at a steady, conversational effort |
| Technical trail walks | Foot placement, balance, and confidence | Choose a slower loop with roots, rocks, or muddy sections |
| Loaded walks | Backpacking readiness and pack comfort | Start light, then add weight only when the previous load feels easy |
Once you have terrain in the mix, technique becomes the next lever. That is where a lot of hikers find quick, surprisingly visible progress.
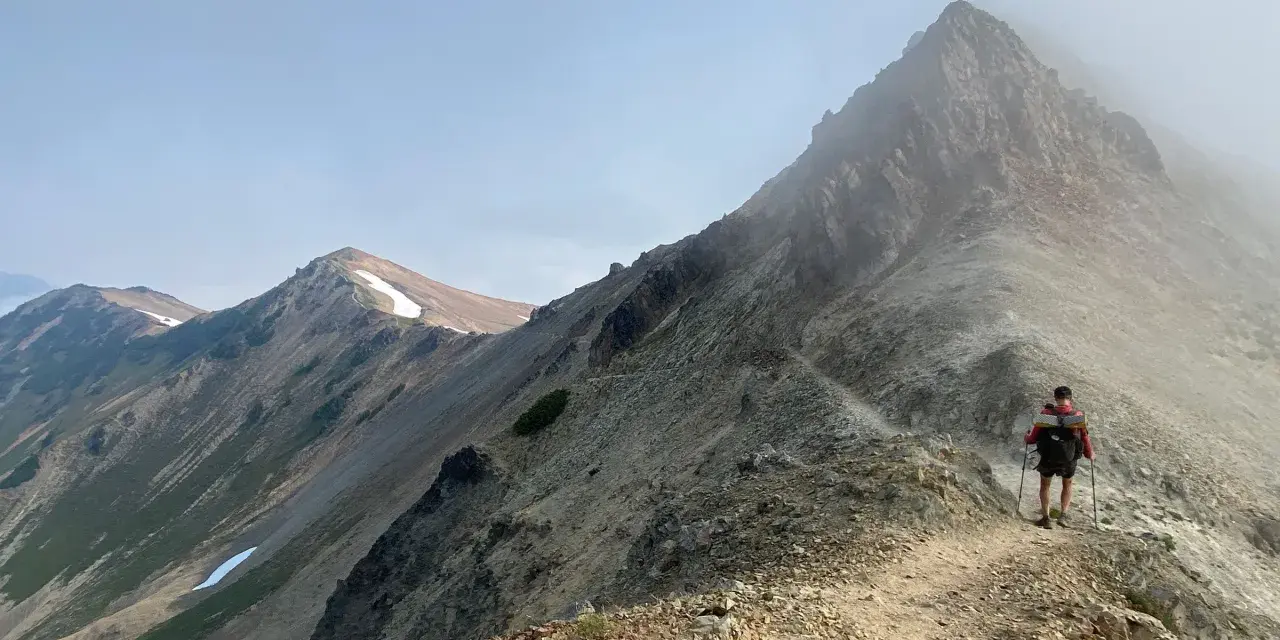
Learn to walk efficiently uphill and down
Technique is often the fastest shortcut to feeling better. I see a lot of hikers waste energy by overstriding uphill, leaning back on descents, or trying to maintain the same pace on every section of the trail. The body does not care about pride; it cares about efficiency.
On climbs, shorten your stride and keep your steps rhythmic. Think smaller, steadier steps rather than lunging upward. A slight forward lean from the ankles is fine, but avoid folding at the waist. If you can breathe through your nose for part of the ascent, you are probably moving at a sustainable pace; if you are fighting for air early on, you are burning matches too soon.
On descents, stay tall through the torso, soften your knees, and keep your weight over your feet rather than sitting back like you are resisting the slope. That “braking” posture is a common reason hikers end up with sore quads and tired knees after a day in the hills. I also like to cue “quiet feet”: if each step lands with a heavy thud, you are probably over-controlling the terrain instead of flowing with it.
Pacing matters just as much as footwork. Most fit adults can manage roughly 3 miles per hour on good, flat ground, but on longer routes the realistic average is often closer to 2.5 miles per hour once climbs, pauses, and trail conditions are included. In the UK, steep sections, mud, and weather usually slow that figure down further. If you accept that early, you plan better and finish stronger.
That said, technique alone will not save you if your kit is fighting you. The next gains often come from removing friction rather than adding effort.
Choose kit that helps, not hinders
The right gear does not make you fitter, but it can stop your energy leaking away through blisters, instability, cold, or an awkward pack. A lighter, better-fitting setup is one of the cheapest performance upgrades available to hikers and backpackers.
- Footwear: Pick shoes or boots that suit the route, not the fashion. For wet, uneven UK ground, grip and a secure heel matter more than trend-driven features.
- Socks: Avoid cotton. Moisture-wicking socks reduce the dampness that turns into hot spots and blisters.
- Pack fit: A hip belt that actually transfers weight, plus shoulder straps that do not dig in, makes long days far easier.
- Poles: Walking poles can help on steep descents and long climbs, especially when you are carrying more weight.
- Layers: A breathable waterproof and a mid-layer you can add or remove quickly will keep you more comfortable when British weather changes its mind.
I also think hikers underestimate the effect of pack discipline. If you are carrying three things “just in case” on every walk, the pack becomes its own fatigue tax. For day hikes, keep the load lean. For backpacking, make the weight deliberate. Every unnecessary kilogram changes how the climb feels, especially by hour three.
Once kit stops sabotaging you, food and recovery become the main levers keeping your pace steady from the first mile to the last.
Fuel and recover so your pace stays steady
People often treat tiredness on the hill as a fitness problem when it is partly a food problem. A hike that starts strong and falls apart late in the day is frequently under-fuelled, under-hydrated, or both. I prefer to eat before I feel tired and drink before I feel thirsty.
For a longer walk, snack every 60 to 90 minutes instead of waiting until you feel empty. That might be a flapjack, a banana, a cheese sandwich, malt loaf, nuts, dried fruit, or an energy bar that you already know agrees with your stomach. On longer backpacking days, portable carbohydrates matter because decision-making, mood, and balance all get worse when you run low.
After the walk, recovery is not optional if you want to improve. A meal with carbohydrate and roughly 20 to 25 grams of protein within a couple of hours helps restore energy and supports muscle repair. Sleep matters too. If your legs are still wrecked two days later, you probably need either less volume, more rest, or a slower progression.
Good fuelling also makes navigation and judgement better, which is why route planning deserves its own section. A tired hiker makes worse decisions, and that is where small mistakes start to compound.
Plan UK routes that stretch you without breaking you
In the UK, route choice is part of training. A 10-kilometre walk with steady ascent can demand more than a much longer flat loop, and a “moderate” route description can hide a surprising amount of effort. I like to choose routes that are just hard enough to create adaptation, but not so hard that they crush recovery or confidence.
That means reading the map, checking the contour lines, and paying attention to weather and daylight. A paper map and a compass still matter, even if you also use a phone, because batteries and signal are not guaranteed in the hills. If you are new to hill walking, practise navigation on familiar ground first so the skills feel normal when the weather turns or the trail splits unexpectedly.
| Goal | Good first step | Next step |
|---|---|---|
| General hiking confidence | 5 to 8 km route with modest ascent | 8 to 12 km with one sustained climb |
| Hill endurance | 60 to 90 minutes on repeated hills or stairs | 2 to 4 hour route with mixed terrain |
| Backpacking readiness | Short loaded walks on easy ground | Longer carry with uneven terrain and real ascent |
| Navigation confidence | Simple loop on familiar paths | Route with junctions, contours, and a planned escape option |
One rule I rely on: if the route feels ambitious on paper, it will feel more ambitious in wind, rain, or mud. Build in margin. That one habit does more for confidence than trying to prove anything on a bad day.
With those pieces in place, improvement becomes much more predictable. The final step is turning all of it into a simple progression you can actually repeat.
A simple six-week build-up that works in real life
If you want visible progress without overcomplicating things, use a six-week cycle and focus on one main goal at a time. I would rather see a hiker train steadily for six weeks than smash one huge weekend and spend the next two weeks recovering.
| Week | Main focus | Example session | Move on when |
|---|---|---|---|
| 1 | Build routine | 2 strength sessions, 1 easy hill walk, 1 longer flat or gentle route | You finish sessions without feeling wrecked the next day |
| 2 | Add climbing exposure | Stairs or incline intervals for 10 to 15 minutes, plus one longer walk | Breathing settles faster after climbs |
| 3 | Increase trail specificity | One route with uneven ground and controlled descents | Your feet and ankles feel stable on rougher paths |
| 4 | Introduce a light pack | Loaded walk with 2 to 4 kg, then a normal hike the next day or two later | Shoulders and hips recover quickly |
| 5 | Practice pacing and fuelling | Longer hill route, snack every 60 to 90 minutes, slower start | You avoid the late-day energy crash |
| 6 | Match the real goal | Longest route so far, or a backpacking rehearsal with your actual kit | You complete it with enough energy left for the next day |
The point of the cycle is not to chase perfection. It is to create a repeatable increase in load, then step back and absorb it. If you are still unusually sore, losing motivation, or dreading the next session, the jump was too big.
After the first cycle, the hikers who keep improving usually share a few habits that are almost boring in their consistency.
The habits that keep progress going
What separates steady hikers from frustrated ones is rarely talent. It is usually honesty and repetition. The best walkers I know are not obsessed with every new gadget or every hard route; they are attentive to the basics and stubbornly consistent about them.
- They keep a simple log of route length, ascent, pack weight, and how they felt.
- They practise with people who are slightly stronger, so their pace gets pulled upward without turning every outing into a race.
- They stop early when a hot spot appears, instead of waiting for a blister.
- They treat descents as a skill, not a free ride back to the car park.
- They adjust one variable at a time, rather than changing distance, terrain, kit, and load all at once.
If you want the biggest return, start with hill-specific fitness, then clean up your pacing, fuel, and route planning. That combination usually does more than buying better gear. After that, every walk becomes a little less about surviving the climb and a little more about enjoying the view.