Camping tacos are one of the easiest ways to make dinner feel proper without overloading your kit. I like them because they can be cooked in one pan, built from a small handful of ingredients, and adapted for whatever a family actually wants to eat after a day outdoors. In this guide, I’m focusing on the formats that work best at camp, a simple recipe that travels well, and the food-safety details that matter on UK trips.
The quickest route to a good taco dinner at camp
- Choose a filling that can be cooked in one pan and reheated safely.
- Soft flour tortillas usually pack better than hard shells on a camping trip.
- Walking tacos are the least messy option, while skillet tacos give the best flavour.
- A proper cool box matters more than shade alone for meat, dairy, and fresh salsa.
- Making the filling at home can turn a campsite dinner into a 10-minute finish.
Why taco night works so well at a campsite
Tacos solve a problem that comes up on nearly every trip: people arrive hungry at different times, and nobody wants a complicated clean-up. A taco filling can sit in one pan, tortillas can be warmed as needed, and the toppings can be as simple or generous as your cool box allows. That flexibility is the real advantage. It works for couples, families, and mixed groups where one person wants heat, another wants mild food, and the kids mostly want cheese and crunch.
I also like tacos because they scale cleanly. If you have two people, you can cook a small batch and eat straight away. If you have six, you can stretch the filling with beans or sweetcorn and turn it into a self-serve meal. On a windy pitch, that matters. You are not trying to plate up something delicate; you are building food that stays useful even when the campsite throws a bit of chaos at you. Once that logic is clear, the next decision is which format fits your setup.
The taco format I would choose first at camp
There is no single best version for every trip, but some formats are much better suited to outdoor cooking than others. If I only had one pan and one burner, I would start with skillet tacos. If I wanted the lowest mess possible, I would go with walking tacos. For fire cooking, foil-pack tacos can work, although they are more about convenience than texture. The point is to match the format to your kit, not to force a restaurant-style taco into a campsite.
| Format | What it needs | Why it works | Trade-off |
|---|---|---|---|
| Skillet tacos | One frying pan, burner, or grill | Best flavour, best texture, and closest to a proper dinner | More washing up than the other options |
| Walking tacos | Individual bags of crisps or tortilla chips | Very low mess and easy for children to assemble themselves | Less like a traditional taco |
| Foil-pack tacos | Foil, embers, or a grill grate | Good when you want hands-off cooking around a fire | Slower, softer, and harder to crisp up |
| Breakfast tacos | Pre-cooked eggs or sausage, plus a pan | Ideal for a late breakfast or a quick departure day meal | Eggs and dairy need stricter chilling |
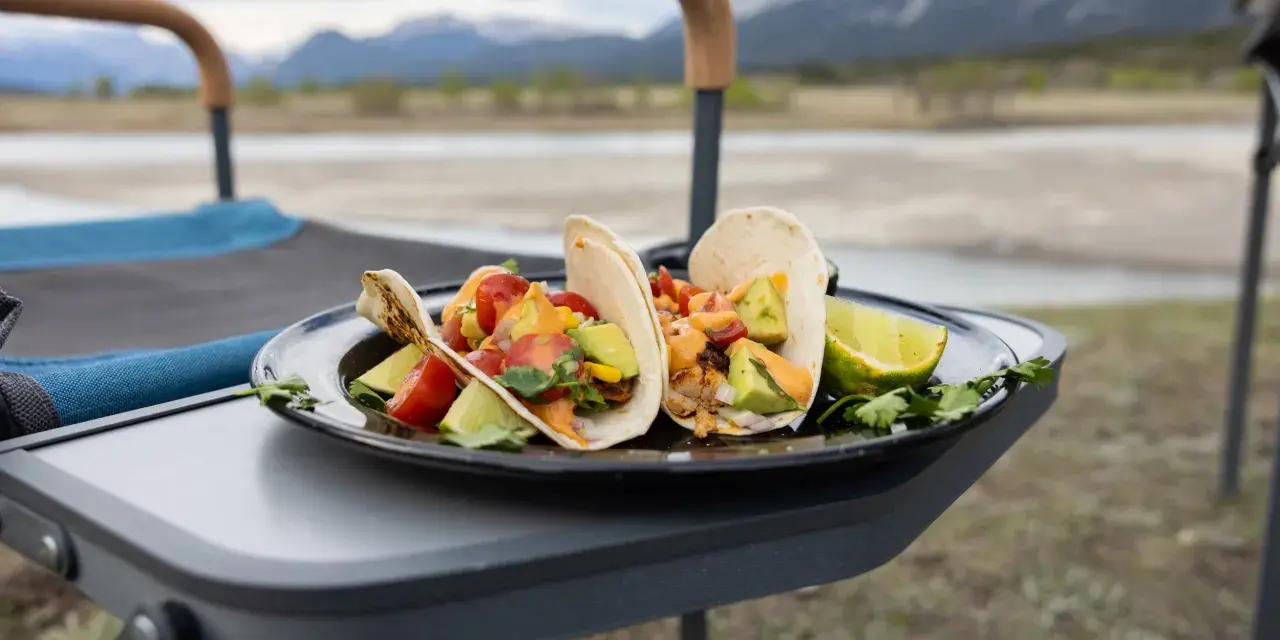
My default choice is still a skillet version, because it tastes the most complete and gives you the widest range of topping options. Walking tacos are the one I reach for when I want zero fuss and fewer dishes, especially with kids. Once you choose a format, the filling itself is easy.
A camp-friendly taco recipe for four people
This is the version I would cook if I wanted a dependable campsite dinner with very little drama. It uses ingredients that are easy to find in UK supermarkets, it reheats well, and it still tastes good if you make the filling at home and finish it at camp. I usually use beef mince for a richer flavour, but turkey mince works well if you want something lighter.
Ingredients
- 500 g beef mince or turkey mince
- 1 tbsp oil
- 1 small onion, finely diced
- 2 garlic cloves, minced
- 2 tbsp taco seasoning, or 1 tsp ground cumin, 1 tsp smoked paprika, 1/2 tsp garlic granules, and 1/2 tsp oregano
- 1 tbsp tomato purée
- 150 ml water or stock
- 1 x 400 g tin black beans, drained
- 8 small flour tortillas
- 100 g grated cheddar
- Shredded lettuce, salsa, lime wedges, and plain yogurt for serving
Read Also: 12 No-Cook Backpacking Lunch Ideas - Easy Trail Meals
Method
- Heat the oil in a pan over a medium flame and soften the onion for 3 to 4 minutes.
- Add the mince and cook until browned, breaking it up as it cooks.
- Stir in the garlic, seasoning, tomato purée, and water or stock. Simmer for about 5 minutes.
- Add the beans and cook for another 2 minutes, just until everything is hot and well coated.
- Warm the tortillas in a dry pan or wrap them in foil and place them near the heat for a minute or two.
- Serve immediately with cheddar, lettuce, salsa, lime, and yogurt.
If I’m preparing ahead, I cook the filling at home, cool it quickly, and pack it cold in a sealed container. At camp, I only need to reheat it until piping hot. That makes the actual evening service feel almost effortless, which is exactly what you want after a full day outside. The other half of the job is keeping everything safe until you cook it.
How I keep ingredients safe on a UK camping trip
Food safety is where people get casual, and camping is exactly the wrong place for that. The Food Standards Agency advises keeping chilled food below 5°C, and I treat that as the baseline for meat, cheese, yogurt, and any other fresh ingredient that could spoil quickly. A cool box is useful, but it is not magic. It needs ice packs or frozen bottles, and it works best when you open it as little as possible.
- Pre-chill the cool box before you leave home.
- Pack raw meat or cooked filling in a leakproof container at the bottom.
- Use frozen ice packs or frozen water bottles rather than relying on shade.
- Keep tortillas, seasoning, beans, crisps, and wraps in a separate dry bag.
- Bring toppings in small containers so you do not keep opening the main cool box.
- On hot days, only pack what you can realistically eat the same day.
I also separate the “needs chilling” list from the “survives anywhere” list. On a short weekend, that can mean meat, cheese, and yogurt in the cool box, while salsa jars, tortillas, beans, spice mixes, and chips live in a crate or cupboard. If a campsite has a fridge hook-up, use it, but do not assume a cool afternoon is enough. Once the food is sorted, the fun part is deciding which toppings are worth the packing space.
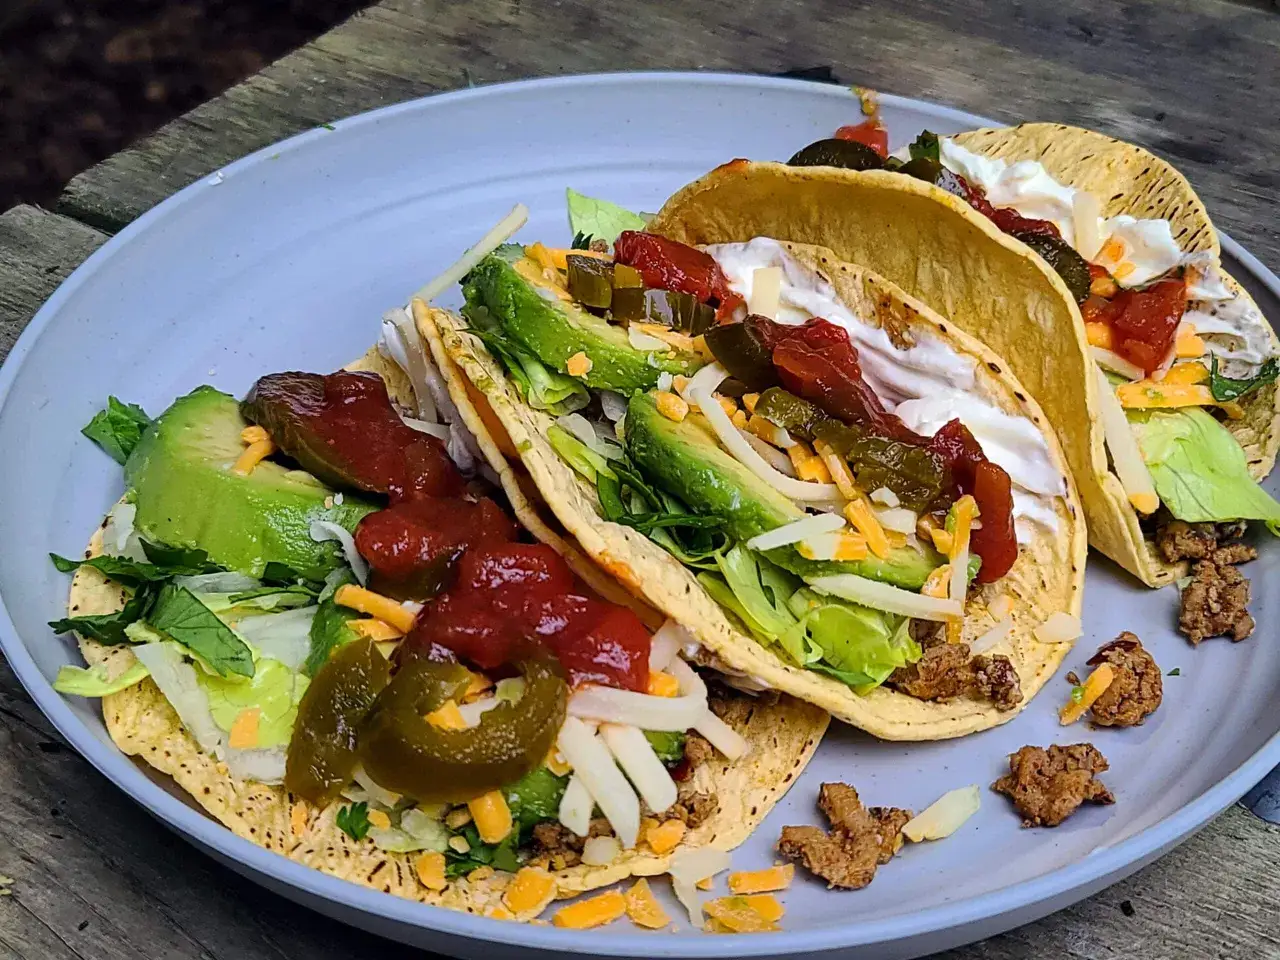
Toppings and swaps that travel well
The best toppings are the ones that add contrast without creating more work. I want something fresh, something creamy, and something sharp or salty. That usually means a small set of ingredients rather than a huge spread. For camp cooking, the goal is not to build an elaborate taco bar; it is to build a meal that still tastes lively after a few hours in a cool box.
- Best stable toppings - grated cheddar, pickled jalapeños, spring onions, lime wedges, and hot sauce.
- Best chilled toppings - shredded lettuce, chopped tomato, plain yogurt, and guacamole.
- Easy protein swaps - turkey mince for beef, or black beans and finely chopped mushrooms for a meat-free version.
- Gluten-free option - corn tortillas, or use the filling in a taco bowl with rice.
- Kid-friendly variation - walking tacos with crisps or tortilla chips instead of shells.
Flour tortillas are usually the most forgiving choice because they pack flat, warm quickly, and do not shatter in transit. Hard shells taste good, but they are awkward on a campsite and can be crushed before you even reach the pitch. If you want a relaxed meal, choose toppings that survive the journey and skip anything fragile unless you are using it straight away. With the menu set, the final step is packing the meal so it actually feels relaxed.
What I’d pack if I wanted this meal to feel effortless
My packing rule is simple: make the cook part short, make the clean-up small, and make the ingredients easy to grab in the order they will be used. That means one pan, one spatula, one sharp knife, one chopping board, and a cool box that is not crammed to the point of failure. If I had to leave one item behind, I would rather skip the fancy garnish than the spare ice pack.
- 1 sturdy frying pan or small Dutch oven
- 1 spatula or wooden spoon
- 1 small sharp knife and chopping board
- 1 cool box with enough ice packs for the whole day
- 1 container of pre-cooked filling or raw mince, depending on your plan
- 1 pack of tortillas and a backup bag of chips
- 2 or 3 topping containers with lids
- Kitchen roll, foil, salt, and a small spice tin
If the weather is warm or your fridge space is limited, I would lean toward bean-based filling or walking tacos rather than a dairy-heavy spread. If you have a reliable cool box and a gas stove, a skillet version is the one I’d trust first for flavour and consistency. That balance is what makes this meal worth repeating: it is flexible enough for family camping, simple enough for a short break, and reliable enough to stop dinner becoming another job.