A camp dinner should be generous, low-fuss, and reliable in less-than-perfect weather. Dutch oven enchiladas are one of the easiest ways to get all three: they use simple ingredients, finish in one pot, and come out rich enough to feel like proper comfort food after a day outdoors. In this guide, I’ll show you how to build the dish, manage the heat, choose the best filling, and avoid the mistakes that usually turn a good bake into a soggy one.
Key points to keep the bake easy and the result worth serving
- A 12-inch camp Dutch oven is the most practical size for a family-sized enchilada bake.
- For a 350 F / 180 C bake, I start with about 25 briquettes total on a 12-inch oven.
- Pre-cooked filling works best, because the pot is finishing the dish rather than cooking raw meat from scratch.
- Keep the filling fairly dry so the tortillas hold their shape instead of collapsing into sauce.
- Rotate the oven and lid every 10 to 15 minutes to reduce hot spots.
- Let the dish rest for 5 minutes before serving so the layers settle.
Why this meal works so well at camp
What I like most about this style of camp cooking is that it solves a real campsite problem: you want something filling, but you do not want to juggle multiple pans, complicated timing, and a mountain of washing up. A Dutch oven gives you steady, enclosed heat, which is ideal for a layered bake that needs the sauce to bubble and the cheese to melt without drying out the top.
It also suits family trips better than a lot of other campsite meals. The fillings can be mild or spicy, the portions are easy to scale up, and the finished dish holds together well enough to serve straight from the pot. On a damp evening in the UK, that matters more than people admit. I find that a bake like this feels more forgiving than grilled food, especially when the weather changes just as dinner is due.
The other advantage is flexibility. You can build the filling at home, keep the cooler organised, and finish the meal at camp without needing perfect conditions. That is why I treat this as a practical camp dinner first and a recipe second. Next, the ingredient choices matter more than most people expect.
What I pack before I leave home
I keep the ingredient list short on purpose. The goal is not a complicated Mexican feast; it is a dependable baked dinner that travels well, reheats cleanly, and still tastes good after a day outdoors. If I am feeding four to six people, this is the basic shopping list I use.
| Ingredient | Amount | Why it helps |
|---|---|---|
| Cooked shredded chicken or beef | 350-500 g | Gives the bake substance without forcing you to cook raw meat at camp. |
| Enchilada sauce | 500-700 ml | Use enough to coat the base and finish the top, but not so much that the tortillas go soggy. |
| Tortillas | 6-8 small flour tortillas or 8-10 corn tortillas | Flour tortillas roll more easily; corn tortillas are sturdier in flavour but can crack more. |
| Onion | 1 medium | Adds sweetness and depth once softened. |
| Grated cheese | 200-250 g | Cheese on top gives you the proper finish, especially after the lid comes off. |
| Beans or vegetables | 1 can beans or 1-2 peppers | Makes the dish more filling and stretches the protein for a bigger group. |
| Oil or cooking spray | A small amount | Stops sticking and helps the base stay neat. |
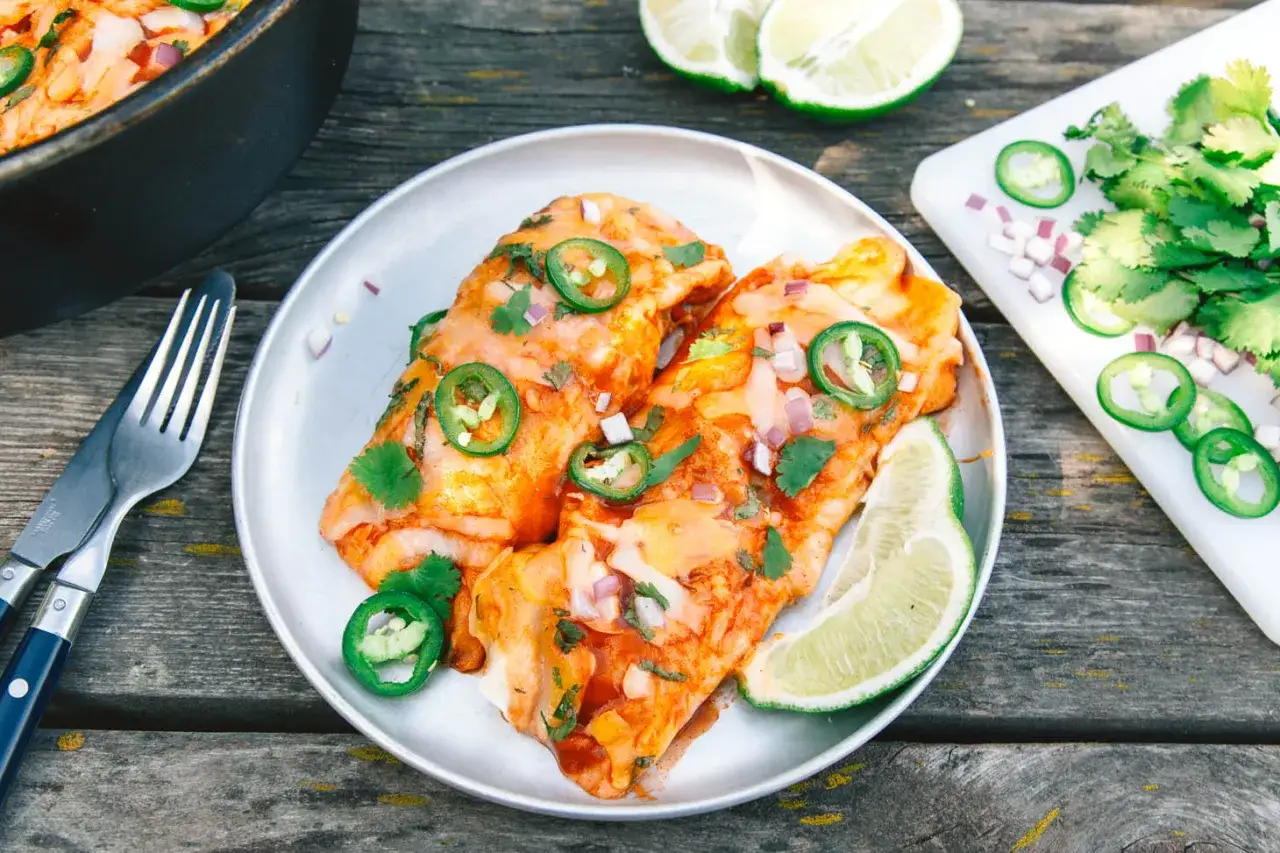
| Toppings | Coriander, lime, sour cream, sliced chilli | These are optional, but they brighten the finished dish. |
I prefer to grate the cheese myself if I can. Pre-grated cheese is convenient, but it often melts a little less smoothly because of the coating used to stop it clumping. I also keep the filling fairly dry before it goes into the pot, because excess liquid is the fastest way to lose texture.
If you want the easiest version for a first trip, pre-cook the filling at home, chill it, and bring it in a sealed container. That one step removes most of the stress on site and makes the rest of the cooking feel simple. Once the ingredients are packed, the build itself is straightforward.
How I build it in the Dutch oven
The method I use is designed to be simple enough for a campsite, but still deliberate enough to avoid a sloppy finish. I usually make the filling ahead, then assemble everything once the oven is ready and the coals or heat source are stable.
- Warm the filling if needed. If the chicken, beef, or beans are cold from the cooler, I gently warm them in a skillet or in the Dutch oven for a minute or two so they are easier to work with.
- Oil the pot lightly. A thin film of oil or a quick spray on the base and sides helps the sauce release cleanly.
- Add a thin layer of sauce. I spoon just enough sauce onto the bottom to prevent sticking. Too much here makes the whole bake heavy.
- Fill and roll the tortillas. I use roughly 2-3 tablespoons of filling per tortilla, roll them snugly, and place them seam-side down.
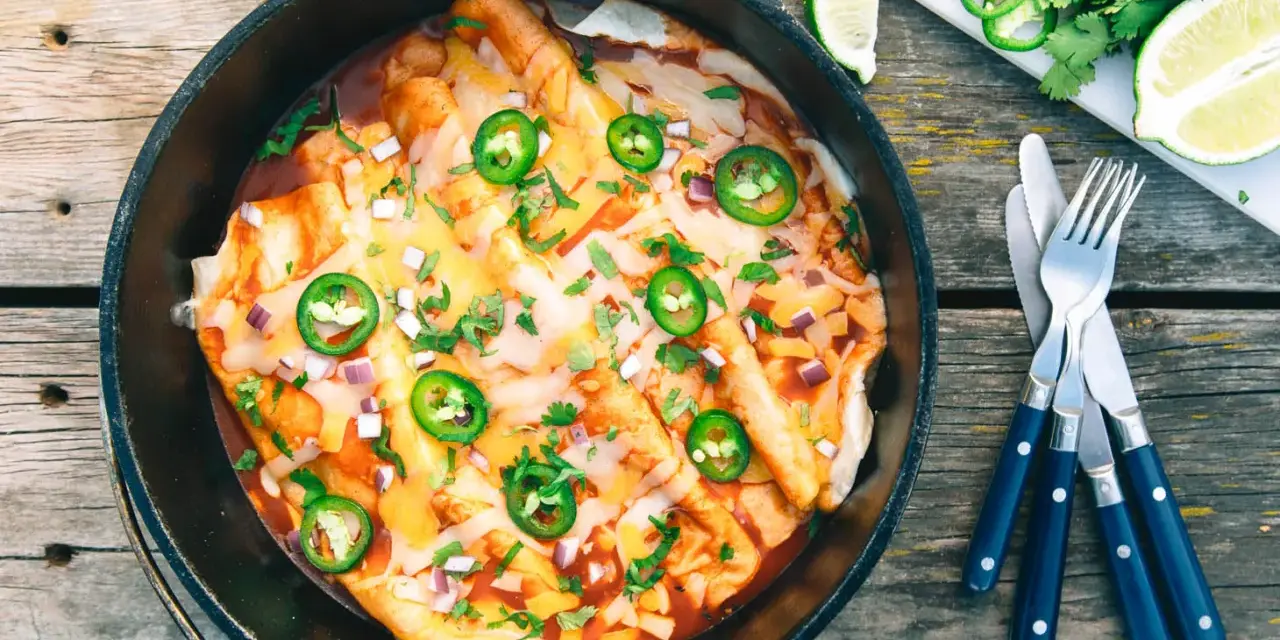
- Cover with sauce and cheese. I pour the remaining sauce over the top, then finish with grated cheese so the surface melts into one even layer.
- Bake until hot and bubbling. At 350 F / 180 C, I usually expect 35-40 minutes for a fully heated dish.
- Uncover briefly if you want a browned top. A few extra minutes with the lid off can give the cheese a better finish, but I only do this if the pot is already hot enough underneath.
- Rest before serving. Five minutes off the heat helps the layers set, which makes serving much easier.
If I am cooking for kids or mixed tastes, I often keep the toppings separate and let everyone finish their own plate. That is easier than trying to make one pot please everyone. It also keeps fresh toppings crisp, which matters more than it sounds when the main dish is rich and cheesy. Heat control, though, is what really decides whether the result is neat or uneven.
The heat setup that keeps it even
Lodge Cast Iron’s baking guidance uses a 3:1 top-to-base coal ratio, and I find that a solid starting point for a camp bake like this. For a standard 12-inch Dutch oven, that usually lands near 17 briquettes on the lid and 8 underneath, which is enough to hold a steady 350 F / 180 C without blasting the bottom too hard.
- Arrange the base coals in a ring, not in a clump, so the heat spreads more evenly.
- Place the lid coals in a checkerboard pattern to avoid hot spots.
- Rotate the oven a quarter turn every 10 to 15 minutes.
- Rotate the lid a quarter turn in the opposite direction at the same time.
- Use hot embers rather than open flames when you can, because flames are harder to control.
The Camping and Caravanning Club is blunt on the safety side: cook outside, not inside a tent or awning. I follow that advice even on breezy sites, because heat, smoke, and carbon monoxide are not things to gamble with. If your campsite does not allow charcoal or open fire cooking, I would switch to a gas stove with a Dutch oven dome or finish the dish in a normal oven at home at the same temperature.
That flexibility is one of the reasons I like this meal for UK camping. The method can adapt to the site rather than forcing the site to adapt to the meal. Once the heat is under control, the only real choice left is which filling style suits the trip best.
The filling versions that are actually worth packing
There are plenty of ways to build the filling, but not all of them travel equally well. I choose the version based on how much prep time I have, how many people I am feeding, and whether I want the dish to feel lighter or more substantial.
| Filling style | Best for | What to expect |
|---|---|---|
| Chicken and black beans | Family camping and mild flavour | Reliable, easy to season, and good with either red or green sauce. |
| Beef and peppers | Colder evenings and hungrier groups | Richer and more filling, with a stronger savoury note. |
| Bean, sweetcorn, and vegetable mix | Vegetarian camping | Cheaper, lighter, and easy to scale up for a crowd. |
| Leftover roast meat and cheese | Make-ahead camping weekends | Useful when you want to use up cooked leftovers without making a separate meal. |
I also think the sauce choice changes the mood of the dish. Red sauce usually gives me a deeper, more familiar comfort-food result, while green sauce feels a little brighter and sharper. Neither is “right”; the better choice is the one that matches the rest of your kit and the kind of evening you are having. If I am cooking for a group, I usually keep the sauce profile simple rather than trying to make it too clever.
Corn tortillas are worth a mention here. They can work well, especially if you want a more traditional texture, but they are less forgiving than flour tortillas. If I am using corn tortillas, I am more likely to stack the bake rather than roll neat little parcels, because that reduces tearing and makes assembly faster. That small adjustment can save a lot of frustration.
The mistakes that ruin an otherwise good bake
Most bad campsite bakes do not fail because the recipe is wrong. They fail because one or two practical details were ignored. These are the mistakes I watch for every time.
- Using filling that is too wet. Excess sauce or watery vegetables will soften the tortillas before the bake is done.
- Pouring too much sauce on the base. A thin layer prevents sticking; a heavy layer turns the bottom into a mushy layer.
- Overfilling the tortillas. If they split or unroll, the whole pot becomes harder to serve neatly.
- Skipping the rotation. A Dutch oven is forgiving, but not magical. Hot spots still happen.
- Cranking the heat too high underneath. The bottom will burn long before the centre is properly hot.
- Serving immediately. Without a short rest, the layers slide and the first portions look messy.
My own rule is simple: if the dish seems too wet before it goes into the oven, it will almost certainly be too wet when it comes out. I would rather have a filling that looks slightly restrained than one that floods the pot. That instinct is especially useful on a campsite, where you do not have the luxury of fixing problems with a lot of extra equipment. Once you know what to avoid, the meal becomes much easier to repeat.
How I serve it for family camping
I like this as a family meal because it can be turned into a build-your-own plate without extra effort. A bowl of chopped coriander, lime wedges, sour cream, sliced jalapeños, and maybe a quick salad is usually enough to make the meal feel complete. If I am cooking for children, I keep the spice mild and let the adults add heat at the table.
It also helps to think about the rest of the evening. A rich baked dish pairs well with something crisp and simple, not another heavy side. I often serve it with lettuce, tomatoes, and a handful of tortilla chips, because that gives texture without adding much workload. If I have leftovers, I cool them quickly, pack them back into the cooler, and reheat them thoroughly the next day rather than leaving the pot out for hours.
For a first trip, I would not try to make this a “big production” dinner. The point is to give the group a meal that feels generous and relaxed. A good campsite recipe should free up the evening, not occupy it. That is why I keep my first version of the dish very simple.
What I’d pack for the first campsite run
If I were making this on a first UK campsite trip, I would keep the filling basic: cooked chicken, one jar of red sauce, grated cheddar, soft flour tortillas, and one onion. That combination is easy to handle, easy to season, and forgiving enough to tell you quickly whether the heat is right.
Once that version works, I would start changing only one thing at a time. Swap chicken for beans, try green sauce instead of red, or move from rolled tortillas to a stacked bake. The less you change at once, the easier it is to learn what your Dutch oven actually does on a real campsite. That is the version of camp cooking I trust most: simple ingredients, steady heat, and just enough planning to make dinner feel effortless.