Cold trail lunches work best when they are simple, sturdy, and easy to eat with tired hands. This guide to backpacking lunch ideas no cooking covers the meals I would actually pack for a day on the hill, from quick wraps and protein-heavy snack boxes to make-ahead salads that hold up in a rucksack. I’ll also show you how to keep everything safe, compact, and satisfying when you’re walking in changeable UK weather.
These lunches are built for energy, convenience, and safe carrying
- A good no-cook lunch should be filling enough to keep you moving for 3 to 6 hours, not just “light” in a vague way.
- I usually aim for a main lunch in the 400 to 700 calorie range, with more on longer or harder days.
- Wraps, oatcakes, bagels, hard cheese, nut butter, tuna pouches, cured meat, and whole fruit are the most reliable basics.
- Perishable food needs to stay chilled and should be eaten early in the day if you cannot keep it cool.
- The best trail lunch is low mess, quick to assemble, and still appealing after it has been bounced around in a pack.
What matters most in a no-cook trail lunch
When I build a lunch for backpacking, I am not trying to make a neat desk meal. I want food that gives steady energy, survives heat or drizzle, and does not turn into a soggy mess by midday. That means thinking in terms of structure first: a sturdy base, a protein source, a bit of fat for staying power, and something fresh or sweet so the meal feels like lunch rather than fuel.In practical terms, the best no-cook lunches do four jobs at once. They are easy to eat without utensils, they do not need much refrigeration, they do not leak all over your gear, and they keep you going without a sugar crash an hour later. On a long UK walk, that matters more than fancy ingredients or restaurant-style presentation. The trail rewards food that is plain clever.
I also think about weather. A lunch that works on a cool spring day can be a poor choice in warm sunshine, and the reverse is true too. The more perishable the food, the more you need a plan for keeping it cold or eating it early. That is the point where the Food Standards Agency’s picnic advice becomes very relevant: keep food clean, chilled, and packed away as soon as you have eaten.
Once those basics are clear, choosing actual meals becomes much easier.
12 lunch ideas that work on the trail
These are the lunches I would actually trust in a backpack. I have included options for different appetites, weather conditions, and dietary preferences, because one person’s ideal lunch is another person’s overcomplicated mistake.
| Lunch idea | Why it works | Typical energy | Best for |
|---|---|---|---|
| Tuna mayonnaise wrap with salad leaves | Compact, high in protein, and easy to eat one-handed. | About 450 to 600 kcal | Full-day hikes and higher-energy days |
| Cheddar and chutney sandwich | Classic British trail food; sturdy, familiar, and satisfying. | About 400 to 550 kcal | Cool weather and family walks |
| Hummus, roasted pepper, and spinach wrap | Vegetarian, flavoursome, and not as fragile as a salad box. | About 350 to 500 kcal | Shorter walks and warmer weather |
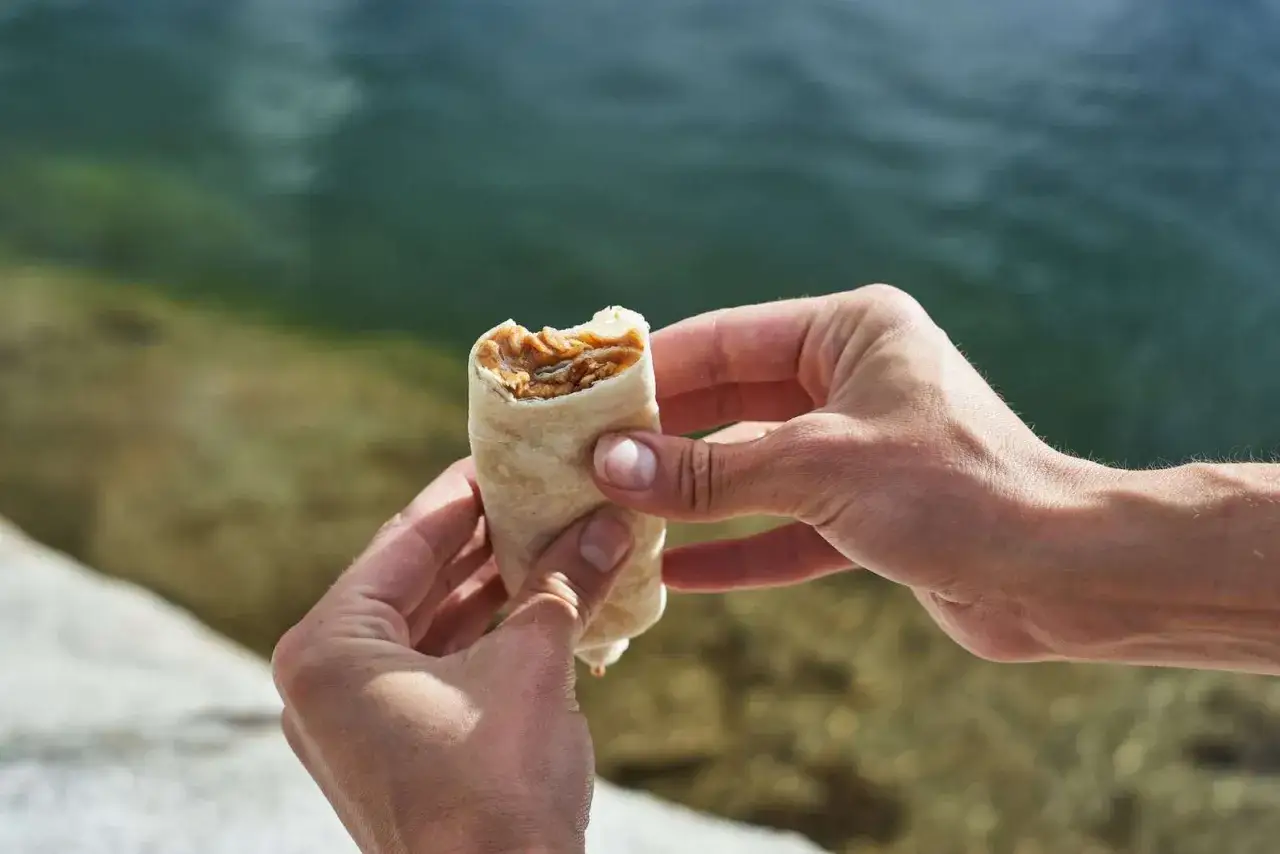
| Peanut butter, banana, and oats wrap | Very energy-dense and surprisingly good on long climbs. | About 400 to 550 kcal | Fast-paced days when you need quick fuel |
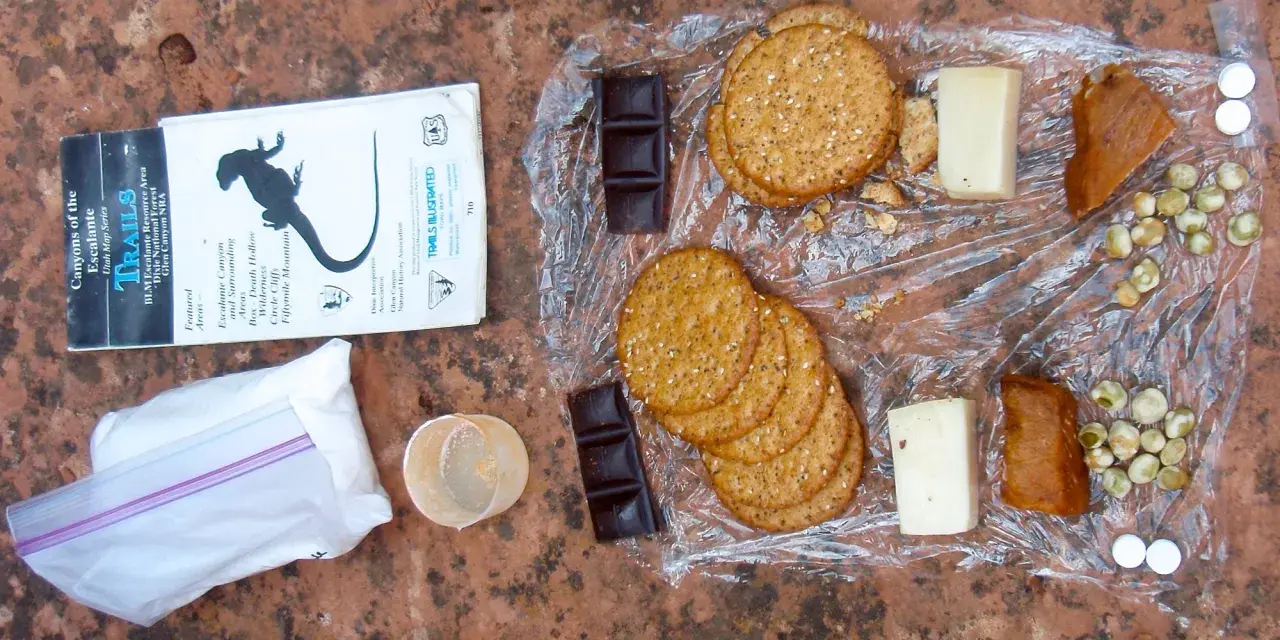
| Salami, hard cheese, and oatcakes | Highly durable and one of the best shelf-stable combinations. | About 500 to 700 kcal | Multi-day trips and warm conditions |
| Chickpea salad with lemon and olive oil | Cheap, filling, and easy to prep the night before. | About 350 to 500 kcal | Vegetarian lunches with a bit more substance |
| Cold pasta salad with pesto and mozzarella | Good if you want a proper meal and can keep it cool. | About 450 to 650 kcal | Day one of a trip or chilled storage |
| Mackerel pouch with crackers and cucumber | Protein-rich and neat if you keep the components separate. | About 350 to 500 kcal | People who want a savoury, filling lunch |
| Falafel pitta with tahini and grated carrot | Portable, tidy, and strong on flavour without needing a stove. | About 400 to 550 kcal | Vegetarian hikers who want something substantial |
| Bagel with nut butter and jam | Dense, compact, and easy to eat even when you are tired. | About 350 to 500 kcal | Simple fuel for shorter or moderate days |
| Cracker box with cheese, grapes, and nuts | Feels like a snack board but packs down well. | About 400 to 600 kcal | Leisurely lunches and family outings |
| Wrap with chicken, pesto, and rocket | Good flavour and enough protein if kept chilled properly. | About 450 to 600 kcal | Same-day trips with cold storage |
My short version is this: if you need the lunch to survive a long, warm day without a fridge, lean on hard cheese, cured meat, nut butter, crackers, wraps, and whole fruit. If you can keep food cold, you can open the menu a lot wider and use more fresh ingredients.
Wraps usually beat sliced bread in a pack because they squash less, leak less, and are faster to eat in bad weather. That is a small detail, but it changes the whole experience when you are standing on a windy ridge or sitting on a damp wall in the rain.
How to build a balanced lunch without a stove
I like to build every lunch from the same basic formula, because it keeps decision fatigue low before a trip. Start with one sturdy carb base, add one protein, include one fat or flavour booster, and finish with one fresh or crunchy element. If that sounds simple, that is because it should be.
- Base - wrap, bagel, pitta, oatcakes, crackers, or thick bread.
- Protein - tuna pouch, cheese, hummus, chickpeas, falafel, salami, chicken, peanut butter, or beans.
- Fat and flavour - pesto, mayonnaise sachet, olive oil, tahini, chutney, or mustard.
- Freshness - apple, cucumber, carrot sticks, grapes, or salad leaves if they will not get crushed.
- Finish - flapjack, chocolate, dried fruit, or nuts for extra trail energy.
For most hikers, a lunch with roughly 15 to 25 grams of protein is a sensible target, because it helps the meal feel like a proper stop rather than a snack. I also want enough carbohydrate to keep me moving and enough fat to stop hunger returning too soon. A packet of fruit and a cereal bar can help, but on their own they are usually too light for a real backpacking lunch.
If I am packing for children or a mixed-energy family day out, I keep the same formula but make the flavours simpler. Cheese, bread, fruit, and something sweet travel better than anything fiddly, and they tend to get eaten instead of brought home untouched.
Once the meal is built well, the next question is whether it will still be good when you actually stop to eat it.
What to pack so food survives a long walking day
Packaging is where a lot of trail lunches quietly fail. Soft sandwiches get crushed, wet ingredients soak through bread, and anything loose ends up at the bottom of the pack in pieces. I solve that with a few habits: use a wrap or box instead of a flimsy bag, keep wet and dry items separate until eating time, and choose ingredients that do not mind being compressed.
For anything perishable, I treat the lunch as a same-day item and keep it cold in a small cool bag or insulated pouch with an ice pack. The Food Standards Agency’s guidance is straightforward here: keep things clean, chill picnic food, and put it away once you have eaten. That applies just as much on a hill path as it does at a park table.
There is also the reality of British weather. On a chilly day, you have more freedom with cheese, hummus, or a mayo-based wrap if you pack them sensibly. On a warm day, I shorten my risk window and choose shelf-stable food first. If I would not be comfortable leaving it in a warm bag for several hours, I do not make it the core of the lunch.
- Use a hard-sided container for anything fragile.
- Wrap bread in parchment or reusable wrap so it does not sweat.
- Pack sauce sachets separately and add them at the stop.
- Keep a small napkin or wipe in the same pouch for sticky hands.
- Bring a spare bag for wrappers so you are not stuffing rubbish into side pockets.
Food safety also comes down to labels and dates. If a chilled item has a use-by date, respect it; the Food Standards Agency is very clear that use-by dates are about safety, not just quality. That is especially important for meat, dairy, and ready-to-eat salads. A no-cook lunch should make your day easier, not introduce avoidable risk.
Once the packing side is sorted, you can match the lunch to the type of day you are actually having.
My go-to lunch kits for different trail days
I do not pack the same lunch for every route, because the trail itself changes the answer. A short family walk, a full hill day, and a two-day backpacking trip all ask for something slightly different. The trick is to keep the system simple enough that you can repeat it without thinking.
- Short day walk - cheddar and chutney sandwich, apple, flapjack, and a small bag of crisps. This is the easiest option because it feels like normal lunch and does not need much planning.
- Big climbing day - tuna wrap, nuts, dried fruit, and a chocolate bar. I like this because it gives more protein and more staying power without taking much room.
- Warm-weather day - salami, hard cheese, oatcakes, grapes, and a drink mix. This keeps the lunch stable even if the pack gets warm.
- Vegetarian option - hummus and roasted pepper wrap, chickpeas or roasted nuts, and a piece of fruit. It is lighter than a meat version, but still solid enough for a real hike.
- First day of a multi-day trip - cold pasta salad or a chicken wrap if you have proper cooling. I only do this when I know the food will stay safe and I can eat it early.
These kits all follow the same logic, but they are tuned to different conditions. That is what makes them useful. If you try to use the same delicate lunch on every route, you end up disappointed half the time and wasting food the other half.
For longer trips, I would rather carry a slightly plainer lunch that I know will survive than a more exciting one that needs perfect storage. The best trail food is usually the food you still want to eat after several hours of walking.
A simple system you can repeat on every trip
If I had to reduce the whole subject to one rule, it would be this: choose a lunch that survives the journey, not just the idea of the journey. That means a sturdy base, enough protein, a bit of fat, and packaging that does not fall apart when your pack gets shoved under a seat or dropped on wet grass.
From there, the decision is easy. If you have cooling, use it for better flavour and fresher ingredients. If you do not, lean into shelf-stable foods and keep the lunch simple. Either way, the goal is the same: a meal that is easy to carry, quick to eat, and good enough that you look forward to it when you stop.
That is the real value of backpacking lunches with no cooking. They save fuel, reduce faff, and keep your day moving without sacrificing proper food. Once you have a few reliable combinations, you can pack in minutes and spend the rest of your energy on the walk itself.