Pizza on a grill is one of those camp meals that feels more impressive than it is difficult, provided you respect the heat and keep the toppings disciplined. In this guide, I cover the practical side of grilled pizza ideas, from the best bases to pack for a trip to the toppings that actually work outdoors, plus the small details that stop the crust from turning leathery or burnt. If you cook while camping in the UK, the goal is simple: something smoky, quick, and easy to share after a long day outside.
The essentials for a better pizza night over fire or gas
- Use a hot, preheated grill and aim for a clear direct-heat zone with a cooler side for finishing.
- Keep the dough dry and manageable; thinner dough is easier, but it should still hold together when lifted.
- Choose low-moisture toppings and keep the count to three or four per pizza.
- Grill the base first, flip it, then add cheese and toppings so the crust stays crisp.
- Make a few parts ahead of time so camp cooking feels relaxed instead of rushed.
Why pizza on the grill works so well at a campsite
I like grill-cooked pizza because it gives you the best parts of a wood-fired oven without needing a special setup. The crust picks up a little smoke, the edges char in a good way, and you do not have to heat a caravan, tent kitchen, or holiday cottage for half an hour just to make supper. That matters on warm evenings, especially when you are cooking for a family and want the meal to feel fun rather than fussy.
It also suits camp cooking because the method is forgiving in the right places and strict in the important ones. You can use a gas barbecue, a charcoal grill, or even a camp stove setup with a heavy pan, but the real rule is the same: the base needs strong heat, the toppings need restraint, and everything should be ready before the dough goes on the grate. That is why I always start with the heat plan before I think about flavour combinations.
How I set up the grill for a crisp base without burning it
For most outdoor pizzas, I want the grill hot enough that the dough sets quickly, but not so ferocious that the bottom blackens before the top catches up. In practical terms, that usually means preheating for 10 to 15 minutes and creating two zones: one hot area for cooking the base and one gentler area for finishing the toppings. On a gas grill, I turn on one side and leave the other side lower or off; on charcoal, I bank the coals to one side and use the cooler side as my landing spot.
Gas grill
A gas barbecue is the easiest option for beginners because the heat is easier to control. I brush the dough lightly with oil, lay it directly on the grates, and keep a close eye on it for the first minute. If the grill is behaving, the dough should puff slightly and show clear marks before I flip it.
Read Also: Master Your Camp Kitchen Setup - Cook Smarter Outdoors
Charcoal grill
Charcoal gives a deeper smoky finish, which I love for a campsite meal, but it demands more attention. Wait until the coals are glowing and ashy rather than aggressively flaming, and move the pizza away from flare-ups as soon as the first side is set. If a flame licks the underside, I shift the dough immediately instead of pretending it will sort itself out.
That is the point where the grill stops being scary and starts being usable, and once the heat is under control the next choice is the base itself.
The best bases to bring when you are cooking outdoors
Not every dough behaves well on a grill, and I think that is where many camp pizzas go wrong. Wet, sticky dough is hard to move, and very soft dough tears when you try to flip it. I prefer dough that has had time to relax, with enough structure to stretch but not so much spring that it fights you.
| Base | Best for | Why it works | What to watch |
|---|---|---|---|
| Homemade dough balls | Best flavour and texture | Easy to portion into 150-200 g rounds and stretch thin | Needs at least a few hours of proofing, ideally overnight |
| Ready-made dough | Simple campsite cooking | Saves time and usually behaves well if brought to room temperature first | Can still be sticky, so dust lightly with flour |
| Naan or flatbreads | Fast family supper | Great when you want pizza flavour without handling raw dough | More like flatbread pizza than a classic grilled pie |
| Thin sourdough base | More flavour with a rustic edge | Handles smoke well and tastes great with simple toppings | Can be unpredictable if it is too airy or unevenly rolled |
If I am travelling, I portion dough into lightly oiled containers and keep it in a cooler, then bring it out around 1 to 2 hours before cooking so it relaxes. That small bit of planning makes the difference between dough that stretches and dough that snaps back. Once the base is sorted, the combinations are where the meal starts to feel personal.
Six topping combinations I keep coming back to
For outdoor cooking, I like combinations that balance flavour with restraint. The grill adds smoke and char, so you do not need a crowded pizza to make it interesting. In fact, too many toppings usually create a soft centre and an awkward finish, which is why I keep each pizza to a few strong elements.
| Pizza idea | Flavour profile | Why it works outdoors | Easy shortcut |
|---|---|---|---|
| Courgette, ricotta and lemon | Fresh, bright, slightly creamy | Courgette grills quickly and lemon lifts the whole pie | Shave the courgette thin and add the ricotta in small spoonfuls |
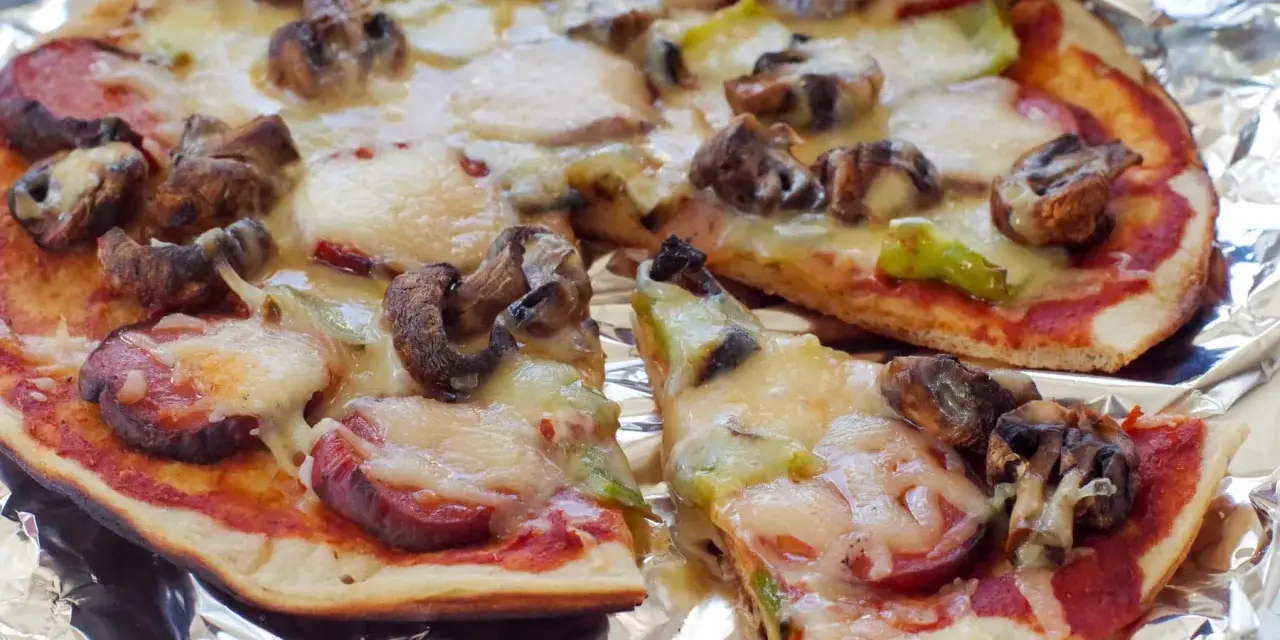
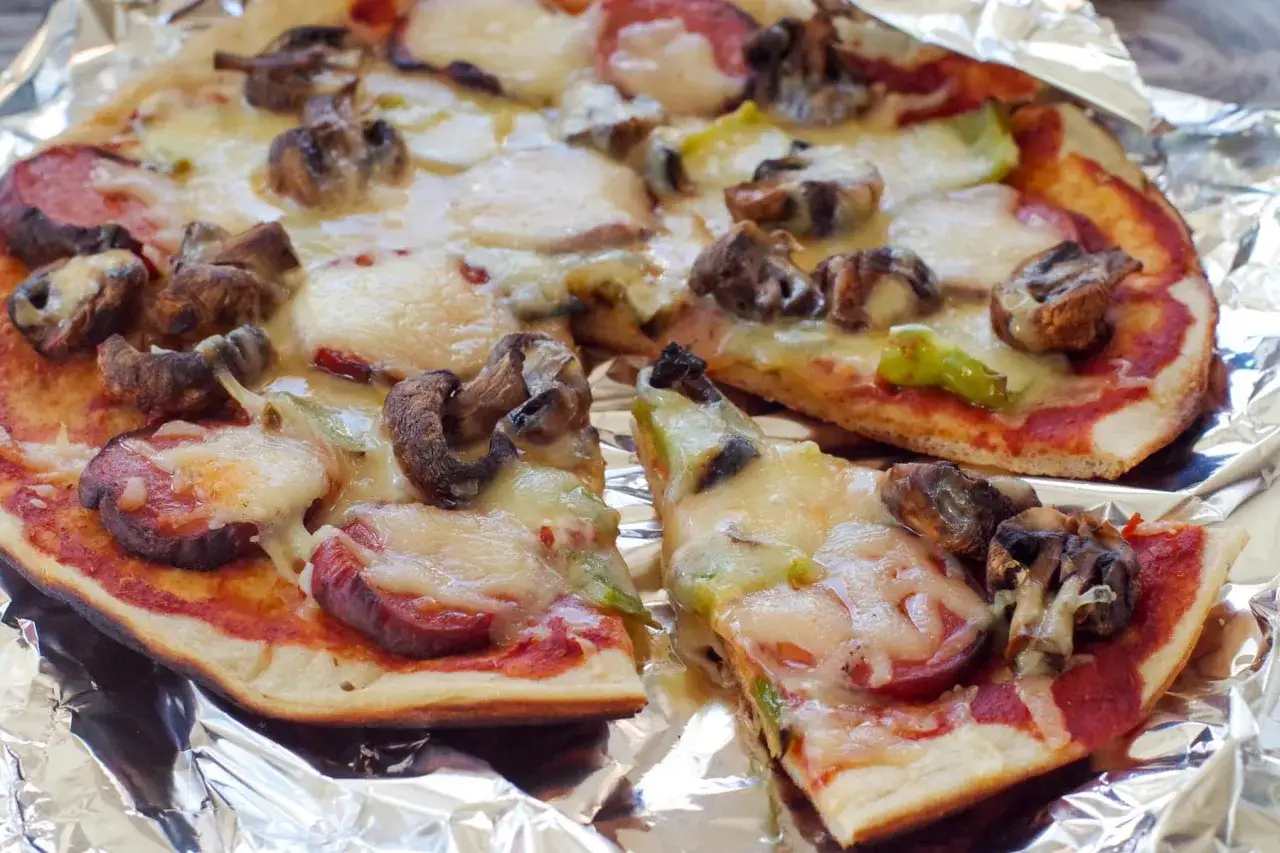
| Mushroom, thyme and mature cheddar | Earthy and savoury | Mushrooms gain more flavour on the grill and cheddar melts well | Pre-cook the mushrooms so they do not release water on the crust |
| Sausage, red onion and roasted pepper | Hearty and smoky | Ideal after a long walk or a cold evening by the fire | Cook the sausage first, then slice it thin before topping |
| Goat’s cheese, beetroot and rocket | Sharp, sweet and peppery | Feels a little more European and works well with a crisp base | Use pre-cooked beetroot from the shop to save time |
| Pesto, cherry tomato and pecorino | Herby and salty | Fast to assemble and strong enough to stand up to smoke | Use a light hand with the tomatoes so the crust stays dry |
| Prosciutto, fig and rocket | Sweet, salty and elegant | Good for a campsite dinner that still feels special | Add the rocket after grilling so it stays fresh |
For me, the most useful rule is simple: if a topping leaks water, soften it first; if it burns easily, add it later. That keeps the flavour clean and the base crisp, which leads straight into the method I trust when I want the whole thing to work smoothly.
A camp-friendly method I trust when the light is fading
I use a straightforward sequence so I am not juggling too many decisions at once. It keeps the grill moving, the crust intact, and the cheese where it belongs.
- Preheat the grill and set up a hot zone plus a cooler zone.
- Stretch the dough into a thin round or oval, then brush one side lightly with olive oil.
- Lay the oiled side down on the grill and cook for about 60 to 90 seconds, until the underside firms up and shows grill marks.
- Flip the base and move it to the cooler side if the heat feels aggressive.
- Add a thin layer of sauce, then cheese, then the rest of the toppings.
- Cover the grill and finish for 2 to 5 minutes, just until the cheese melts and the base feels crisp.
- Rest the pizza for a minute before slicing, so the toppings settle instead of sliding off.
If I am using pre-cooked vegetables, I add them sparingly at the end so they warm through without over-softening. If I am using a sauce-heavy base, I reduce the amount rather than trying to force a wetter pizza through the same method. That small adjustment protects the crust and keeps the texture right.
Even a good method can fall apart if the heat and toppings get careless, which is why I pay attention to a few common mistakes.
The mistakes I avoid when the heat is high
The first mistake is overloading the pizza. It looks generous, but it works against you on a grill because the centre stays too wet and the edges cook faster than the middle. The second is using too much sauce, especially if it is loose or very tomato-heavy. A thin spread is enough.
The third mistake is choosing toppings that fight the method. Fresh mozzarella, watery tomatoes, and thick raw vegetables can all turn a crisp base into a soggy one. I would rather use a firmer cheese, a little less sauce, and vegetables that have already had some heat. The fourth is trying to move the dough too early. If the first side has not set properly, it tears, and once that happens the whole pizza becomes an exercise in damage control.
The fifth is cooking over active flames rather than live heat. Flames look dramatic, but they are the quickest route to a burnt bottom and raw top. I would rather wait for steadier heat than rush a pizza that should have been allowed to settle. If you keep those mistakes in mind, the meal becomes much easier to repeat.
What I pack for easy pizza nights away from home
A small kit makes a big difference, especially on a campsite where you do not want to hunt for tools while the dough is already on the grates. My own packing list is deliberately modest, because the fewer moving parts I have, the better the pizza usually turns out.
- Pre-portioned dough balls or ready-made bases
- A jar of thicker sauce
- Grated cheese in a sealed container
- Two or three cooked toppings, not six
- Olive oil in a small bottle or squeeze container
- Tongs, a wide spatula and a pastry brush
- Foil for covering the grill or shielding a pan
- A cooler with an ice pack for anything perishable
If I want the evening to feel effortless, I prep the toppings before we leave and keep them simple enough that assembly takes less than five minutes. That is the real secret of good camp pizza: not cleverness, just timing, restraint and a grill that is hot enough to do its job. If you keep the base dry, the toppings light and the heat steady, pizza night outdoors becomes one of the easiest meals of the trip.