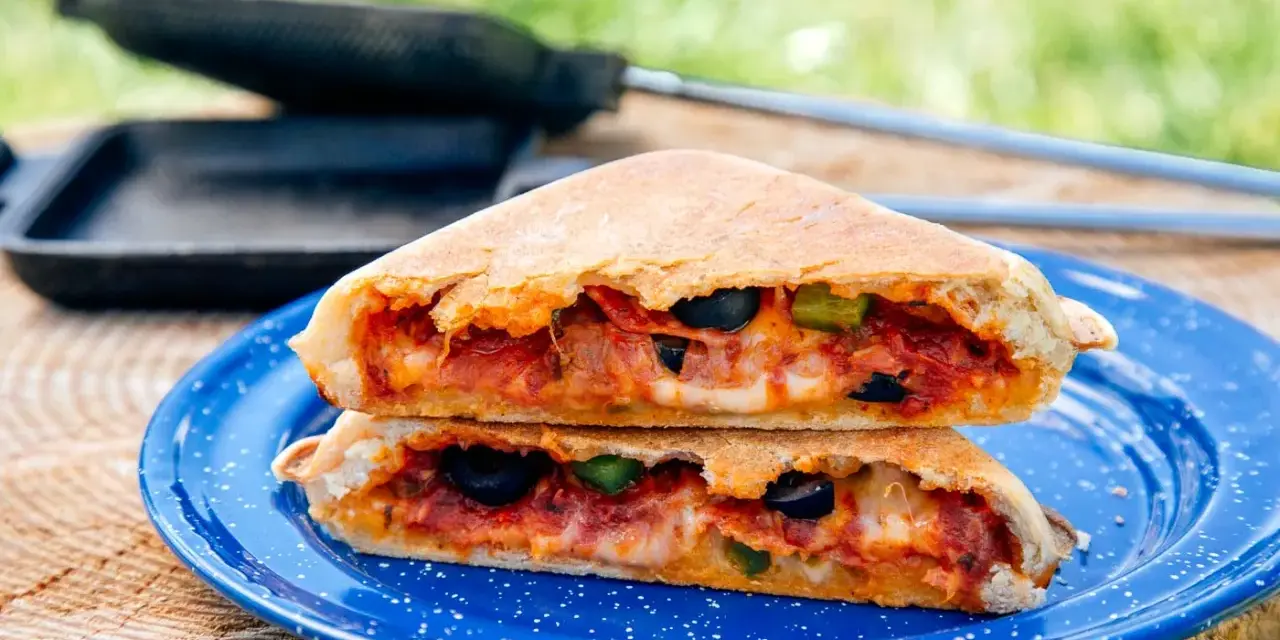
A campfire pizza pocket works because it gives you the flavour of pizza without needing an oven, a baking stone, or much cleanup at the end of the day. I’m going to show you the ingredients that behave well in a pie iron, the method that stops sticking and leaking, and the fire-control details that make the difference between a golden crust and a burnt mess. It is a simple campsite meal, but only if you treat the dough, the filling, and the heat with a bit of discipline.
The reliable way to make it taste like pizza, not disappointment
- Use a pie iron, not a heavy filling load, because the pocket cooks fast and seals best when it is modestly filled.
- Keep the sauce thick and the cheese low-moisture; watery fillings are the main reason these break open.
- Cook over embers or steady medium heat rather than open flame, then turn the iron often so both sides brown evenly.
- Ready-made pizza dough is the easiest option for camping, especially if you let it sit for 10 to 15 minutes first.
- For UK campers, passata, mozzarella, salami, peppers, and olives make a dependable, easy-to-pack combination.
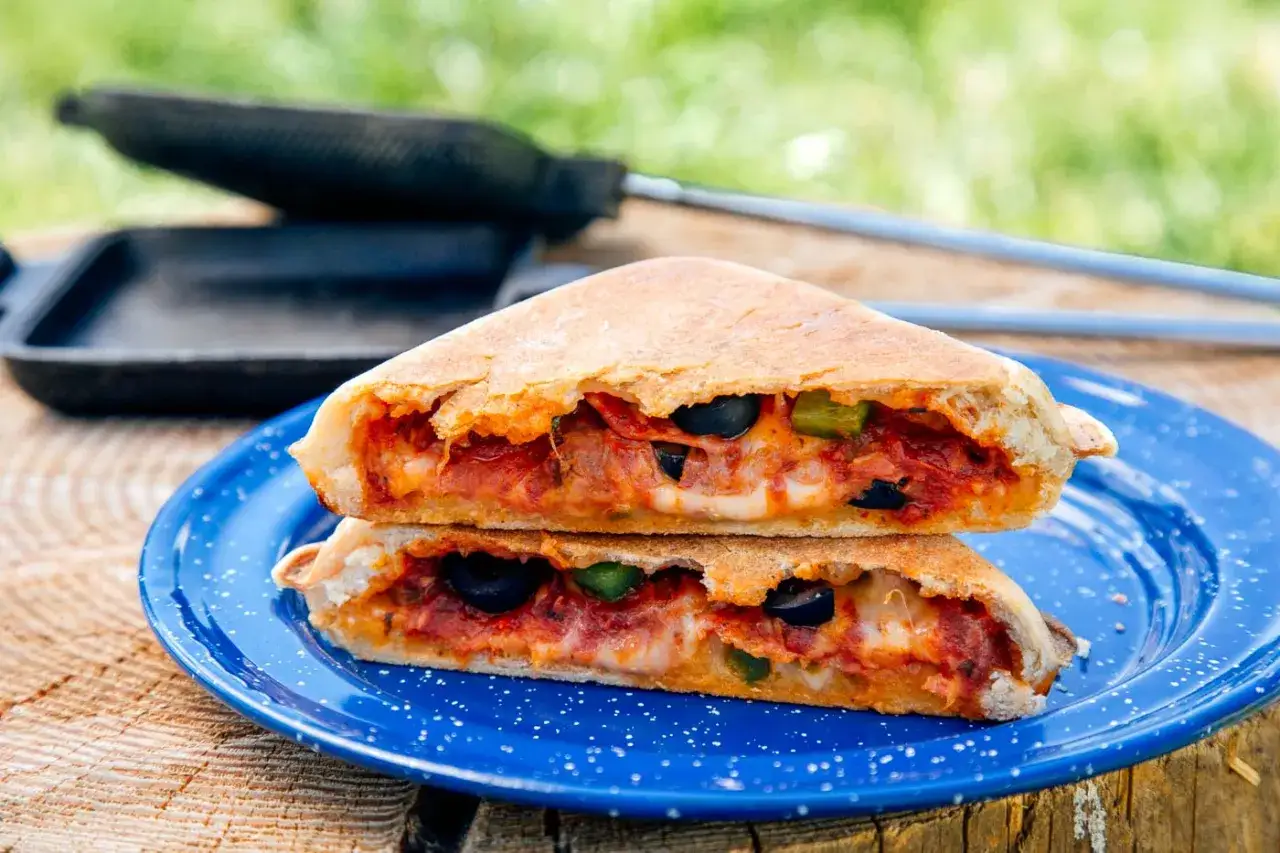
- The best result is crisp on the outside, molten in the middle, and easy to eat after a short rest.
What makes a campfire pizza pocket work
I like this style of camp cooking because it solves a real campsite problem: you want something hot and comforting, but you do not want the fuss of a full pizza setup. A pie iron turns pizza into a sealed pocket, so the dough protects the filling while the outside toasts like a good sandwich. In some campsites you will hear them called mountain pies or campfire pies, but the idea is the same: a small, handheld meal cooked directly over heat.
The trick is to think in terms of balance. Too much filling and the pocket bursts. Too much sauce and the crust goes soggy. Too much heat and the outside burns before the inside properly melts. Once you see it that way, the recipe becomes less about improvising and more about controlling a few moving parts. That starts with the ingredients, because the filling you choose determines how forgiving the final result will be.
Ingredients and equipment I would pack
For four pockets, I would keep the recipe tight and practical. It is easier to add flavour than to rescue a leaking iron full of wet ingredients. If you are camping in the UK, supermarket dough, passata, and a good mozzarella are the easiest route, and they travel well in a cool bag.
| Ingredient | Amount for 4 pockets | Why I use it | What to avoid |
|---|---|---|---|
| Pizza dough | 500 g ready-made dough or dough made ahead | Stretches easily and gives a proper pizza-style crust | Dry dough that tears, or pastry that puffs too much |
| Thick tomato sauce or passata | 120 to 150 ml | Enough flavour without flooding the pocket | Watery jar sauce or too much sauce |
| Low-moisture mozzarella, grated | 180 to 200 g | Melts cleanly and binds the filling | Fresh mozzarella straight from the tub, unless well drained |
| Extra cheese, optional | 30 to 40 g mature cheddar | Adds a stronger flavour that suits UK tastes | Using cheddar as the only cheese, which can go greasy |
| Pizza toppings | 120 to 160 g total | Gives each pocket a clear, personal filling | Large chunks, raw mushrooms, or very wet vegetables |
| Olive oil or softened butter | 1 to 2 tbsp | Keeps the dough from sticking to the iron | Skipping grease entirely |
For equipment, I would bring a pie iron with long handles, a silicone brush or small spoon for the oil, a board for resting the cooked pocket, and heatproof gloves. If your iron is square, cut square dough pieces; if it is round, cut round discs. Matching the shape saves time and makes sealing easier. The next step is the part that matters most in practice: how to actually build and cook the pocket without making a mess.
How to make it in a pie iron
- Let the dough sit at room temperature for 10 to 15 minutes if it has been chilled, then divide it into 8 equal pieces for 4 pockets.
- Lightly oil the inside of the pie iron. I prefer oil over butter for the iron itself because it is more forgiving over campfire heat.
- Stretch one piece of dough into a square or circle that is slightly larger than the iron plate, then lay it into the bottom half.
- Add a thin layer of sauce, about 1 tablespoon per pocket, followed by a small handful of cheese and 1 or 2 tablespoons of toppings.
- Top with a little more cheese, then cover with the second piece of dough. Press the edges together so the filling stays fully enclosed.
- Close the iron without crushing the seam flat. You want it sealed, not compressed into paste.
- Cook over embers or steady medium heat, turning the iron every 30 to 60 seconds until both sides are golden brown.
- Expect roughly 3 to 6 minutes in total, though a thick iron or a cooler fire can push it a little longer.
- Open carefully, tip the pocket onto a board, and let it rest for a minute before serving.
I would keep the filling light rather than generous. The pocket should look almost underfilled when you close it, because the cheese melts and spreads as it cooks. If you can smell burning before the crust turns golden, the heat is too aggressive and you need to move the iron further from the flame. That leads straight into the part most people underestimate: fire control.
How to manage the heat so it browns instead of burns
Campfire cooking is less about exact temperature and more about reading the heat you have. A pie iron wants the kind of heat that cooks bread steadily from the outside in, not a burst of flame that blacks the crust before the cheese softens. On a campsite, that usually means glowing embers or a gentle bed of coals rather than a lively fire with tall flames.
| Heat level | What it usually means | What I would do |
|---|---|---|
| Roaring flame | Too hot for reliable browning | Wait until the fire calms down before cooking |
| Glowing embers or coals | Best all-round heat for even cooking | Cook with regular turning and check often |
| Steady low heat | Safe but slower | Use it if you want more control and less charring |
| Hot gas barbecue | Useful fallback if the weather turns | Keep the heat around medium and rotate the iron |
The other thing I watch is the second pocket, because cast iron holds heat. Once the iron is already warm, the next one can brown faster than the first, so I tend to shorten the cooking time a little and check sooner. Rotate it front to back as well as side to side if one end sits closer to the heat source. When the outside looks evenly golden and the seam feels firm, you are done. Once you can judge the fire, the toppings become the fun part.
Filling ideas that taste like pizza and stay tidy
The best fillings are the ones that taste familiar but do not leak. I like to keep the ideas simple, because a pie iron rewards restraint. If the filling stays dry enough to hold shape before it cooks, it usually works well inside the pocket.
- Classic pepperoni - passata, mozzarella, and thin pepperoni slices. This is the easiest version to get right and the one I would hand to a first-timer.
- British deli-style - mozzarella, salami, and a little mature cheddar. It is a stronger, saltier combination that suits a cooler evening at camp.
- Vegetarian - mozzarella, roasted peppers, olives, and a pinch of oregano. The key here is to use vegetables that are already cooked or well drained.
- Ham and cheese - a thin layer of sauce, mozzarella, and small pieces of ham. This one is mild, kid-friendly, and easy to portion.
- Mushroom and mozzarella - only if the mushrooms have been cooked first. Raw mushrooms release too much water and make the crust soft.
There are also fillings I would avoid unless I had already cooked them down at home. Fresh tomato, large chunks of onion, and anything that sweats heavily can turn the inside of the pocket sloppy. Pineapple can work, but only in tiny amounts and only if it is well drained. My rule is simple: if a topping is wet on the chopping board, it usually needs more prep before it goes into the iron. Knowing that saves you from the most common campsite mistakes, which is the next thing worth covering.
The mistakes that ruin the first batch
The first pocket is often the test piece, and I think that is useful rather than frustrating. It tells you whether the fire is too hot, whether the dough is too thick, and whether the filling is sensible. Most of the failures come from the same small set of errors.
- Overfilling the pocket - use less filling than you think you need. A modest layer always cooks better than a packed one.
- Using thin, watery sauce - thick sauce stays put. Runny sauce escapes and softens the crust.
- Forgetting to grease the iron - even a seasoned iron benefits from a light coating of oil.
- Cooking over open flame - flames are too aggressive. Move to embers or a gentler heat source.
- Leaving the iron in one position - turn it regularly so one side does not scorch while the other stays pale.
- Opening it too soon - give the pocket a short rest so the cheese settles and the seam firms up.
If something does go wrong, I do not throw the whole idea out. I simply adjust the next round: less sauce, a cooler fire, a slightly larger dough square, or a bit more oil on the iron. That is the advantage of camp cooking over a recipe that depends on perfect oven settings. You can improve quickly if you change one variable at a time. With that in mind, the last thing I would pack is not another ingredient but a better setup.
The small prep tricks that make campsite cooking easier
I get the best results when most of the work is done before I leave home. I would portion the sauce into a small container, grate the cheese in advance, slice the toppings thinly, and keep everything in a cool bag so the assembly at camp is fast and clean. That matters even more if children are helping, because they can choose toppings without turning the fire area into chaos.
For a family campsite, I would set up three simple options: one classic, one vegetarian, and one extra-cheesy version. That gives everyone choice without forcing you to carry half the fridge. I would also keep a board, a knife, and a roll of kitchen paper close to the fire so the iron can be reloaded safely after each pocket. If you want a proper campsite meal rather than a novelty snack, serve the pockets with a green salad, coleslaw, or fruit on the side. It keeps the meal balanced and makes the whole thing feel more complete.
My final piece of advice is to treat the first pocket as practice, not pressure. Once you see how quickly the iron browns and how little filling you really need, the rest of the batch becomes much easier to control. That is why I keep coming back to this style of camp cooking: it is simple, hands-on, and good enough to make people ask for another round before the first one has even cooled.