The HRP trail is one of those mountain crossings that looks manageable until you start planning the nights, the water, and the weather. It runs across the Pyrenees from the Atlantic to the Mediterranean, and the real challenge is not only the walking but the logistics of sleeping high, dropping into valleys, and staying inside the rules of each protected area. In this article I focus on the practical side: where to camp, when to use refuges, which bases are worth stopping for, and how to build a realistic plan from the UK.
The route rewards flexibility more than fixed plans
- Roughly 800 km and about 52,000 m of ascent make this a serious mountain traverse, not a casual long walk.
- The line is only partly marked, so I would plan with maps, GPX files, and backup options.
- Camping is possible, but the rules change sharply between French parks, Spanish parks, and valley zones.
- Refuges, bivouac, and valley campsites each solve a different problem.
- For most walkers from the UK, late June to early September is the safest planning window.
What makes the Haute Route Pyrénéenne a camping-first trek
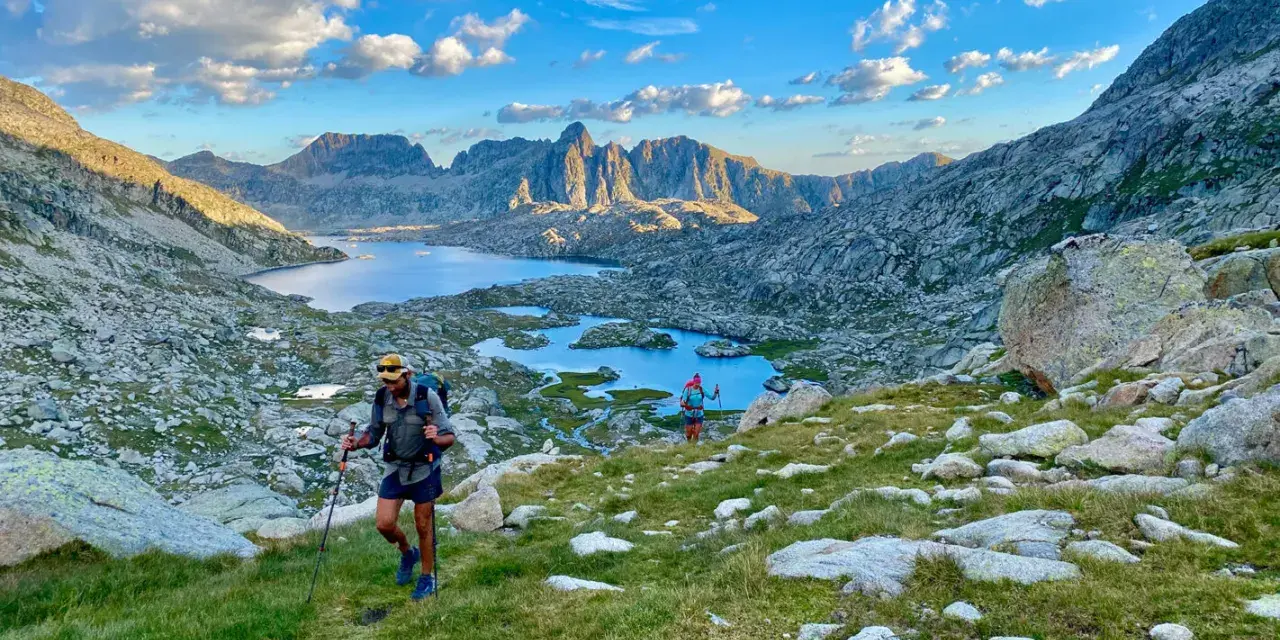
For a UK walker used to waymarked footpaths, the biggest surprise is that this route behaves more like a high alpine crossing than a conventional long-distance trail. It is usually described as a route of about 800 km with roughly 52,000 m of ascent, and one common guidebook breaks it into 44 stages, but the real story is the terrain: high passes, border crossings, exposed ridges, and long stretches where your overnight choice shapes the next day as much as your pace does.
| Route | Character | What it means for sleeping |
|---|---|---|
| HRP | Highest, roughest, least marked | A tent or bivouac setup is genuinely useful, and flexibility matters every day. |
| GR10 | Lower French-side line with more villages | Easier to stitch together with village nights and fewer high camps. |
| GR11 | Spanish-side counterpart with broader access to towns | Still demanding, but usually simpler if you want to sleep lower more often. |
If I were choosing between them, I would pick the HRP for scenery and challenge, the GR10 for a more forgiving French-side walk, and the GR11 when I wanted Spanish-side logistics with a lower line. That difference matters because on this route the overnight decision is part of the route design, not an afterthought. Once that is clear, the next question is where you can realistically sleep.
Where you can realistically sleep along the route
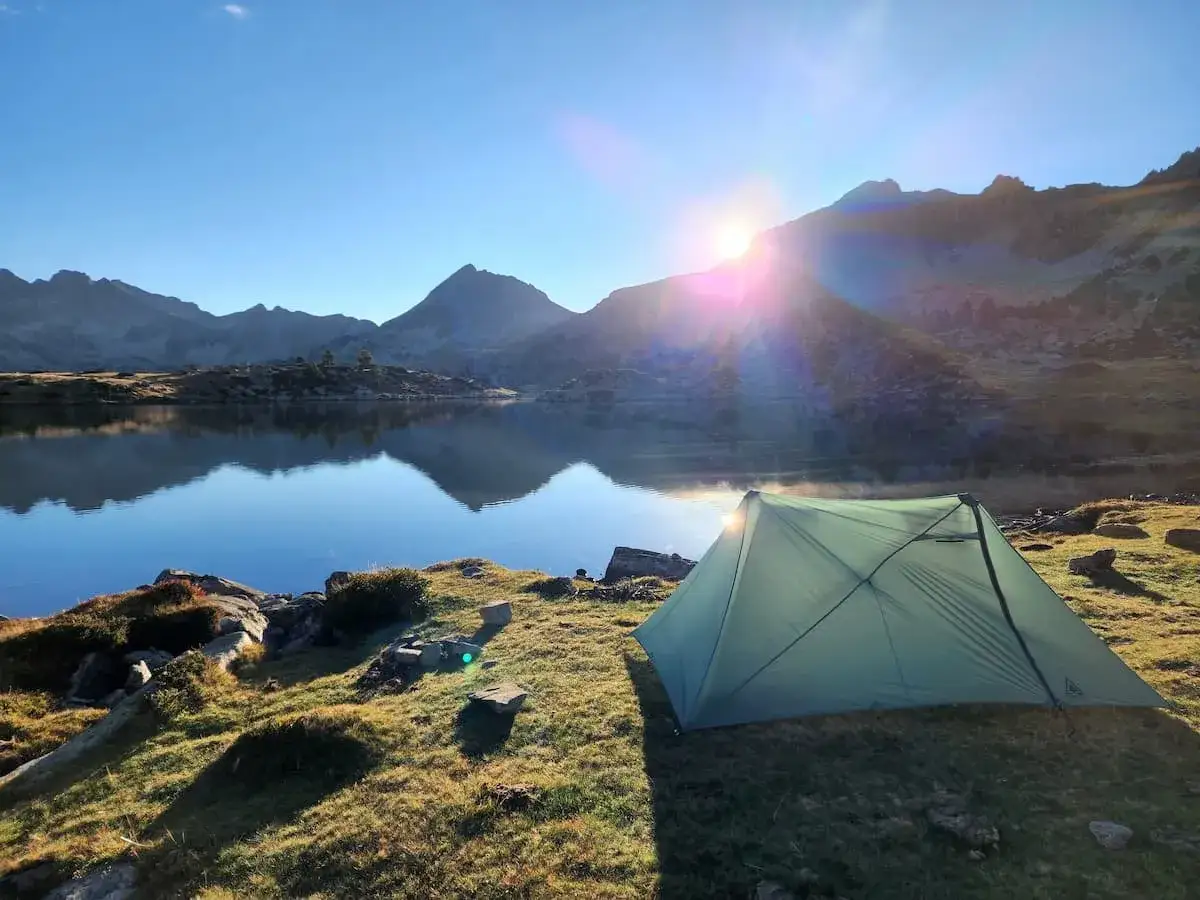
I would not treat every night on the Pyrenean high route the same way. Some sections reward a light bivouac stop, some are better handled with a refuge booking, and others are simply more sensible with a valley campsite or guesthouse. In practical terms, bivouac means a one-night lightweight camp rather than a pitched camp you expect to leave in place all day.
| Option | Best use | Strengths | Limits |
|---|---|---|---|
| Refuge | Bad weather, recovery nights, reliable food | Warm meal, roof, drying space, social atmosphere | More expensive, can fill up in peak season |
| Bivouac | Remote passes, flexible mileage, quiet lake basins | Cheap, scenic, and ideal when the route is stretched between huts | Weather exposure, legal limits, and a greater need for self-sufficiency |
| Official campsite | Resupply nights and laundry stops in valley towns | Showers, toilets, easier logistics, a real reset | You usually lose altitude and add detours |
| Village accommodation | Storm breaks, rest days, or a comfort-heavy itinerary | Best for drying gear and eating well | Least “wild” option and usually the priciest |
The key detail is that I never apply one mountain rule to the whole chain. In the French Pyrenees National Park, bivouac is generally allowed only more than an hour from any road and only between 19:00 and 9:00. By contrast, the official Aigüestortes park rules ban overnight stays outside refuges, including camping and bivouacking, across the park and its protection zone. I would always check the exact section before assuming a tent pitch will be acceptable. With that in mind, the best camping bases are the valleys that let you reset before the next high section.
The best bases for memorable nights
If I were building a camping-focused itinerary, I would think in clusters rather than in isolated nights. The most useful bases are usually the valleys where you can refill food, wash clothes, and decide whether the next section should be a refuge night, a bivouac, or a full rest day. For families or mixed-ability groups, these same valleys also work far better as basecamps for day hikes than as exposed ridge stops.
| Area | Why it works | What to watch out for |
|---|---|---|
| Lescun and the western valleys | A strong first mountain base with dramatic scenery and straightforward access | The weather can turn quickly, so I would not arrive without a flexible plan |
| Gavarnie and Torla | Big mountain amphitheatres, good refuge networks, and memorable landscape | Popular spots can feel busy, especially in summer |
| Candanchú and Canfranc | Useful for resupply, road access, and weather fallback | Less wild than the high route itself, but very practical |
| Benasque and the central Pyrenees | One of the strongest logistics hubs on the traverse, with enough services to justify a full reset | Easy to overstay when the mountains deserve your attention |
| Espot and Vall de Boí | Beautiful, high-value bases for the middle-to-eastern sections | Camping rules are stricter here, so I would plan carefully and not assume wild camping is acceptable |
| Banyuls-sur-Mer and the eastern foothills | A good finish line base, useful for the last night and the exit from the mountains | Lower and drier, so it feels very different from the central peaks |
These places matter because they let the route breathe. I would rather build one strong valley stop than force a string of uncomfortable high camps, especially if the weather is unstable or if I am travelling with a partner or family group. From there, the next practical question is food, water, and how much ground you can honestly cover each day.
How I would manage food, water, and stage length
For food planning, I like the simple rule that if a section looks long on the map, it will feel longer on the ground. The Trek notes that resupply is usually possible every one to three days, with one of the longest carries stretching to about five days between Candanchú and Gavarnie, and that sounds realistic for the route. I would still keep one extra meal in reserve, because weather, a missed shop, or a closed refuge can turn a neat plan into a bad decision quickly.
- Plan for ascent first. A 15 km day with big climbing can feel harder than a flat 25 km day.
- Carry enough water for exposed ridges. I often leave a reliable source with 2 to 3 litres, more if the next refill point is uncertain.
- Use valley exits as pressure valves. If a section becomes too hot, too snowy, or too wet, I want a clean way down.
- Keep one emergency meal. That single spare dinner gives you options if a refuge is full or a stage runs long.
- Do not trust every spring blindly. In late summer, some marked water sources can be weak, seasonal, or simply gone.
I also plan the route with a map or GPX file, not just with intuition. On a trail that is partly unmarked and sometimes traced by cairns, the stone stacks used as rough markers, navigation is part of the safety system. Once food and water are under control, the remaining variable is timing, because the season changes the route more than many first-time hikers expect.
When to go and what gear actually matters
For this kind of crossing, I would aim for the most stable window I can get, which usually means late June to early September. Even then, the mountains keep their own schedule: early season can bring snow patches on high passes, while late season shortens the daylight and can make water planning more awkward. If I wanted the best balance of daylight, access, and lower snow risk, I would lean toward the middle of that window.
- Tent: Choose something that handles wind and exposed ground, not just mild forest weather.
- Sleep system: Bring insulation that copes with cold nights at altitude.
- Rain gear: Wet weather is not a surprise here, it is part of the route design.
- Navigation: Carry a map, offline GPX track, and a charged phone or GPS device.
- Backup traction: If snow lingers, a light traction option can be useful on specific high passes.
- Extras: Headtorch, power bank, poles, and dry bags make a bigger difference than most people expect.
I would also keep one important distinction in mind: a bivouac is not the same thing as a full wild-camping setup. It is a short, one-night stop that works best when you are moving steadily and respecting the local rules. That makes the route feel more like a chain of decisions than a single continuous camp, which is exactly why a good plan matters. From there, the simplest approach is to stitch the crossing together in a way that protects energy rather than ego.
How I would stitch the crossing together without wasting energy
- Pick a direction that matches your transport and your weather window, then stick to it unless conditions force a change.
- Mark the strict camping zones first, especially the park sections where bivouac is limited or not allowed.
- Book a few refuges as weather anchors instead of trying to reserve every night.
- Use valley campsites for showers, laundry, and food resupply whenever your pace starts to fray.
- If you are travelling with family or a mixed-ability group, keep the high route as a day-hike objective and use the valleys as the sleeping base.
- Leave space for one buffer day if your transport home is fixed, because mountain weather rarely respects a perfect timetable.
If I were planning it again, I would anchor the crossing with a few booked refuges, use bivouac for flexibility, and choose valley campsites whenever I wanted food, showers, or a weather reset. That mix keeps the route flexible without pretending the mountains are forgiving, and it is the most reliable way I know to enjoy the Pyrenees without turning the trip into a logistics problem.