A good camping trip is usually won in small decisions: where you pitch, how you separate wet and dry gear, and how you make the first night warmer. These camping hacks are not clever tricks for the sake of it; they are simple systems that save time when the weather turns or the kids are tired. In the UK especially, a bit of planning goes a long way because rain, wind, and muddy ground can change the mood of a campsite fast.
The fastest way to make camp feel sorted
- Start with the pitch. A dry, sheltered spot fixes more problems than extra gear ever will.
- Separate wet and dry zones. Mud, coats, and boots should never mix with sleep kit.
- Fix the cold ground first. Most tent discomfort comes from below, not from the air.
- Pack by module. A kitchen crate, sleep bag, and wet-gear bag are easier to live with than one huge pile.
- Keep family routines simple. Small rituals beat complicated plans when everyone is tired.
- Carry a few backup items. Headtorches, pegs, tape, and power are the difference between calm and chaos.
Choose the pitch before you open the tent bag
I always start with the ground, because a good pitch does half the work for you. Look for slightly higher, flatter ground that drains well, and avoid the lowest hollow on the site unless you enjoy waking up in a puddle after rain. If there is wind, I try to place the narrow end of the tent into it and give myself a little natural shelter from hedges, fences, or a solid bank, without camping under anything that could drop branches.
It also helps to think in terms of access. Being close to toilets or water can be convenient, but being too close usually means more noise, more foot traffic, and less privacy. I would rather walk a few extra metres than spend the evening hearing every zip, shout, and late-night torch beam from the next pitch. The rule I use is simple: spend an extra 10 minutes choosing the spot and save yourself an hour of annoyance later.
- Check for dips where rainwater collects.
- Look up for dead branches before you unpack anything.
- Leave enough room for guylines so the tent can breathe and stay stable.
- Keep the door facing the most useful direction, not just the prettiest view.
Once the ground is right, the next win is keeping water outside the tent instead of letting it spread through camp.
Camping hacks that keep you dry when the weather turns
I split camp into a wet zone and a dry zone. The wet zone is where muddy boots, coats, umbrellas, and any dripping kit live; the dry zone is everything you sleep on, sit on, and cook with. That one habit stops moisture from creeping into bedding and food, which matters a lot more in the UK than people expect.
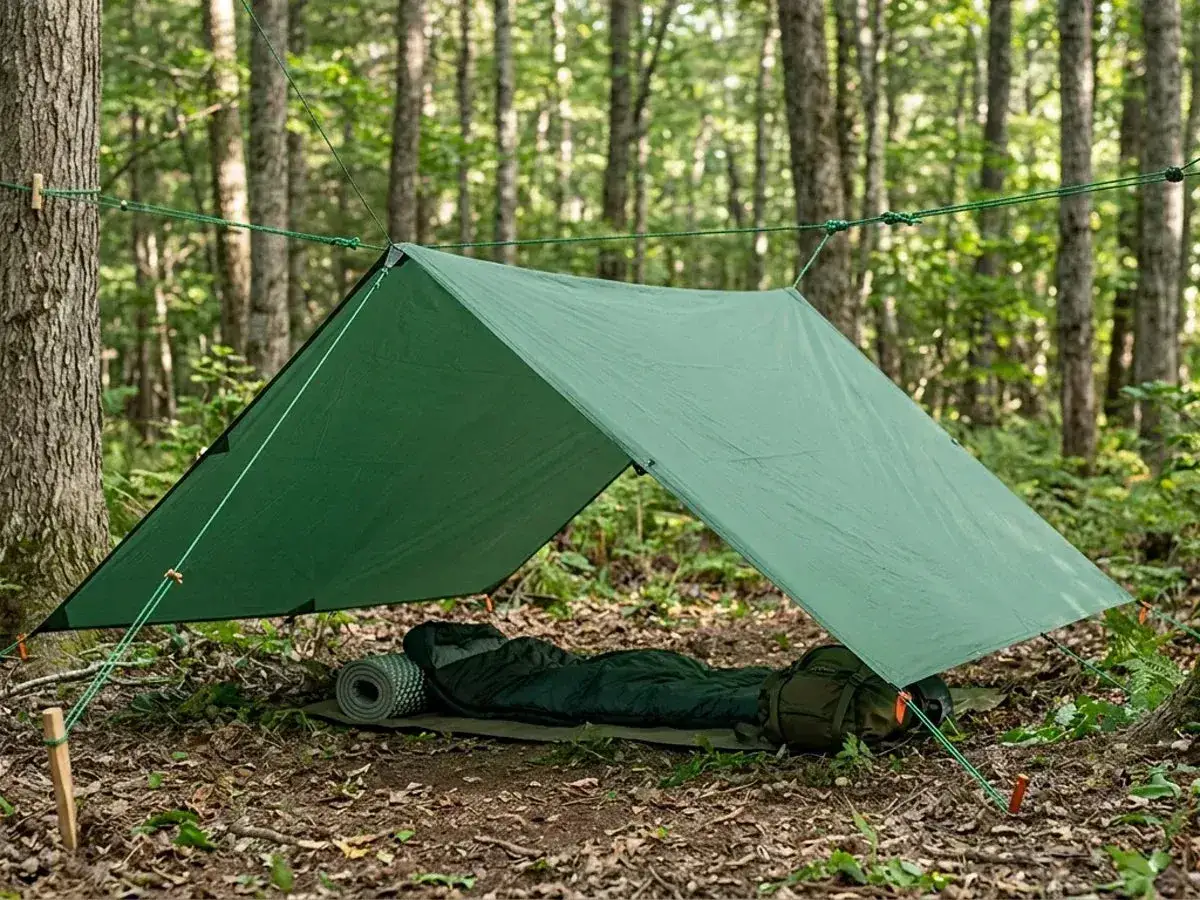
A tarp can be brilliant, but only if you use it as a sloped shelter rather than a flat sheet. A flat tarp becomes a rain collector. Angled properly, it gives you a porch for boots and bags, and it buys you time on arrival if the weather is ugly. I also keep a small stack of refuse bags or dry sacks for wet clothes, because the fastest way to ruin a tent is to throw damp kit into the same box as your sleeping bag.
- Put boots in a tray, crate, or plastic tub just outside the door.
- Pack one microfibre towel per person; it dries fast and takes almost no space.
- Use dry bags or zip pouches for underwear, socks, and sleepwear.
- Keep a spare change of clothes sealed in case the first layer gets soaked.
- If you arrive in rain, unpack the sleep kit last so it stays protected.
Dry gear is only half the story, though. If the mattress is cold or the bag is damp, you will still feel rough by morning, so the sleep system deserves its own attention.
Sleep better by fixing the cold spots first
Most people blame the sleeping bag when the real problem is the ground. Cold air above you is annoying; cold ground below you pulls heat away all night. I would rather carry a slightly better mat than a much heavier sleeping bag, because insulation under the body usually makes the biggest difference on a British campsite.
| Problem | Fast fix | Why it works |
|---|---|---|
| Cold from the ground | Use a foam mat under an inflatable mat | It adds a second barrier between you and the cold earth |
| Damp bedding | Change into dry base layers before bed | Dry fabric traps heat better than sweaty clothes |
| Condensation inside the tent | Crack open vents, even when it is chilly | Warm air needs an exit route or it settles on the tent walls |
| Cold feet and hands | Use a hot water bottle or warm socks in the bag | Warming the core helps the rest of the body settle faster |
I keep one dedicated sleep layer that never gets worn during the day, and I avoid cotton socks because they stay damp for too long. A hat can help on cold nights too, but only if you are already comfortable inside the bag; otherwise, you are just piling on layers and compressing the insulation. Once sleep is under control, food becomes the next place where a few smart choices save a lot of effort.
Pack the kitchen in modules, not loose bits
The easiest way to keep a campsite calm is to stop treating the kitchen like a random bag of bits. I prefer separate modules: one crate for cooking, one for washing up, one for breakfast, and one cooler or food box for chilled items. That way, nobody has to empty half the tent looking for a spoon, a lighter, or the sponge after dinner.
Frozen water bottles are one of the simplest upgrades I still recommend. They cool food for longer than loose ice, and once they melt, you have drinking water instead of a soggy mess. For a weekend trip, I also like to pre-plan meals around low-fuss dishes: one-pot pasta, wraps, soup, and breakfast oats. If the menu depends on six different sauces and three pans, it is too ambitious for campsite life.
| Module | What goes in it | Result |
|---|---|---|
| Cooking crate | Stove, fuel, lighter, pan, mug, spoon | Everything for hot food in one grab-and-go box |
| Wash kit | Small bowl, sponge, dish soap, cloth, bin bags | Cleanup is faster and less messy |
| Breakfast bag | Coffee, tea, oats, cereal, long-life milk, sugar | Morning starts without a search party |
| Cooler | Frozen bottles, dairy, meat, lunch items | Food stays safer and fresher for longer |
I like to think of camp cooking as a workflow rather than a recipe list. If one box handles cooking and another handles washing, the site feels organised even when the weather is not. That same logic matters even more when children are involved, because family camping only feels relaxed when the routine is simple.
Make family camping easier with tiny routines
For families, the best trip usually starts before you leave home. If it is the first outing with children, I prefer a campsite that is not far away, so leaving early is an option if somebody gets overwhelmed or the weather is miserable. A one-night garden trial is also worth doing; in about 20 minutes, you can spot missing pegs, awkward bedding, and any zip that sticks.
Children do better when the camp has a rhythm. I keep their clothes in day-by-day packs, not one giant pile, and I give each person a torch and a water bottle that stays theirs for the whole trip. A few cards, a sketchbook, or a simple scavenger hunt can help the evening feel fun without turning the tent into a toy shop. If you need electric hook-up for a baby steriliser, fan, or powered cool box, book it early rather than assuming it will still be free when you arrive.
- Pack one snack bag that stays easy to reach.
- Use one rule for bedtime every night: toilet, teeth, story, sleep.
- Keep a spare layer for each child in a sealed bag.
- Give children a small job, like passing pegs or carrying soft items.
Simple routines reduce friction, and friction is what turns a short family break into work. Even then, a few avoidable mistakes can still spoil a good pitch, so I keep a final checklist in mind before dark.
Stop the small mistakes that ruin a good campsite
The mistakes that matter most are rarely dramatic. They are small, annoying, and perfectly avoidable. One adult should always be the key-holder, because locked car keys can end a trip very quickly. I also keep one headtorch per person, plus a spare battery or power bank in the kitchen crate, because phone flashlights are useless when you need both hands.
Repair gear earns its place too. A handful of spare pegs, a short roll of tape, and a patch kit can save a tent that is otherwise fine. I do the same with waste: bin bags, a reusable water container, and a simple leave-no-trace mindset make a campsite much easier to pack up. Leave-no-trace just means taking rubbish home, protecting grass where you can, and leaving the pitch as tidy as you found it.- Do not stash wet clothes with sleep gear.
- Do not trust one light source for the whole group.
- Do not assume the site shop will have the one thing you forgot.
- Do not pack so tightly that you cannot reach the essentials first.
When those basics are covered, the rest of the trip feels lighter. The final step is deciding which few items deserve permanent space in your kit, because the smartest gear is the gear you actually use every time.
The few things I would never leave out for a British pitch
If I had to strip my kit down to the most reliable essentials, these are the items that stay in:
- A proper waterproof layer that I can reach without unpacking half the tent.
- One warm spare layer that lives with the sleep kit and stays dry.
- A headtorch for every person, not just one shared light for the whole group.
- A dry storage system, whether that is crates, dry bags, or both.
- A hot drink setup for the first evening and the first cold morning.
- A small repair pouch with pegs, tape, and a basic patch kit.
For me, that is the real value of smart campsite thinking: not carrying more, but carrying better. If you start with a good pitch, protect your dry kit, fix the cold ground, and keep the kitchen and family routine simple, the whole trip feels easier. The tent might still flap in the wind, but it will not feel like the weather is running the show.