The essentials at a glance
- 4.5-7 kg is a realistic three-season target for many UK trips; lower is possible, but weather margin matters.
- The biggest savings usually come from the backpack, shelter, and sleep system.
- A frameless pack only works when the whole load stays genuinely light.
- In Britain, a reliable waterproof jacket and trousers are not optional luxury items.
- Keep cooking, water, and clothing simple before you start chasing tiny gram savings.
What ultralight means on British trails
I think the usual ultralight benchmark still makes sense: a base weight under 4.5 kg, or 10 lb. That said, I would be less dogmatic on UK routes, where 5-7 kg is often the more practical comfort zone if you want enough margin for rain, wind, and colder nights.
Base weight means everything in the pack except food, water, fuel, and the clothes you are wearing. That definition matters because it lets you compare kits properly instead of arguing about a full bottle of water or a two-day food carry. It also keeps the focus where it belongs: on the gear that comes with you on every trip.
- Counts toward base weight: pack, shelter, sleep system, stove, pot, filter, spare clothing, electronics, first aid, and hygiene kit.
- Does not count: worn clothing, food, water, and fuel.
- Practical rule: if an item is only there because you might want it, it is usually the first candidate to cut.
Once that baseline is clear, the next step is deciding where the real savings should come from first.
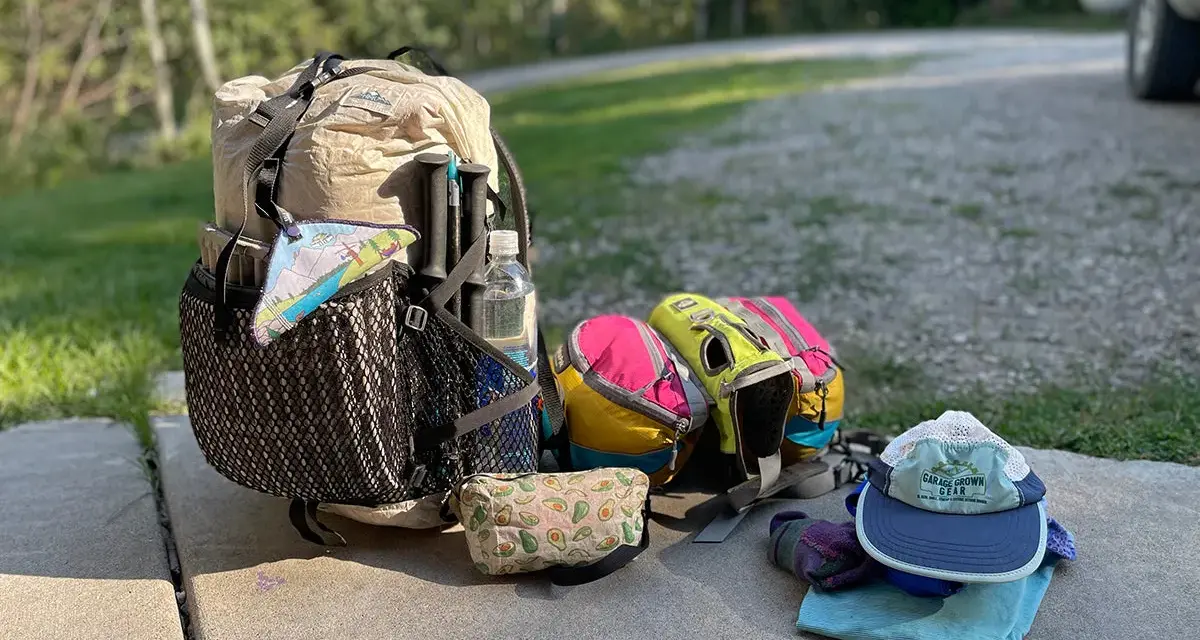
The core kit I would build first
If I were building a compact kit from scratch, I would start with the three items that have the biggest impact on comfort per gram: pack, shelter, and sleep. The rest of the system should support those choices, not fight them.
| Item | Practical target | Typical UK spend | What I look for |
|---|---|---|---|
| Backpack | 450-800 g | GBP 120-350 | 35-50 L, simple frame or supportive harness, no unnecessary features |
| Shelter | 500-1100 g | GBP 180-550 | Good ventilation, storm worthiness, and enough room for wet gear |
| Sleep system | 800-1500 g | GBP 120-450 | Pad and insulation matched to the coldest realistic night |
| Cook kit | 150-350 g | GBP 30-120 | One pot, one stove or a no-cook setup, one lighter, one spoon |
| Water system | 80-250 g | GBP 20-70 | Easy treatment, enough capacity for dry sections, and quick access |
| Clothing carried | 700-1400 g | GBP 80-300 | Rain shell, insulating layer, and a dry camp or sleep set |
| Safety, navigation, hygiene | 250-500 g | GBP 25-100 | Headtorch, map, compass, first aid basics, and a compact toilet kit |
As a rough shape, many solo hikers are happiest with a 35-50 litre pack. That is enough for a lean three-season setup without forcing you into a giant bag of empty space. I would only go frameless if the load is genuinely disciplined; otherwise a light framed pack is the smarter compromise.
The backpack matters, but the shelter decision is where weather tolerance starts to matter more than spec-sheet weight.
Shelter choices that handle rain and wind
On British ground, a shelter has to do more than block rain. It needs to deal with condensation, gusty exposed sites, and pitches that are never quite as flat as the map promised. That is why I usually steer people toward a trekking-pole tent rather than the absolute lightest tarp on the market.
| Shelter type | Typical weight | Best for | Trade-off |
|---|---|---|---|
| Trekking-pole tent | 500-900 g | Most three-season UK trips | Needs trekking poles and a little pitch practice |
| Freestanding tent | 900-1400 g | Hard ground, campsite convenience, and easy setup | Heavier and usually bulkier |
| Tarp plus bivy | 300-800 g | Experienced hikers who know how they sleep in bad weather | Least forgiving in wind, spray, and changeable nights |
My honest ranking is simple: trekking-pole tent first, freestanding tent second, tarp plus bivy only if you already know how you sleep in bad weather. Two vestibules are worth real money here, because wet boots, a soaked shell, and a pack all need somewhere to live without turning the sleeping area into a puddle.
If you camp in Scotland, the Lakes, or anywhere with persistent wind exposure, I would rather carry 150-250 g more and actually sleep. That is a better trade than discovering at 10 pm that the lightest shelter in the store also hates sideways rain.
The shelter that saves the most weight is not always the one that saves the most stress, and that leads straight into sleep comfort.
The sleep system that actually keeps you warm
This is the section where many light kits fail. A poorly chosen pad or bag feels acceptable in a shop and miserable at 2 am when the ground steals heat and the temperature drops faster than expected.
| Option | Typical weight | Best for | Trade-off |
|---|---|---|---|
| Inflatable pad | 340-500 g | Best balance of comfort and pack size | Can puncture, so carry a repair patch |
| Closed-cell foam pad | 250-450 g | Budget builds and bombproof reliability | Bulkier and less comfortable |
| Hybrid or winter pad | 450-650 g | Colder shoulder-season trips | Heavier, but warmer and more forgiving |
For most three-season UK trips, I would want a pad that gives me a realistic warmth buffer rather than the lightest thing with a decent price tag. A common three-season benchmark is around R 3.2, but if you sleep cold or expect damp ground and cool nights, I would nudge that higher. The extra few hundred grams are easier to forgive than a broken night's sleep.
On the insulation side, a quilt is lighter and more compact, but a mummy bag is easier to live with if you move around a lot or tend to run cold. Down still wins on warmth-to-weight, while synthetic insulation makes more sense when repeated dampness or poor drying conditions are part of the trip. I use that as a weather call, not a religion.A pillow is optional; a stuff sack filled with spare clothing works well enough. What is not optional is a sleep system matched to the coldest night you are likely to face.
Once sleep is sorted, the next question is how to eat well without turning your pack into a mobile kitchen.
Cooking, water, and food without a kitchen
For short warm trips, no-cook or cold-soak meals can save real weight. For most UK walking, though, I still prefer a tiny gas stove because wind, rain, and tired evenings make a hot drink worth far more than the handful of grams you save by skipping it.
| Approach | Typical weight | Best for | Trade-off |
|---|---|---|---|
| Gas stove plus pot | 200-350 g | Most trips | Not the absolute lightest option, but the easiest to live with |
| No-cook or cold soak | 0-150 g | Warm weather and short overnights | Less flexible in cold or wet conditions |
| Alcohol stove | 80-200 g | Calm weather and gram counting | Slower and more wind-sensitive |
I would keep the cook kit brutally simple: stove, pot, lighter, spoon, and nothing that does not earn its place. A 700-900 ml pot is enough for most solo trips, and a wider mug-pot hybrid only makes sense if you genuinely use it for both cooking and drinking.
For water, I normally carry 1-2 litres of capacity rather than a full bottle farm, then top up as I go. A squeeze filter is the easiest all-round choice, tablets are a sensible backup, and a purifier earns its keep if you want extra insurance. In Britain, I think the bigger mistake is not carrying a filter; it is assuming every stream is automatically fine because it looks clear.
Food weight is the piece people underestimate most. A day on trail often lands somewhere around 2500-3500 kcal, which usually means roughly 600-900 g of food depending on how dense your choices are. Nuts, oil, tortillas, cheese, oat bars, and dehydrated meals all help because calories per gram matter more than the fancy packaging.
If you want one simple food rule, use denser food on longer days and stop carrying spare utensils you never touch.
That takes care of the calories, which leaves the layer system that keeps you comfortable when the forecast changes mid-walk.
Clothing that works when the weather changes
Britain rewards restraint, but it does not reward optimism. I would rather have one excellent waterproof shell, one warm layer, and one dry sleep set than three mediocre tops and no real rain protection.
| Item | Typical weight | Why it stays in the kit |
|---|---|---|
| Waterproof jacket | 180-300 g | Your first line of defence against wind and rain |
| Waterproof trousers | 120-250 g | Worth carrying when rain is likely or you expect long exposed sections |
| Fleece or light midlayer | 200-350 g | Warms well even when it is a little damp |
| Insulated jacket | 250-450 g | Useful for camp and colder evenings |
| Sleep base layer and spare socks | 180-300 g | Lets you stay dry overnight and preserve morale |
| Hat and gloves | 50-120 g | Small weight, outsized comfort return |
I also think the boot-versus-trail-shoe debate is usually solved by the route, not the internet. If the pack is light and the ground is mixed, trail shoes are often enough. If the route is heavy bog, steep, or you know your feet need more structure, a slightly heavier shoe can be the more efficient choice because it reduces fatigue.
The mistake is not usually that people carry too little clothing. It is that they carry too many half-useful layers and still do not have the one layer that matters when the rain settles in.
The next place weight gets wasted is in the choices people make when they are trying to save weight in the wrong order.
The mistakes that add weight without adding comfort
The lightest kit is usually not the one with the best spec sheet; it is the one with the fewest unnecessary decisions built into it. These are the mistakes I see most often.
- Buying the pack before the shelter and sleep system. The load should dictate the bag, not the other way around.
- Carrying multiple "just in case" tops. One spare dry layer is enough for most trips.
- Choosing the lightest sleeping pad without checking warmth. Cold ground punishes shortcuts.
- Taking a too-small pot set that saves grams but slows every meal.
- Going frameless while carrying too much food, water, or camera gear.
- Skipping waterproofs because the forecast looked decent at breakfast.
| Typical swap | Approximate saving | Why it matters |
|---|---|---|
| Heavy tent to trekking-pole tent | 500-900 g | Often the biggest single drop in pack weight |
| 1.2 kg pack to 700 g pack | 300-600 g | Good only after the rest of the kit is sorted |
| 900 g sleeping bag to 550 g quilt | 250-400 g | Useful if you know a quilt suits your sleep style |
| Heavy cook set to pot-and-spoon kit | 150-300 g | Easy to simplify without losing function |
| Duplicate layers to one camp layer and one dry set | 200-500 g | Removes dead weight fast |
I would do these swaps before obsessing over a lighter toothbrush. Micro-savings matter later; the big wins come first.
That is the point where the kit stops being theoretical and starts being genuinely good to carry.
A lean kit that still feels sensible on a damp weekend
My rule of thumb is simple: build for the worst likely night, not the best possible afternoon. On a dry summer weekend, you can run a very lean setup and keep the mood light. On a mixed three-season trip, I would keep the shelter, sleep system, rain shell, and water plan honest even if that means carrying a few extra grams.
- Dry and warm forecast: lighter shelter, simpler clothing, and the option to cook less.
- Mixed three-season weather: dependable shelter, warmer pad, real waterproofs, and a normal cook kit.
- Cold shoulder-season conditions: add insulation, a warmer pad, and a bit of fuel margin before trimming anything else.
If I had to leave you with one practical decision rule, it would be this: protect sleep, shelter, and waterproofing first, then trim the rest around them. That is how a light backpack stays enjoyable on the second day, not just impressive when it is sitting on the floor at home.