A Tonquin Valley hike is one of those trips that looks straightforward on a map and feels much bigger on the ground: a long alpine corridor, backcountry camps, big mountain views and enough weather variability to reward good planning. In this guide I focus on the parts that matter most for a camping trip in Jasper National Park: current 2026 access, permit rules, campsite choices, timing and the gear decisions that make the difference between a memorable outing and a miserable slog. It is the kind of route I would only recommend if you are happy to treat the camp as part of the experience, not just a place to sleep.
The essentials for planning the route
- Current 2026 access is via the Portal trailhead only; Cavell Road and the Astoria trailhead remain closed.
- The full route is 43.1 km one way and is usually planned as a 2-3 day backcountry trip.
- Parks Canada says late summer and fall are the best seasons, mainly because of mud, mosquitoes and more settled weather.
- A backcountry camping permit is mandatory, and camping is allowed only in designated sites.
- The current backcountry fee is C$15 per person per night, plus the reservation service fee if you book online or by phone.
- There are seven campgrounds and one Alpine Club hut, so camp choice matters as much as the walking.
Why this valley works so well for campers
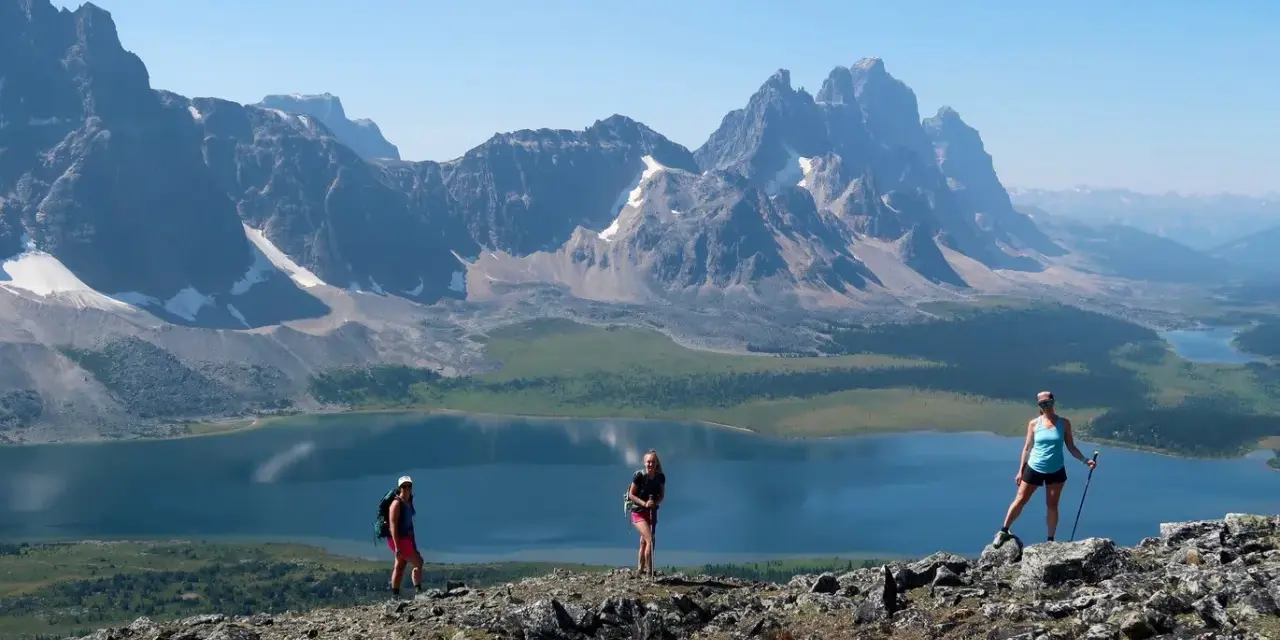
I would not frame this as a casual day walk with a tent at the end. It is a proper backcountry destination, and the appeal comes from the mix of alpine drama and real remoteness: Amethyst Lake, the Ramparts, glacier country, wildlife and long views that make the effort feel earned. That is exactly why experienced campers keep coming back.
At the same time, the valley has a rough side that matters just as much as the scenery. Mud is common, mosquitoes can be intense, and mountain weather can turn quickly even in summer. That combination is useful information, not a warning label: it tells you what kind of trip this is. If you want polished comfort, choose a frontcountry site. If you want a route that feels like an expedition without needing technical climbing, this one fits the brief.
That balance between beauty and effort is what makes the rest of the planning so important, because the right timing and access plan can make the trip feel smooth instead of awkward.
How to plan the trip around current access and permits
For 2026, the practical starting point is simple: the route is open through the Portal side only, while Cavell Road and the Astoria trailhead remain closed until further notice. The valley also has a seasonal closure from November 1 to May 15 to protect winter habitat, so this is a summer-and-early-autumn trip rather than a shoulder-season gamble.
| Planning item | Current 2026 note | Why it matters |
|---|---|---|
| Access | Portal trailhead only | Changes your route choice and any transport plan |
| Length | 43.1 km one way | Confirms this is a multi-day backpacking route |
| Typical duration | 2-3 days | Helps you judge whether the trip suits your pace |
| Season | Best in late summer and fall | Mud and insects are usually less punishing then |
| Rules | No bikes, no dogs, no fires | Affects what you pack and how you camp |
| Permits | Backcountry permit required | You must camp where your permit says you can camp |
| Fees | C$15 per person per night, plus reservation service fees | Lets you budget realistically before you book |
Bookings opened for 2026 on January 28 at 8 am MT, which is another reason I would not leave this trip to the last minute. My rule would be to decide on a realistic itinerary first, then reserve the campsite sequence that matches that pace rather than trying to improvise after the fact. If I had one spare piece of advice here, it would be this: build a weather buffer into your plan, because a mountain route like this is far less forgiving when you are racing the clock.
Two details are easy to miss and both matter. First, camping is only allowed in designated areas, so this is not a random-camping kind of valley. Second, the trail is maintained at high priority, but that does not make it easy or dry; it simply means the route is looked after more than many other backcountry lines. That distinction helps set expectations before you start choosing where to sleep.

Where to camp along the valley
The campgrounds are not interchangeable. Some are better for scenery, some for a first night after the climb in, and some for sitting still and exploring nearby side trips. I would think about them as tools for shaping the trip, not just as names on a booking page.
| Campground | Sites | Best for | What stands out |
|---|---|---|---|
| Astoria | 4 | A quieter first night | Forested ridge setting above the river |
| Switchback | 8 | Higher camp with broad views | Good mid-route staging point |
| Clitheroe | 8 | Base camp for the Eremite Valley | Solid Ramparts views without feeling exposed |
| Surprise Point | 4 | Scenic base camp | Close to the Ramparts and useful for side hikes |
| Amethyst | 8 | Central camp and classic scenery | The most popular campground in the valley |
| Maccarib | 8 | Treeline camping | Feels spacious and works well for an exit-day setup |
| Portal | 4 | Trailhead-end camping | Open forest beside a creek, useful for access-side itineraries |
There is also an Alpine Club of Canada hut in the valley, which is useful to know about if you prefer a roof over a tent, but I would treat it as a separate booking rather than a fallback plan. The bigger point is that the valley lets you choose between more scenic, more central and more practical camp positions, which is rare on a route this wild. That is why the campsite decision deserves more attention than people usually give it.
One small but important practical note: the facilities vary between camps, so check your permit details and pack for the site you actually booked, not the one you hoped to get. That brings the trip from theory into real-world preparation.
What to pack for mud, mosquitoes and cold nights
The packing list for this route is less about fancy gear and more about reducing friction. The trail is long enough that every poor choice becomes annoying, and the weather is variable enough that underpacking is a bad bet.
Footwear and clothing
I would start with waterproof or at least highly water-resistant boots, plus gaiters if you own them. Mud is part of the valley’s reputation for a reason, and wet feet are one of the fastest ways to turn a good trip sour. Layering matters too: a breathable base layer, a warm mid-layer and a shell that actually sheds wind and rain will do more for your comfort than any novelty item in your pack.
Shelter and camp kit
Bring a tent with a reliable fly and good ventilation. Mosquitoes can be fierce, and a stuffy shelter gets miserable fast. Because campfires are not allowed, I would also pack a stove, fuel and a cooking system that you genuinely trust in bad weather. If you normally travel light and minimalist, this is not the route where I would shave off the last essential item just to save a few grams.
Food and water
Food storage is not optional. The official campgrounds use lockers, cables or poles, so bring a carabiner, a waterproof food bag and whatever attachment system your setup needs. Water is widely available in the valley, but I would still filter or treat it rather than assuming meltwater is automatically clean. That extra minute is worth far more than a stomach bug in the middle of a backcountry trip.
Read Also: French Pyrenees Hiking - Choose the Best Campsite & Trails
Navigation and comfort
Offline maps, a charged power bank, a headlamp and a small repair kit belong in this pack. So does bear spray, and so does a realistic attitude about the distances involved. One more thing that catches people out: hammocks are not permitted in this valley, so if that is your usual setup, leave it behind and travel with a tent instead.
When I pack for a route like this, I am not aiming for ultralight perfection. I am aiming for a trip that still feels comfortable when the weather turns damp, the bugs show up and the final climb takes longer than planned. That mindset leads naturally into the safety rules, because in this valley the basic precautions matter more than the clever gear.
The safety rules that actually matter on the ground
The safety side here is not complicated, but it does require discipline. Wildlife, weather and navigation are the three things I would keep front of mind from the moment I left the trailhead.
- Tell someone where you are going and when you expect to be back.
- Carry bear spray and know how to use it before you leave home.
- Keep at least 30 m from elk and other herbivores, and 100 m from bears and other carnivores.
- Store food, toiletries and cooking gear securely every time you stop.
- Assume there is no cell coverage for most of the trip.
- Check trail conditions, weather, fire bans and closures immediately before departure.
- Use campground toilets whenever they are available, and keep any off-trail hygiene at least 70 m from water sources.
I would add one more practical point: do not underestimate how tiring a muddy alpine route can be. The trip is not hard because it is technical; it is hard because the terrain, weather and wildlife rules demand attention for several days in a row. That is exactly why a calm, methodical approach works better than trying to cover too much ground too quickly.
If you are used to easy campgrounds with services, this is the section that should recalibrate you. The valley is beautiful, but it is still a self-sufficient backcountry environment, and treating it that way is the safest way to enjoy it.
Why I would still choose this valley over an easier trip
I would pick this route when I want the camping itself to feel like the reward. The scenery is strong enough to justify the logistics, the campgrounds give you real options instead of one-size-fits-all sleeping spots, and the route has enough structure to feel manageable if you plan properly. That combination is rare.
For me, the smartest version of the trip is usually the simplest one: go later in the season if you can, keep the first day realistic, choose a campsite that matches your pace rather than your ego, and leave room for one side trip only if the weather and energy are both good. Moat Lake or the Eremite Valley can add real depth, but they should feel like bonuses, not obligations.
The honest appeal of the valley is that it rewards patience. If you arrive with a good permit, the right kit and a bit of flexibility, you get a backcountry camping destination that feels genuinely alpine, genuinely remote and worth the effort of getting there.