A solid hammock setup is simple once you understand the load path: the trees or posts carry the weight, the straps protect the anchor, and the sag keeps the whole system comfortable. This guide covers how to hang a hammock safely, from choosing anchor points to checking the final tension, so you can use it in the garden, at a campsite, or on a quiet weekend outdoors. The details matter because a few centimetres, the wrong strap, or a poor tree choice can turn a relaxing setup into an unstable one.
The safest hammock setup starts with strong anchors, wide straps, and a little sag
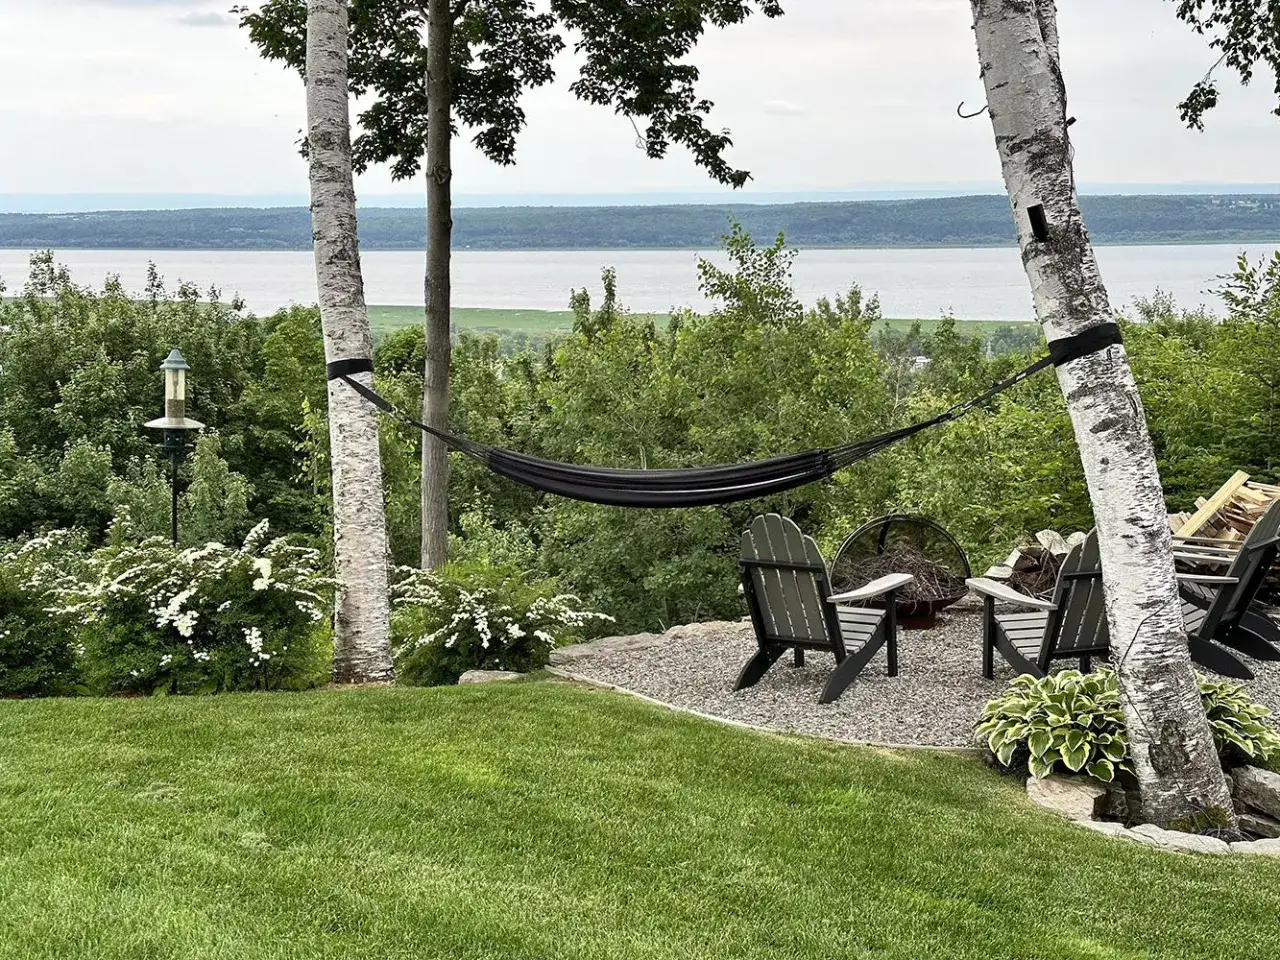
- Choose live, healthy trees, a properly rated post, or a freestanding stand rather than forcing a weak support to work.
- Use tree-friendly webbing straps that are at least 25 mm / 1 in wide; thin cord can damage bark and slip.
- Start with a gentle suspension angle of about 30 degrees and aim for a low, easy entry height.
- Keep the hammock away from paths, water, dead branches, and anything that could move under load.
- Test the setup before you fully sit back, and stop if any hardware slips, twists, or creaks.
Choose a safe place before you touch the straps
The first decision is not about knots or clips. It is about whether the place itself is suitable. I look for two healthy, live supports with enough spacing to work, then I check the ground below for rocks, roots, hard edges, and anything I would not want to land on. A trunk that is roughly 15 cm / 6 in across is a bare minimum in my book; thicker is better, especially if the tree is soft, leaning, or crowded by other branches.
Leave No Trace recommends live, sturdy trees and wide webbing straps for a reason: bark damage and unstable anchors are the two problems that turn up fast when people improvise. I also avoid hanging over water, across footpaths, or in places where children, pets, or other campers might walk through the swing zone. In the UK, I am even more careful about wind exposure, wet ground, and site rules, because a pitch that looks fine in dry weather can become awkward once the weather changes.
| Anchor option | Best for | Why I use it | Main limit |
|---|---|---|---|
| Healthy trees | Woodland camps and informal outdoor use | Compact, natural, and comfortable when the spacing is right | Must be live, sturdy, and protected with proper straps |
| Solid posts or beams | Gardens and fixed outdoor spaces | Very stable when structurally rated for the load | Not every post is strong enough; decorative fittings are a bad idea |
| Freestanding stand | Patios, campsites without trees, and rented spaces | Predictable and easy to place almost anywhere | Heavier, bulkier, and less natural than a tree-to-tree hang |
When the site is awkward, I would rather switch to a stand than force a poor anchor arrangement into service. That choice usually saves time, and it removes most of the uncertainty before the straps even go on.
Pick suspension gear that protects the tree and holds steady
The suspension system does the real work, so this is where cutting corners usually hurts. My default choice for a tree hang is tree straps made from nylon or polyester webbing, because they spread the load over a wider area and are kinder to bark. A strap that is 25 mm / 1 in wide is the minimum I would trust for outdoor use, and I prefer wider if the manufacturer allows it.
- Tree straps are the safest all-round option for live trees because they reduce bark damage and are quick to install.
- Daisy-chain straps are beginner-friendly because the sewn loops make adjustment fast and obvious.
- Whoopie slings are adjustable suspension lines that pack small, but they suit people who already know their setup well.
- Carabiners and buckles should be part of the hammock system, not random hardware from a DIY box.
I avoid thin rope, wire, zip ties, and improvised clips. They bite into bark, create pressure points, and are much easier to get wrong under load. If you are using a stand, the stand and connectors should be the ones supplied or approved by the maker, because that is the only version I would trust to match the frame geometry.
The simplest rule is this: the lighter and more flexible the gear, the more careful you need to be about load ratings and connection quality. That leads naturally to the next piece of the setup, which is the angle and height.
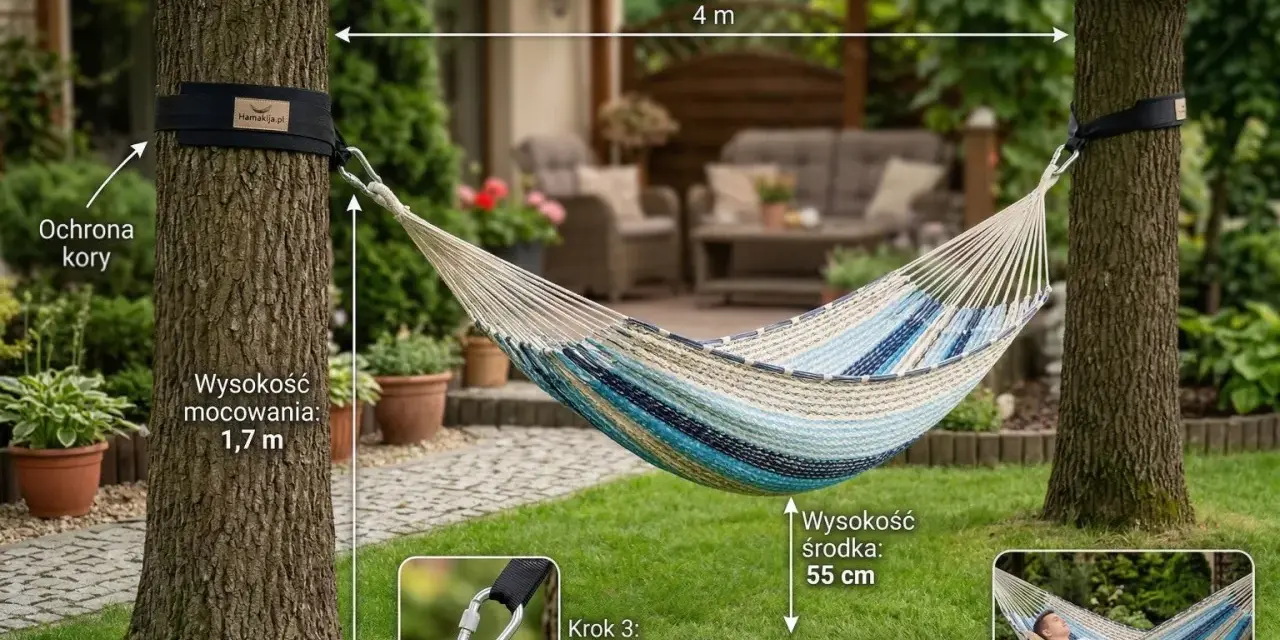
Get the sag and height right
REI recommends a strap angle of about 30 degrees and a bottom height around 45 cm / 18 in when occupied, and that is still the most practical starting point I use. A little sag is not a flaw. It spreads the load, makes the hammock more comfortable on the back, and keeps the entry and exit point low enough to feel sensible rather than theatrical.
If the suspension is pulled tight like a clothesline, the hang may look neat, but the load on the anchors rises and the comfort usually drops. I would rather see a relaxed curve than a drum-tight line. A good setup should settle smoothly when I sit down, not snap into shape like a trampoline.
- Start with the straps a little higher than you think you need, because the system will drop once loaded.
- Aim for a visible curve rather than a flat seat.
- If your shoulders feel pinched, add more sag instead of tightening the system.
- If the lowest point gets too close to the ground, raise the anchors and reset both sides evenly.
Once the angle is close, the rest is about careful installation and a deliberate first test.
Set it up step by step
- Wrap each strap around its anchor at the thickest healthy section of the tree trunk or around the load-rated post.
- Thread or clip the suspension so both sides have roughly the same starting tension.
- Connect the hammock body to the straps or hardware, then step back and check that the hammock is centred.
- Adjust one side at a time until the body sits with a gentle diagonal lay rather than a straight, stiff line.
- Before you fully sit back, recheck every buckle, knot, and carabiner to make sure nothing has slipped.
If I am using a stand, I assemble the frame exactly in the order the maker gives, then check that the locking points are fully engaged before I add any load. That extra minute matters, because most collapses happen when people assume a partial fit is good enough.
Check comfort and stability before you settle in
My own test routine is short and boring, which is exactly what I want. I press down with both hands first, then sit slowly with my feet still on the ground, and only after that do I lift my legs. The hammock should feel planted, not twitchy. The straps should stay put, the hardware should not rotate, and the lowest point should remain comfortably above the ground.
- Nothing should slip along the strap after the first load.
- No bark should be visibly crushed or pinched.
- The ground beneath the hammock should be clear of hard objects.
- Children should be supervised, and nobody should stand or jump in the hammock.
- If the setup creaks, twists, or moves more than expected, I reset it instead of hoping it settles.
I also keep the area below and beside the hammock free of bags, boots, and cooking gear. A clean landing zone is not just tidy; it is what turns a minor slip into a harmless sit-down instead of a bad fall.
Avoid the mistakes that ruin a good hang
Most hammock problems come from the same handful of errors, and once you know them, they are easy to avoid. The big one is over-tightening. A tight hang may look efficient, but it is harder on the anchors and usually less comfortable. Thin cord is the other classic mistake because it damages trees and can bite into fittings in a way webbing simply does not.
- Over-tightening makes the system harsher and puts more stress into the suspension.
- Using thin cord or wire damages bark and makes the setup harder to trust.
- Choosing weak anchors is a bad trade, even if the span is convenient.
- Hanging over water or a path creates unnecessary risk for you and other people.
- Ignoring the weight rating is not a small oversight; it is a direct safety issue.
- Stacking hammocks on the same trees or supports adds strain and makes the setup less stable.
I would also be cautious about clipping into vehicle bumpers, fences, or anything decorative that was never meant to take body weight. If a support is meant to look good rather than hold a person, I treat it as unsuitable until proven otherwise.
What changes in UK campsites and gardens
In the UK, I think about a hammock setup a little differently than I would on a warm, sheltered site abroad. Damp bark can behave differently, gusty weather can make the system swing more than expected, and soft ground can make entry and exit awkward. On a family campsite, I prefer a pitch with a bit of shelter from the wind and enough room that nobody has to walk through the hammock line.
Managed sites, public parks, and woodland stays can all have their own rules, so I always check first rather than assuming tree attachment is allowed. If the site is small, the trees are awkwardly spaced, or the lawn is soft from rain, a freestanding stand is often the cleanest answer. It is not as romantic as a perfect tree hang, but it is often the more practical choice for a relaxed weekend.
For garden use, I also like the fact that a stand turns a temporary problem into a permanent solution. You do not need to hunt for the right pair of trees every time, and you can keep the hammock low, neat, and easy for children or guests to use without much adjustment.
The one rule I rely on every time
If I had to reduce the whole process to one habit, it would be this: I never trust a hang until I have checked the anchors, tested the load gently, and confirmed that the hammock settles without drama. A good setup is calm. It does not twist, slip, or make you guess. It simply holds, with enough sag to feel relaxed and enough clearance to feel safe.
That is why the best hammock advice is usually the least glamorous. Use strong supports, protect the surface they rest on, keep the angle sensible, and ignore the temptation to over-tighten everything. Do that, and the hammock becomes what it is supposed to be: a simple, reliable bit of outdoor gear that works just as well for a quiet afternoon in the garden as it does on a proper camping trip.