Bouldering rock climbing is the stripped-back side of the sport: short problems on rock or indoor walls, no rope, and a strong focus on movement, balance and decision-making. In this guide I cover what it is, how indoor and outdoor bouldering differ in the UK, what kit actually matters, and how to start without building avoidable bad habits. I also cover the conditions, safety habits and planning details that matter if you want it to fit neatly into climbing trips, family days out or a camping weekend.
The essentials at a glance
- Bouldering is short, rope-free climbing on “problems” rather than long routes.
- Most UK walls use Font or V grades for bouldering, but grades are only a rough guide.
- Indoor walls are the easiest place to start; outdoor rock adds pads, landings, weather and access.
- Good footwork, a proper warm-up and sensible landings matter more than brute strength.
- Wet gritstone and sandstone should stay off limits because the rock can be damaged.
- A first outdoor day works best when it is short, dry, well-padded and low pressure.
What bouldering changes compared with roped climbing
The BMC describes bouldering as climbing distilled down to movement, with short problems close enough to the ground that ropes and harnesses are usually unnecessary. That is exactly why it feels so direct. Every move matters, but the consequence of a mistake is different from lead climbing or mountaineering, where a fall can turn into a serious systems problem rather than just a landing problem.
What I like about it is the compression. In a few metres, you get route reading, footwork, body tension, timing and problem-solving all at once. You are not just “pulling harder”; you are learning how to stand, twist, balance and commit. For climbers and mountaineers, that translates well, because the same habits help on scrambly rock, steep approaches and awkward mountain terrain where precise feet often matter more than raw power.
It also changes the mindset. A bouldering problem is usually short enough that you can try it, analyse it, rest, and try again without the mental drag of a long rope route. That makes it a very efficient way to build movement skill. Once that is clear, the next question is where you want to do it first: indoors or outside.
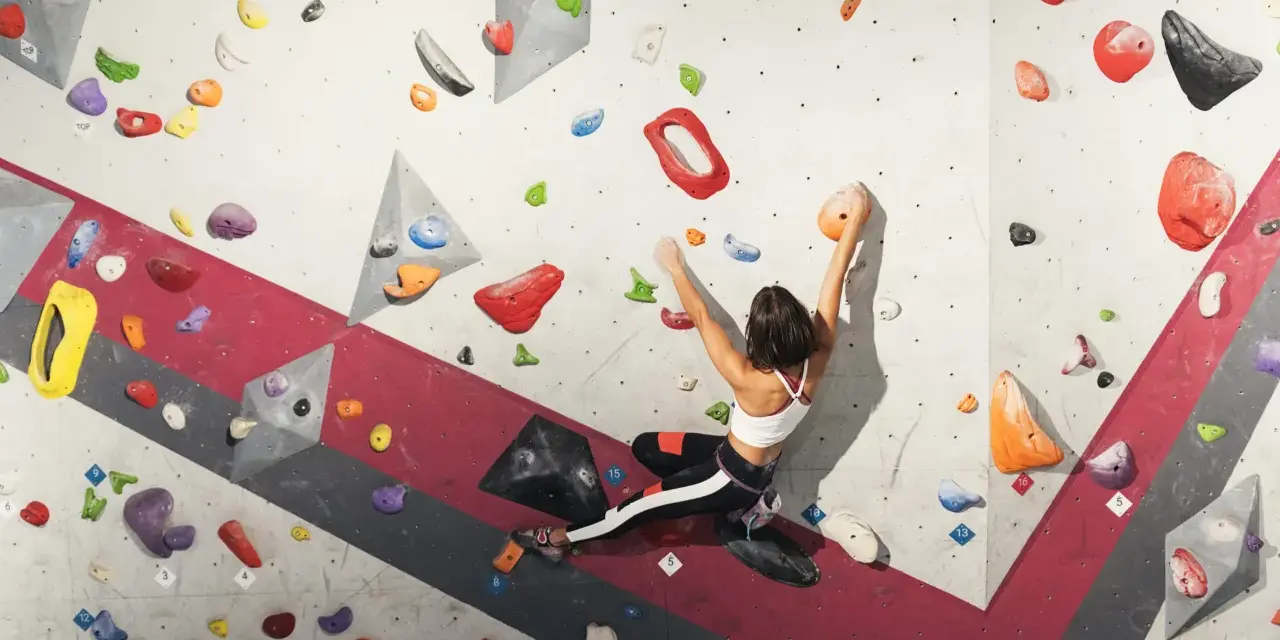
Indoor walls and outdoor rock each teach something different
I usually tell beginners to start indoors because it removes weather, access issues and uncertain landings from the picture. Outdoor bouldering is richer and often more memorable, but it asks more of you before the climbing even starts. The same sport, the same movement, very different logistics.
| Aspect | Indoor wall | Outdoor rock | Why it matters |
|---|---|---|---|
| Surface | Artificial holds and designed sequences | Natural features, friction and less obvious beta | Indoors teaches movement cleanly; outdoors teaches you to read the rock |
| Safety setup | Mats are built in and staff are nearby | Crash pads, spotters and landing placement are your responsibility | Outdoor sessions need more planning before the first move |
| Conditions | Stable and year-round | Weather, dampness, wind and temperature change the experience | The “best day” can disappear if the rock is too wet or too hot |
| Access | Easy entry, simple logistics | Approach walk, access notes and landowner rules may apply | Outdoor climbing rewards people who check the details before driving out |
| Learning value | Fast repetition and visible grades | Better route reading and adaptation to real rock | Both are useful, but they teach different parts of the sport |
In the UK, walls usually use Font or V grades for bouldering, and I would treat those as guides rather than verdicts. Grades vary by setting style, wall size and even region, so a problem that feels soft at one wall may feel stiff at another. That is normal. The point is to find the right challenge, not to build an identity around a number.
Once you know where you will climb, the kit list gets much simpler than most people expect.

What you actually need for a first session
If you start indoors, you need less gear than you probably think. A decent pair of climbing shoes is the main purchase worth making, and most walls will rent shoes for a first visit. Outdoors, the list grows because the environment stops doing the safety work for you.
The BMC's first-outdoor guide recommends pads, a guidebook, a phone with current access info, shoes, a chalk bag, brushes and finger tape. That is a practical list, not an aspirational one. I would add only what helps you climb better or stay safer; everything else can wait.
- Climbing shoes - snug, but not painfully tight. Fit matters more than brand.
- Chalk bag and chalk - useful for sweaty hands, but not a substitute for good footwork.
- Crash pad - essential outdoors when the landing is not already safe and flat.
- Brush - keeps holds clean and improves friction on outdoor rock.
- Finger tape - helps manage skin and minor hot spots, but does not fix overuse.
- Warm layer, food and water - especially important in British conditions, where a session can turn cold fast.
My blunt advice is this: spend first on well-fitting shoes, then on the basics that match where you actually climb. You do not need a bag full of specialist kit to enjoy bouldering; you need enough kit to focus on the moves instead of your feet or the weather. With that sorted, the real gains come from movement.
How to make your first problems feel better than they look
I think the fastest way to improve is to stop treating every problem like a strength test. The climbers who progress steadily are usually the ones who make simple climbs look tidy. That means better feet, quieter hips and fewer wasted attempts.
Start with your feet
Good bouldering starts from the ground up. Put the foot where it actually needs to be, not where it feels convenient, and trust it before you reach for the next hold. Quiet feet are a real skill. If your shoes are scraping and readjusting on every step, you are probably losing more energy than you realise.
Keep your body close
Body tension is just the ability to keep your trunk organised while your hands and feet are working in different directions. On easy problems, that often looks boring: hips in, arms straighter than you expect, and enough rotation to stay balanced. On steeper ground, it becomes the difference between hanging on and climbing smoothly.
Learn the sequence before you go all in
Climbers often call the move sequence “beta”. On a good day, beta is not magic; it is simply the most efficient way to link the holds. Read the wall first, identify the obvious footholds, and decide which hand is doing what before you lunge. A dyno, which is a dynamic jump to the next hold, can be fun later. It is not a shortcut around learning how the problem really works.
Use short sessions to build quality
For a first few visits, I would rather see 60 to 90 minutes of focused climbing than a long, exhausted session. Warm up for 10 to 15 minutes with mobility, easy traversing and a few very simple climbs, then gradually increase difficulty. Tendons and finger joints adapt more slowly than enthusiasm, and that gap is where many new climbers get into trouble.
That same realism matters even more outdoors, where mistakes are less forgiving and the landing does not reset itself for you.
The beginner errors that slow progress and raise risk
Most early problems in bouldering are predictable, which is useful because that means they are avoidable. I see the same ones over and over, and they are usually not about talent. They are about impatience.
- Chasing grades too early - if you only try problems at the edge of your ability, your technique stays thin.
- Skipping the warm-up - fingers and elbows do not care how keen you are.
- Pulling with your arms instead of standing on your feet - this is the classic beginner pattern, and it wastes energy fast.
- Ignoring falls and landings - a bad landing can end a session faster than a hard move.
- Using outdoor conditions like an indoor mindset - damp rock, poor spotting or awkward pads change the whole risk profile.
One thing I would underline is the temptation to attack “highball” problems too soon. A highball is a boulder problem high enough that the fall feels much more serious than a normal short problem. They are impressive, but they are not the right place to learn the basics. Build judgment first, then decide whether the extra height is worth the stress.
That caution becomes even more important when you choose where to climb outside in Britain, because the best-looking crag is not always the best first crag.
Choosing a good first outdoor day in Britain
Outdoor bouldering in the UK works best when the venue matches the day. I would look for a short walk-in, solid dry rock, obvious landings and plenty of lower-grade problems. That gives you a chance to learn the rhythm of the crag without turning the session into a logistics exercise.
Before I went, I would check three things: the weather, the access situation and the rock type. Wind and temperature can make a huge difference to friction, but so can moisture. Wet gritstone and wet sandstone are not worth the risk, both because they climb badly and because they can be damaged. That is one of those rules that sounds fussy until you understand how permanent the damage can be.
Good first venues often feel a little unglamorous. They are not always the hardest or most famous places; they are the ones where you can move safely, learn to spot properly, and top out or descend without drama. If you are exploring the Peak District, North Wales, the Lake District or Yorkshire, that principle matters more than the name of the crag. The best first day is the one where the conditions and the venue help you climb, rather than fight you.
When the approach, landing and weather all line up, outdoor bouldering becomes much easier to enjoy. That is also why it fits so neatly into a camping trip, which is where the sport can really show its versatility.
How I would fold it into a camping weekend
Bouldering suits a camping trip because it is easy to scale up or down. You can treat it as a half-day mission, an early-morning session before the site wakes up, or a backup plan when the weather makes longer walks less appealing. For families or mixed-ability groups, that flexibility matters. Not everyone has to climb at the same intensity, and the day does not collapse if one person just wants to walk, spot or take photos.
If I were planning a weekend around it, I would keep the structure simple: climb when conditions are best, eat and rest properly, and leave room for the rest of the trip to feel like a holiday rather than a training block. Pack water, snacks, a dry layer and a headtorch if the day might run long. Then think about the next day as well, because bouldering is fun, but it is even better when you are fresh enough to enjoy the walk back to camp.
My practical rule is to start indoors if you are new, move outdoors only when you understand the basics of landing and spotting, and choose venues that reward good habits rather than bravado. That sequence keeps the sport enjoyable, and it is usually the easiest way to make the movement stick.